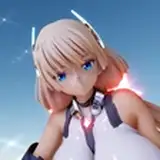
The model currently in production is also planned for sale as a VRChat avatar, so I'll be setting it up for use in VRChat. Once setup is complete, I'll start creating vore videos featuring this character.
To set it up, I'll use the software Unity. I'll export the model created in Blender as an .fbx file, then import the FBX file and textures into Unity. Immediately after importing, the model will be completely white since no VRChat-specific settings have been applied yet.
Fig.1
Looking at the material settings, the initial shader (a shader is like a controller that determines what kind of shadows to apply) is set to “Standard.”I'll change the shader to “liltoon,” which is more suitable for anime-style models.
Fig.2
Switching to liltoon automatically changes the material settings screen as shown below. Here, I apply the textures I created for the body, clothes, and hair, set the shadow color, and adjust the influence values to fine-tune the model's color scheme. Since I divided the materials into five parts this time, I'll input the settings for each one individually.
Fig.3
I've finished most of the setup.
Fig.4
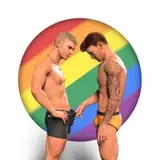
Here, I create matcap textures to simplify the shading calculations. Create a sphere image in Blender as shown in the image below. The model's shading appears to reference the shadows and lighting on this sphere. Prepare separate matcap textures for the body, hair, and clothing, then apply them in Unity.
Fig.5 & 6
Create a mask image that determines how much shadow and outline lines are drawn on the model. Write the influence level from 0 to 1 along the model's UVs (the model's unfolded map). Black indicates areas where shadows and outline lines are not drawn, while white indicates areas where they are drawn. Set this image as the mask image in Unity. Since three settings were required this time, three mask images were created. The image below is the outline mask image. To prevent outlines from appearing on the face, facial features, and nails, those areas are filled in black.
Fig.7
Next, configure the model's basic actions. The following are not configured by default.
Fig.8
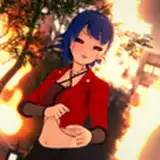
The player's eye position, selection of shape keys for lip sync, and settings for eye movement have been completed.
Fig.9
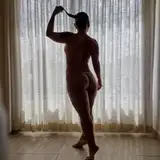
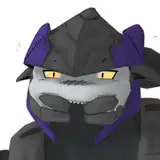
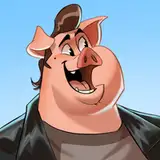
This allows me to upload it to VRChat for now. However, I've discovered the model's shoulders are too broad, so I'll go back to Blender to fix it. By the way, my first impressions were: “Is it somehow well-built?” “Are its shoulders tense?” “It looks like an Obelisk Giant Soldier.”
Fig.10
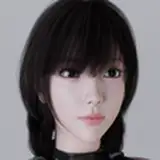
By adjusting the model's bone positions and redoing the weight painting, it now looks like this.
Fig.11
There are still a large number of settings to configure, but that's all for this week's progress. I hope I can have it ready for sale by next Saturday.