Hi! Increasingly, I see short animations on furry sites. Maybe you will be curious to look behind the scenes of how this was done:

All the animation was done in Photoshop. Link to the finished work: https://www.patreon.com/posts/halloween-iii-4k-70665970
Link to the animated first page: https://www.patreon.com/posts/candy-for-iii-1-71294074
But before I start the story "how it was done", I need to tell you about a couple of important principles of animation, with which I usually start working. It is more convenient to do this with a simpler example.
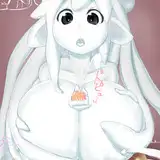
To do this, I specially made for you (and explained in detail below) a small animation with a jumping cat =^_^=

After the explanations on the cat, we will return to the animation with Judy. Get ready, there will be a lot of text and examples! 🧐
It may seem unnecessarily difficult. But I am ready for a lot in order to please you with the highest quality and most erotic content 😉
The PSD file of the animation with the cat will be at the end of the tutorial. But I will prepare a PSD animation file with Judy for the next time, when I tell you about creating shadows, lights, highlights, etc. for this animation.
So...
Inbetweening is an animation technique, which consists in first drawing the "key" frames (the most important moments of movement), and then drawing the intermediate frames. This gives you more control over the entire animation.

The intermediate frame does not have to be exactly between the two previously drawn, but may be closer to one or the other, but more on that below.
Timing Chart is a table that helps us record the duration of each frame. You can also put notes for Inbetweening in it. You can see it in the working materials for many large animation projects, such as the cartoon "Klaus":

The fact is that animators do not draw all 24 frames in every second. Instead, only every second frame is drawn (such frames are called "Twos"), or every third ("Threes"), sometimes every fourth, sixth, etc.
And we don't have to choose the same duration for all frames. Depending on the acceleration and deceleration of the movements, you can use different intervals for each frame.
You can get more information about these things here in this great video: https://www.youtube.com/watch?v=86tqKH3zxuM
Here are all the frames of our animation with a cat. Pay attention to the special graph on the right.

This is our Timing Chart. The frame rate of this animation is 24 frames. On the graph, the numbers mean the number of the newly drawn frame. For example, the drawn 15th frame remains unchanged in the 16th frame, but changes to a new one in the 17th frame.
Parentheses indicate the proximity of the lines of intermediate images to neighboring images.
Frame 9 is almost identical to frame 1, and frame 27 is almost identical to frame 30, so for simplicity of the text I will not mention them.
1). The sequence of the drawing process and Inbetweening
First, I drew the key frames (blue cats) - they best characterize the process of jumping. Then I drew intermediate frames (red cats) on the principle of "Slow In" and "Slow Out".
The principle is as follows: if the movement develops with acceleration ("Slow Out"), then the lines of the intermediate frame should be closer to the lines of the earlier frame, and further from the next frame.
In the graph, this is marked with parentheses: one parenthesis between 1 and 15, two parentheses between 15 and 17. This means that the lines of the 15th frame will be much closer to the lines of the 1st than to the lines of the 17th.
In general, "Slow Out" looks like this:

At the top of the jump, the cat's movement is uniform, so the lines of frame 19 are located exactly between the neighboring ones.
After the highest point of flight, the cat flies to the ground with acceleration, and the "Slow Out" repeats: the lines of frame 25 will be closer to the lines of frame 22.
When the movement slows down (for example, if we were drawing a beetle landing), then the "Slow In" deceleration would generally look like this:

2). Timing.
When a character's movement is slow, we don't need many frames to portray it. Therefore, while it lies at the beginning, in the first 14 frames the animation has only 2 frames: the 1st and the 9th.

On the 15th frame, a sharp movement begins: a jump, a sharp impulse! Here you need more frames in a small amount of time. I draw the 15th and 17th frames as "Twos" (i.e. a new image every 2 frames). Everything is very fast!
On the 19th frame, the movement calms down a little (he is at the top of the flight), and I do these two frames as "Threes" (every third frame): the 19th and the 22nd.
When approaching the ground, the cat accelerates slightly, so I made the 25th frame "Twos" again. After landing in the 27th frame, the movement slows down - then follows the long 30th and the end of the animation.

Let's pet the cat and leave him alone :3
1. The first thing was a rough sketch.

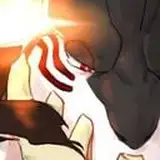
2. Then I created a scene in 3D that matches my rough sketch and rendered it. I did it in two positions: when the device is outside and when it is inside. These will be my main key frames.

3. As a result, after thinking about it well, I drew a Timing Chart in which I got 3 key frames (1, 11 and 15): when the device dries out, when it slaps Judy with a knot, and when Judy moved forward from this blow and opened her eyes wide.

The animation is looped, so frames 1 and 31 on my graph are the same frame.
Pay attention to the details of the Timing Chart:
4. According to the graph, I draw intermediate frames 9 and 23. Note that the lines of frame 9 are closer to the lines of frame 1 than to the lines of frame 11. But the lines of frame 23 are exactly between lines 15 and 31.

Tip: in the early stages, before drawing all the frames, it is easier to adjust the duration of the frames and their proximity to each other if you immediately feel that something needs to be fixed somewhere.
5. Based on the frames already drawn, I draw the following intermediate frames: 7, 13, 21 and 25.

6. And at the end I draw all the remaining intermediate frames. Our animation has acquired the intended form (in the form of a sketch).

Another tip. Please note that some dynamic parts (butt, eyes, ears, Nick's robe) I drew entirely as a new sketch, and some more static (legs, arms) I just warped a little bit for each new frame. This saved a lot of time when working on the sketch.
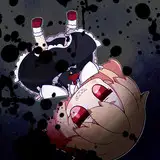
7. I paid special attention to the movement of the ears. At first I made them very badly:

Therefore, I thought it would be easier to first draw schematically the position of the beginning, middle and end of these ears:

I tried to take into account the fact that the tips of the ears will move with a delay compared to their base. After that, I circled the resulting scheme with lines (you saw the result just above in paragraph 6).
8. Based on this detailed animation sketch, I made a lineart for each frame:

These are important principles, and I hope I was able to explain them to you well. After all, good animation requires careful study and a lot of practice.
Of course, you can just make one picture and move parts of it back and forth, but it won't be at all as magical as the classic frame-by-frame animation.
And the continuation of how I painted it all, applied shadows and light, how I added liquids, as well as the PSD source of the animation with Judy, you can see and download in October.
The PSD source of the animation with the jumping cat is available at this link:
https://disk.yandex.ru/i/8om3vVgG_fprGg
I hope it was useful and interesting for you 😉