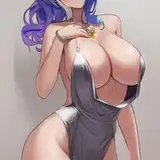
Good evening! Today I will tell you how 3 art was created about a bunny who decided to show off his charms in a crowded park. You can see the final result here:
https://www.patreon.com/posts/flashing-in-park-61895781
https://www.patreon.com/posts/flashing-in-park-61966377
https://www.patreon.com/posts/flashing-in-park-62020318
I have already done a commission with this wonderful character, you can see the result at this link.
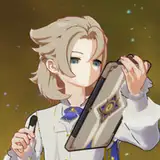
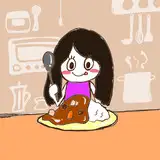
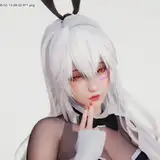
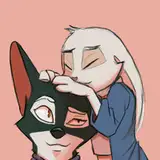
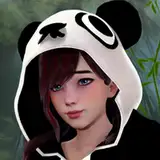
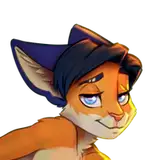
01. Below are the references (including my last drawing) that I had. The character perfectly exists both in the pony version and in the Furry version.

So, where did the work start? With an idea. The idea was that this rabbit, though shy, still decides to undress and take a naked picture in a crowded park during the day, when there are a lot of passers-by.
02. The first rough sketch. I made it six months ago, but only in January I got to its implementation.

03. Six months later, in January, I returned to this project and continued. I created an environment corresponding to the sketch in the Blender program and drew a more detailed sketch.

04. Regarding the environment, I want to share with you my opinion about two 3D programs.
Until the beginning of January 2022, I used the 3DS Max program. She is very good, she has really cool rendering engines. But then I started studying Blender and realized that this program is much better! It is clearer, more intuitive, more complete. There is sculpting, compositing, and even 2D animation! Perhaps the Blender does not have such a physically reliable render, but it is a pleasure to use it and study it!
Here's what our park looks like in a 3D program:

05. And a different angle. I really tried to make the city in the distance so authentic that I inserted a large pile of buildings here. And on the other side of the building, too, so that there is something to be reflected in the glasses. Between them is our park with characters.

06. Suddenly there was a desire to change her hairstyle. Unlike the old art, now it should have been shorter and more modern. At the sketch stage, it's time to make such changes, so everything turned out fine:

07. The final detailed sketch.

08. Next - lineart.

09. Then I painted everything in the right colors. The bunny should turn out to be exclusively black and white, but with a little warmth.

10. As usual, I took a picture from the renderers, transformed it so that it coincided with my contours, and manually added all the necessary anatomical details to it.

11. I made a separate layer of shadows that appear in depth, or that are needed to separate the front face from the farther one. What I call Ambient occlusion.

12. Each time I connect these layers, obtained in the previous two paragraphs, in a slightly different way, depending on the impressions of the result. This time I applied masks for layers (which are obtained by copying the layers themselves directly into the mask, and in one case by inverting the mask color).
One overlap is in the "multiply" mode, another copy is in the "soft light" mode, and the third is in the "normal" mode with an Opacity of 15%. Additionally, the layer with Ambient Occlusion overlaps the top in the "multiply" mode.

13. On the new layers, I make highlights for the eyes, hair and some other (most interesting) parts of the body. On a dark background , these highlights look like this:

14. An important note about how to defocus an object. How to make someone or something seem out of focus? The object needs to be blurred. But never use the usual Gaussian Blur filter for this! The result is not similar to what we could see in the photo.
Use the "Lens Blur" filter. It preserves the correct blur and creates a bokeh from light objects (pay attention to the hexagon in place of glare in the eyes - this is good and reliable!)

15. I took care of the background. In addition to adding the sky and birds, I decided to create an "airy atmosphere" - the effect of depth created by the opacity of the air. Distant objects become less contrasting and their contours are more blurred.
I used the information obtained from the Blender rendering program about the depth of the scene (the black and white picture at the top right of the picture at the bottom is it) to make a blue air haze (but with warm shades). I used the depth information of the scene as a mask to apply Lens Blur.

16. We got this result. But it seemed too cold to me, so I decided to go further.

17. The previous file became too large and it was difficult to work on it, I decided to save the layers with the finished picture and transfer everything to a new file (in the list of source files, this will be file #2, which will be further manipulated).
I added warmth by taking as a basis the blurred texture of an old photographic film.

18. Additionally, I applied the effects of noise and Chromatic Aberration, as I wrote in my recent post. Don't forget about vignetting, of course.

19. With the "Liquify" filter, I modified the hottest object in the second art, so that instead of a bagel it became more like a sexy ass :3

20. According to the idea, this character should be exclusively black and white. So I can't use red tones to give "hotness" to the ass and penis. With a lot of attempts, I managed to pick up colors that would look sexy and at the same time would not look dirty.

21. Then I added a frame (as if it's being filmed right now) and a signature. And here is the finished result!

Source file #1: https://disk.yandex.ru/d/ON_OKzRZrGUZ8g
Source file #2 (post effects): https://disk.yandex.ru/d/p9OTCtAidz9hqw
Fun fact: at E621, there was criticism of the first art about the fact that 99% of the battery charge is nonsense for filming on the street! It's always less. And damn it, I can't disagree with that. But I didn't redo it anymore, let it stay that way.
I hope this analysis of art was useful to you. I plan to write even more useful articles in the future: about the Blender program, about the combination of shape and background, and about many other things.
And see you soon! ;3