3D character art is easily the most challenging type of content required for a game, both artistically and technically. The margin of error for character art is tighter than any other type of art in the game, and comes with a set of challenges unique to characters. With the additional problems of gameplay design, rendering performance, and artistic stylization on top, character art quickly becomes the most time consuming aspect of developing Mahou Arms. This two part installment of the Dev Deep Dive series will summarize the tools, techniques, and thought processes used to bring Amelia to life.
Tools: Photoshop
The first step in the character art pipeline is to come up with rough character designs (thumbnails). A lot of people have the misconception that concept art all looks like polished paintings, but most production drawings can barely be shown to the public because of how rough they are. Just because the initial thumbnails are rough doesn’t mean it is less important than the clean drawings, though. Often I find thumbnailing is the most important part of the process since it informs everything else going forward. A boring or unreadable thumbnail will always work against the artist at every stage of the process.
Most of the work in the initial thumbnailing process happens internally in the character designer’s head; drawing is just a tool to help visualize, develop, and communicate the idea. For that reason, it can take a while to show through an article what is exactly going on. For me, a thumbnail always starts with a tone/idea I want the design to evoke, and/or a shape motif. Gameplay needs are also considered.
Examples for tone/ideas:
Examples for shape motifs:
It’s really hard to draw completely without direction, so sometimes when I don’t really have a direction I will limit myself to some ideas and/or motifs just to figure out which direction to take a drawing in. Occasionally I’ll develop an entire rough silhouette in my head before my stylus even touches the drawing surface but this is rare. Usually I draw something on the canvas even when the idea is a little nebulous in my head.
For Mahou Arms, these are some of the points that informed the character designs, some of which are overall art direction goals:
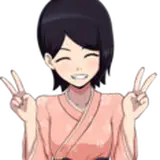
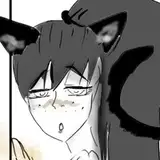
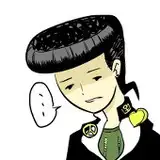
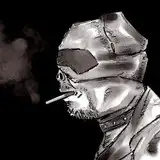
The initial thumbnails for characters for MA at various stages can be seen below. The number of drawings gets cut down as time passes and I figure out which directions aren’t working. It’s normal for a lot of thumbnails to get tossed throughout the process of finding workable designs.


Tools: Photoshop
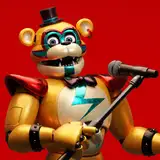
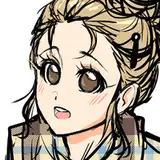
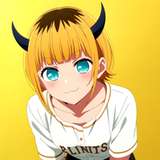
From these I decided on a design to go forward with for Amelia. I remember one of the criteria for choosing this design was that it wasn’t too extreme or complex in too many aspects but was also interesting enough. Designs with certain features, like dual-wielding, require more specific technical challenges and code, which wasn’t something that was available in code at the time. The combat mechanics were still very primitive at this stage, as they needed an actual character to work with to develop them further. Combat mechanics can only be developed so far without character art, and character art can only be useful with some combat mechanics. The trick to solving this chicken and egg problem is to develop art and code a bit at the same time.

I don’t draw orthographic (views directly from the front, back or side) views except the side as it makes for a more interesting concept and the modeling usually needs to interpret the design anyway. Most good character artists know how to work without orthographic views; modeling directly from orthos isn’t really that common anymore.
After a while, her Amelia’s casual design was sketched out as well, though I didn’t think it needed as many drawings as her normal design since it’s simpler and easier to figure out:

Tools: Zbrush, Maya, Marvelous Designer

After the final design is complete comes the sculpting, which is how the high polygon count model is created. The high poly model’s detail is baked into the low polygon model in the form of multiple texture maps, as a sculpt can have as many as 100 million polygons, which is way too much for a game engine to render quickly enough. Zbrush sculpts are also impossible to animate and work with, which is another reason why the high poly information is baked into texture maps for the lowpoly model.
Some artists like to model directly in a general purpose program first or skip sculpting altogether, but I find it more natural to sculpt and remesh the sculpt later. The style of the model also informs what process the artist decides to use. I mostly sculpt from a dynamesh sphere in zbrush, though I’m pretty lazy with ears and hands. I use the built-in IMM brushes to get the basic shapes for ears, hands, and feet, then polish them to get rid of any features and re-sculpt on top. I used to use zspheres to model hands and feet but lately I’ve been lazy and no one really cares anyway. Amelia is modeled in an A-pose as this is the relaxed position for most of the body and will provide better skinning later. Basic polypaint coloring is added to the sculpt, as this informs how the character will read, especially for the face. A combination of Zmodeler and Maya was used to model certain basic shapes at this point, though I don’t remember which ones.

Hair modeling is a specific challenge that can really only be tackled during the retopology and texturing phase, so really rough blockout hair was sculpted at this stage to help develop the model before final hair modeling.

Amelia’s casual skin was modeled after her magical girl skin was finalized, since they share the body model. It was modeled after her Magical Girl skin has already been through the pipeline and tested ingame.

Marvelous designer was used to make the basic model for Amelia’s coat on her casual skin, which was then cleaned up in zbrush and remeshed later.
Throughout the sculpting process, there were points where I ran into bits where I didn’t know what direction to take something. One example is Amelia’s collar, which wasn’t in her initial casual outfit design. For situations like these, supplemental production drawings were created:

Amelia’s axe was also primarily modeled in zbrush with heavy use of zmodeler, and it’s actually in the same file as the rest of Amelia’s sculpts under a separate chunk of subtools.


After sculpting comes the low polygon model, materials, and rigging. For those steps, stay tuned for part 2!
AppleShy
2018-05-25 15:11:42 +0000 UTC