XaiJu
entagma
entagma

patreon


Render Setup: Rigid Body Constraint Networks

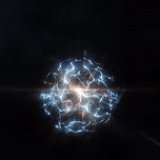
As usual set up to render using Redshift. For texturing we used one of Cornelius Dämmrich's great free textures. Get them here: https://gumroad.com/l/OYhL

Render Setup: Rigid Body Constraint Networks

Comments

It would be great! Thank you Moritz!

Daniele Frontini

Hi Daniele and thanks for your feedback, usually with our free tutorials we provide a basic setup for free too (see download link here: <a href="https://vimeo.com/270764227)" rel="nofollow noopener" target="_blank">https://vimeo.com/270764227)</a> which should match the video tutorial closely. As with every project when preparing the final artwork, things (such as lighting setups, minimalistic environments, materials, textures etc.) get added. These files have seen some work and might not necessarily be one to one the files created in a tutorial, but they use the same underlying techniques. So what we're trying to provide here are the files that have seen some additional work to get them ready for final rendering. The focus here is more on answering the question "how did you set up the render engine/lights/materials?". So if you'd like to see a fully set up file, use this render scene and if you'd like to have a file that more closely matches the video - just go with the free download on Vimeo. :) Regarding the issue with incorrectly displayed instances: In the instancer just append an attribute delete and delete the pivot point attribute, that should take care of your display issues. Cheers, Mo

Entagma

Hallo, I have some issue with this file: 1. It seems quite different from the lesson - I am an admirer of your tuts, but sometimes the render files are too different from the lesson they are referring to... 2. In houdini the instances created start to fly around the viewport, but when I render them with RS everything looks fine... Thank you!!

Daniele Frontini


More Creators