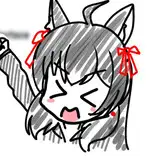
the program used was the Paint tool Sai 1. you start your design making a doodle, use the basic geometric shapes, circles, rectangles. 2. Now you can start applying the details over your initial draft. Take care of the position of the eyes, nose and ears. 3. I always leave to make hair accessories and finally, it gets easier. 4. I make a line art, attention to the finish, it is necessary that your artwork is well defined. 5. You can use the selection tool or even paint the entire area with a dense brush. 6. Marking the "group" you can apply the colors on separate layers, I use a layer for each of the design. 7. When the fur of the characters have more than one color, I usually apply the shadows in a light-colored layer and then I overlap with the strongest color layer with the effect "multiply". 8. To paint your layer without smudging the drawing, check the "Preserve Opacity" 9. To have the effect desired volume, I use three tones of the same color, a medium tone, darker, and other lighter. After adjusting'll all with overlapping or light effects. Brushes used in this tutorial: http://fav.me/d8bmtr3 thanks for the support