As fall rolls in and nights get colder, we find ourselves staying inside more and looking for something creative and cozy to do. Recently, I picked up my love for watercolor painting again and wanted to share it with you all to inspire your own cozy fall nights in.
If you’re completely new to watercolor painting, Marika has done an amazing tutorial in the past explaining 9 different watercolor techniques. Check it out here!
In this tutorial, I’ll show you one of my favorite ways to make unique watercolor pieces which involves incorporating ink.
🎨 Supplies:
*Note: in a watercolor course, I was told that round brushes made from sable hair are the best and can last a lifetime, if taken care of well. They are a bit expensive, but I have had mine for years and find it works well for many types of brush strokes because it has a “belly” for thicker strokes and also a sharp point for thinner strokes. This is only a recommendation, so use what you have!
Let’s get started!
1. Find a reference. I usually like to find my own references either from photos I’ve taken or objects I see around me. Today, I’ll be painting a lovely plant I have on my desk!
2. Sketch out your drawing either in pencil or pen. I love the look of loose pen sketches so I usually start with a pen right away and use that to build the ‘outline’ of my painting. It can be daunting if you’ve never done that before but embrace all the mistakes - it becomes part of the painting in the end! However, if you are not comfortable with that yet, sketch in pencil and then trace over your sketch in pen.

3. Start adding in color. I usually do this in layers as I wait for each color to dry. It’s ok to paint outside the lines and get a little messy! It’s part of this type of watercolor style and I find it to be a charming look in the end. Have fun with it!
4. *Bonus* If you have colored pencils or pastels, go in and add some details or enhance the ink lines with color to really make the piece pop more and add an extra layer of texture! After you’ve added all your final touches, revel in the glory of completing your beautiful painting✨

Extra tips:
- Have a napkin or towel handy to not only clean off your brush but also to have it as an ‘eraser’ if you put too much water on your paper or accidentally mixed colors.
-Sometimes it’s nice to have two cups of water handy. One for deep cleaning your brush from a certain color and another one that can be used only for dipping to get more water to mix colors with or drop on your painting.
- Remember that there’s no white paint in watercolor. Plan ahead which areas you want to leave white and remember to paint around those so you create the illusion of highlights!
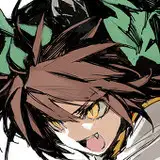
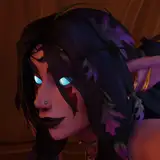
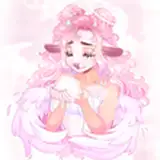
P.S. Here are some other pieces I’ve done to help inspire your own paintings:


--
Tutorial by Anna Korol. Anna is a graphic designer and illustrator based in Chicago and a graduate of the University of Illinois at Urbana-Champaign. She loves creating vibrant illustrations that she hopes can positively inspire others.