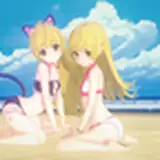
[making process]Blue Archive Toki bunny girl making Process & tips2
Added 2024-01-19 11:00:02 +0000 UTCThis is a continuation of the article on the production of ”Bunny Toki” by 一撃三万発様 (sculptor: toshi-san). This time, I will continue with the painting part.
Please refer to the previous article for more information on points to consider when dry fitting.
Once again, I will start the painting process after first creating the coloring specifications in Photoshop or other software. Careful preparation will reduce the number of repaints and make the work more efficient.
Make the colors you need from the materials (explanation of each painting process)
This is how I made the coloring specifications for the bunny Toki.

Place the material illustrations on the left side, use the color picker and gradient tool to classify the colors of the main parts on the right side, and write notes in the extra space. (For memos, just write what you think is necessary at the time. If you think it is unnecessary later, you don't have to do it.)
I started making the coloring specification sheet since the last time I was in Owari, and making it has eliminated color recognition discrepancies. Probably because it gives me a comprehensive grasp of highlights and shadows, intermediate colors, and base colors. I feel that this may lead to appropriate color mixing.
┃Bunny suits are metallic and satin-like
For the bunny suit, I first thought of using a candy color, but halfway through the process, I decided to go for a satin-like, smooth-feeling suit.
Therefore, I left the metallic paint on instead of gloss.
The base color is Gaianotes' 139, prismatic pastel mint green-blue.

It's a nice color as it is.
This time, mix cyan and magenta to make navy on top of this and apply a top coat of it.

If you are aware of the gradation, you will get a beautiful paint job.

Nice navy.

If you look closely at the original illustration, you can see the magenta shimmer around the groin area, so a thin layer of Gaianotes 136, Prism Magenta Gold, was applied here. Prism Magenta Gold was used only on the body. If too much is applied, it will approach a purple color, so use it in moderation.

The suit, bunny ears, and pumps are all easy enough to paint in this manner. Halo is also mostly navy color, except for the center section, so if you use navy toning, you can handle painting most of the parts.
Navy made in pure color is a clear color, so it will gradually become shiny as it is painted. To reduce this, I think a thin coat of prismatic pastel mint green-blue can be applied at the end to intensify the metallic look and give it a satin-like texture.
Personally, I believe that the graininess of metallic can only be achieved by applying metallic directly. Semi-gloss coating will give a different texture, so I think it is best to have you choose according to his or her preference.
┃Skin is pinkish-white

This time the skin was different from the skin recipes I have used in the past.
Until now, the skin color was created by applying a very thin coat of a mixture of two colors from Gaianotes 059 and 060 as a base color, followed by an overcoat of Modelkasten's C-12 (Mucosal Clear).
This time, however, I decided to use a recipe where C-12 is applied as the base color, followed by a very thin coat of Gaianotes 103 (fluorescent red).
Looking at the pinkish-white skin tones applied by Alter's Honolulu and St. Louis, or by Hoshina-san (a very famous painter), I had a feeling that these colors were caused by fluorescent colors. So I tried it out and found that the color was quite close, so I went ahead with it this time.
Here is a comparison image with the skin tone I have been using as my main color.

(On the left is Tsugumi senpai sculpted by Piyo-Piyo-Do)
Comparison with Honolulu in Alter

You can see that the skin has become quite pinkish-white. Until now, all of the characters have had a blood orange skin tone, but now it looks like I will be able to use a different color to match the color of the character's original painting.
Fluorescent red stands out if applied too much, so I thinned the coat considerably. It is difficult to add or subtract, but if you find the best color, you can create beautiful pinkish-white skin, so I personally think this is a good idea.
┃Knee socks must have skin color transparency expression

The original painting has the feel of thick denier white tights, but the basic technique for this kind of painting is to make the skin color slightly transparent, so I used skin tone translucent paint job.
First, the skin color is applied, and then a thin layer of white is applied on top of the skin color. Finally, use clear black to shade the edges and depressions.
At this point, mix not only clear black but also a little violet to get a beautiful shade color.
┃Blonde hair is created with ivory and brown
Blonde hair tends to be yellow hair, but we almost never actually use yellow.
If you want to paint blonde color easily, prepare the following three colors.
- Ivory
- Clear brown
- White
This time, Toki's hair is painted with only these three colors. First, the entire hair is painted with ivory, then the edges of the hair are painted with a mixture of ivory and clear brown, and finally a thin layer of white is applied to the highlights. Basically, those are the only three steps.


The ivory circle in the figure shows the shade area. The white circled area is the highlight area. Although it is a small detail, the finished product will look better if you are conscious of painting these areas.
I wanted to increase the amount of information in the highlights of the bangs with a glossy finish, so I painted the highlights with a partial gloss finish.
The hair mesh color, but for the back hair, it is better to mask it before painting. It would be beautiful to make a gradation here with fluorescent blue and navy.
There are no masking guides for the back of the hair, so if you draw in the photo to help you visualize the hair, you won't be confused about where to mask it.

(↑Image of mesh color is drawn on the photo)
It is more reliable to paint the braided part with a brush. I tried masking + enamel, but I got the impression that it was difficult because the masking tended to leak.

It would be nice if we could create a gradation like this.
I used a navy made from a mix of enamel fluorescent blue, cyan and magenta. It is a bit risky to apply this mesh color with lacquer...
┃Chair legs painted in chrome for a metallic look

The cushion part of the chair was painted in navy color. For the legs, I used Gaianotes GP-08 Premium Mirror Chrome because it is not interesting to use regular silver.
Premium Mirror Chrome is the easiest of the many chrome-based paints to use. Other chrome paints require a lot of time and effort because they discolor due to oxidation if they do not have a topcoat.
On the other hand, Premium Mirror Chrome can be applied to a mirror finish by simply painting over a glossy, dry base coat, and no topcoat is required. The paint film is strong enough to withstand masking, so recently I don't want to use any other chrome paint than this.
When painting chrome, the texture of the finished chrome depends on the base color. (This is true for all chrome paints, not just premium mirror chrome.)
https://twitter.com/sukimasangyo2/status/1737007633151000698
This time, I wanted to achieve a luxurious silver color, so we created a gloss black base.
First, I used a gray surfacer to even out the surface of the parts, and then applied gloss black over that. Finally, a gloss finish was applied with lacquer clear. After allowing it to dry overnight, we painted on Premium Mirror Chrome.
Be careful not to apply too much paint and not to let the paint drip. If it does drip, allow it to dry, then sand the area and restore it again with another coat of gloss paint.
The way to apply Premium Mirror Chrome is to spray only a thin mist of paint from a distance, which is fine. The solvent seems to be as strong as tool cleaner, so if you apply the paint all at once, it will invade the base coat. Therefore, I recommend painting slowly and not rushing.


In this case, I dared to use black undercoat, but if you want to make bright chrome, you can use gloss white undercoat.
┃The light part of the headset is enameled for easy painting
The headset is the most difficult part to paint soberly. Although omitted in the video, first paint the entire head in white and shade it with clear black.
Then, after masking, paint the black parts with graphite black, and after further masking, paint the light parts with enamel fluorescent color.

This is what it looks like when the masking is removed.

The rest is done by wiping it down with enamel solvent, but the color was wrong here, so I repainted it in fluorescent blue.

Comments
Hello, Jared Adrian-san! Thank you for your question. As for your question about whether it is okay to combine colors between different brands, it is not a problem at all. I often mix Gaianotes and Mr. Color as well. I have never had a problem with this. Also, for skin tones, there is basically no problem even without C-12. For skin tones, you basically just need to adjust the ratio of orange to pink, so you don't have to think too hard about it. Try it out and find your favorite skin tone.
SUKIMA SANGYO
2024-09-18 06:23:55 +0000 UTCHi, I hope you are well, Sukima - san. I would like to know if it is possible to reproduce that beautiful skin color without the C-12? Since it is impossible for me to get it, I was thinking of changing it for the Mr. Color Lascivus 01 as a base and continuing with the 103 from Gaianotes as you mentioned. But I would like your opinion as an expert if it would be possible like this or with another color from the 2 brands mentioned. Thanks for everything.
Jared Adrian
2024-09-17 22:28:05 +0000 UTC