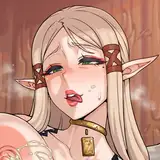
This time on Art Explained, i'm gonna go over the simple-but-effective (i think) hedge effect i did in the background of a recent pooltoy portrait commission.
First off, i eyedrop tool'd the colours off of a photo reference (via an image search for: "poolside") and used a turnip pen to splat them down.
Using the airbrush tool (what i use for my main shading) i smooth out the colours into a gradient. ( holding the Shift key to get straight lines). This provides the base colour for the leaf pattern to then contrast against.
Clip Studio comes with a "Droplet" brush in it's defaults. Alternatively i could've used a smaller turnip pen and spattered colours around. What we want is for the effect of individual leaves catching the light. This took several passes until the level of detail looked decent.
Gaussian Blur is a wonderful thing. It helps create a depth-of-field effect and hides how mediocre your hedge effect is. Since the pooltoy creature is the focus of the piece and is in the foreground, we can blur the entire background (though i do it on a layer-by-layer basis in case things are closer or further away)
Overall this hedge probably took 10 minutes to create, and a bunch of that was deciding on the right brush. If i did it again, i'd probably find a better brush still, or experiment with adding manual touches (like more granular leaf detail where the light is brightest) - but ultimately it's a serviceable background that gave me more time to spend shining up the foreground character.
If you bother to read these posts (and actually enjoy them) let me know. If you don't enjoy them, but by chance have read this far, i still would like that feedback! I've got a bunch more ideas for this series but ultimately it exists to give the $3 tier more value and it'd be good to appraise that value.