I realize my tutorials aren't going to be very accessible to the public due to the subject matter of my page, but whatever! In this tutorial, I'm going to show you how I take one of my renders out of Blender and convert it into a scene that's happening at night, using GIMP (which, like Blender, is completely free).
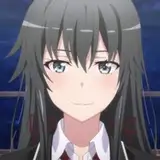
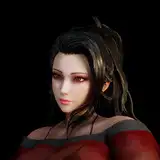
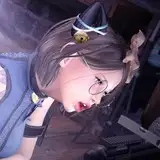
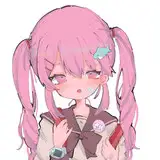
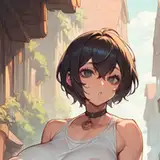
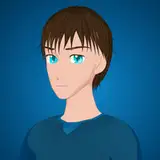
So, the default scene I render out of Blender will look like it's happening during the daytime:

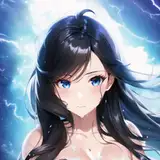
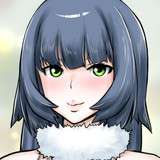
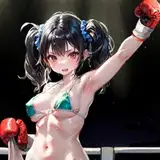
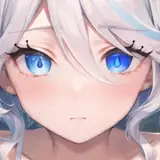
Yeah, it's about to be happening during the nighttime.
First, open this up in Gimp. To the right, you should have your Layers dock, but if not, you can go to Windows > Dockable Dialogues > Layers, and put it wherever. Right now, you'll just have one layer that holds our current image. Right-click that area and add a new layer:

It'll ask you a whole bunch of questions. Odds are, it's fucking fine, but here's what my settings look like:

Same width and height as the source image, filled with transparency. Click "OK." Then drag that layer to the top, if it's not on top already. Also, click on the new layer so it's highlighted.
Next, grab the bucket fill tool and fill this layer with solid black. Gimp's done some weird things with tool organization lately, but the bucket tool (in my version) shares the same spot as the gradient tool:

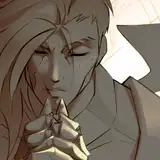
In the top-right, just above the layers, you can adjust the "opacity" of the layer you have selected. I typically do anything from 70% to 80% opacity, depending on how dark I want it to be. Since this scene probably isn't happening in the middle of the night, I'll go with a somewhat brighter scene at 70%.

Now, this is where a lot of beginners tend to stop. "Oh, I made it darker, so it's nighttime now, right?"
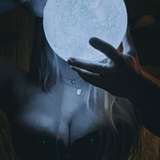
NO. That may be enough for some pictures, but most the time, simply darkening an image will just look weird. Dark sunlight does not look like moonlight. Because moonlight........................is kinda blue.
Click on the other layer (very important). Go to Colors > Color Balance. You have three categories with 3 color levels. What I do for my stuff is really simple: Add 20 blue in each category: Shadows, Midtones, and Highlights.

"20" is the universal value I've settled on for basically all of my renders, but if you're looking to apply this to other pictures, you'll likely want to mess with these values a lot. That said, I think it's a fairly safe rule of thumb to just increase the blue values on any image you're looking to turn to night.
Also, once you enter these values once, you can save them as a preset at the top!
Anyway, boom, nighttime.

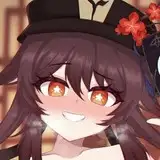
Now, there's one more thing to be wary of, at least in my case. I convert all my .png's to .jpg's when exporting for use in the final VN, because they're like a tenth the size and will load way faster. But I've noticed that compression tends to look a LOT messier on nighttime images than daytime ones, especially on areas such as the blush on the cheeks.
So, when saving as a .jpg, I'll compress the daytime images to 80%, but nighttime ones to only 90%. The night images tend to end up smaller anyway.
I know this might look kinda complicated at a glance but it takes all of 40 seconds to do this, once you get it (with the color balance preset).
If you're looking to use this on normal pictures or other images, you'll probably also want to experiment with Colors > Curves. This kinda gives you control over what aspects of the image get darkened. And of course, there are plenty more tricks and things to look out for (such as getting rid of highlights or glare), but for my simple shit, this workflow is very quick and seems to work well enough.
I figured out how to get Blender to automatically do (basically) this to each frame when rendering out nighttime animations, but that's a tutorial for another time.
Good luck!