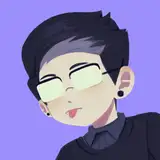

(left to right)
1. Start with your sketch. Try to make sure there are no open gaps if you plan to fill it in automatically.
2. Fill in your sketch with a solid color. If you are using Clip Studio Paint, I recommend using the Fill Lasso tool so there are no transparent gaps in the color. It helps to have the color as close to the edges of your lineart as possible so that when you remove the lines, the silhouette is roughly the same shape and size.
3. With your color layer alpha locked, you can now color your character however you like. This can also be done with a clipping mask on top of your solid color layer, but make sure to merge the two layers before the next step.

4. Hide your sketch layer. I recommend turning the sketch layer to a low opacity so you can quickly toggle it on and off to check for mistakes. At this stage, I also put a midtone background layer behind my character so I can see any stray pixels or mistakes.
5. Begin to render the edges of all the shapes on your character. I personally like to use a somewhat textured but hard brush (here I am using the Chalk Dust Bristle brush from the DAUB collection) when I render the edges so that it has a less flat appearance. This process reminds me of chiseling a sculpture, where you're removing the excess bits and adding in some where there are any gaps. This part really relaxes me!

You can turn any brush in Clip Studio Paint into an eraser by selecting the transparent / checkered color box next to your foreground and background colors. This helps to keep a consistency between what you're erasing and what you're adding.

6. Once every shape is completely rendered out, you can start to add details. I like to use a very textured pencil brush (here I am using the Gross Pencil Liner from the FRENDEN brush collection) to add these in. At this point, I'm not very focused on adding things like light and shadow, and instead am just focused on rendering the figure to a readable extent. I add things like folds, stitches, buttons, and any other small details that will bring the figure to life, but I try to not go overboard with adding lines for places like hair or fabric.

7. With everything rendered out, I start to add texture to make the shapes three-dimensional. There really isn't a science to this, so it can be a great step to experiment and try new things. To keep the colors consistent, I like to texture by using the same color I used for the details in that area (on the dark blue fabric, for example, the even darker blue that I used to draw the buttons) on a Darken layer mode.
For fabrics, I personally like to use very square rake-type brushes with texture to show folds and creases. For skin, airbrushes with little dots are my go-to. Other areas and materials call for different textures, so experiment with the types of effects you can get using different brushes.

A handy tip for quickly texturing an area is to lasso it off using the Selection Lasso, then going in with your texture brush and quickly swiping over the area. I do this frequently for skin to make areas look more three-dimensional.

8. Continue on to add flat shadows in areas that would be shaded regardless of lighting. In this case, there is shadow in the area of the outfit's train that is covered by the legs, and under the hair that overlaps with the face. I also added the eye highlight, but that is subject to change depending on the lighting around the character.
---
With all of the lineless base drawing done, now I can go in and add lighting and effects, and put the character on a background! There are more guides on my Patreon for rendering backgrounds and other effects.

I hope this guide was helpful! This method works great as a base for other methods so experiment and find the style that works best for you!
The .clip file for this illustration will be available to patrons soon!