Colouring/Shading Tutorial (Paint Tool SAI)
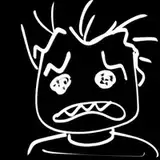
Added 2019-02-20 18:32:38 +0000 UTCStep 1: Lineart

This is pretty basic. I can't really give any tips here, especially because my lineart is honestly pretty garbage. This just requires a lot of practice.
Though I will say, if you fuck up and accidentally make the white background on the same layer as the lineart, you can just use a multiply layer to make the white transparent. This also applies if you're colouring someone else's lineart (though please, ask for permission first if you do that).
Step 2: Colours

Again, this is all up to you. Try and go for something that isn't too saturated, because the saturation will increase after you shade.
Step 3: Picking your Shading Values


So this part requires a little bit of knowledge on colour theory. You're going to want to pick two or three colours of varying values, hues, and saturation levels. A mistake I see a lot is people shading with two colours that differ only in value, while staying the same everywhere else, and that causes the image as a whole to appear flat and washed out.
The brighter shading colours should have less saturation, a higher value, and a warmer hue.
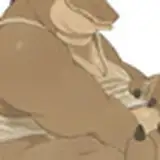
Step 4: Shading

Use a hard brush to block in the colours on a layer above your colour layers, and then a soft brush to blend them, but don't over-blend. You're going to want to have some texture to it. Where you actually end up shading is up to you, but just try to have a healthy range of values. I actually mucked up a bit here, because the nose feels a bit flat. Learn from my mistakes, friends.
Step 5: Lumi-Shade is my Best Friend now

Set the shading layer to "Lumi-Shade," and decrease the Opacity to somewhere between 10% and 40%. It depends on the surface you're shading, and shouldn't be uniform across all layers.
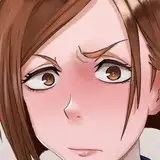
Step 6: Touch-up

Just add some white shimmer-shines on a layer on top of everything else. I may have over-done it here.
Additionally, something I've started doing for horns is doing the same thing I do on shading layers, but on an additional Multiply layer. It adds some 3-dimensionality and shine to it. I do this same thing for varnished wood. It has a very nice texture to it.
Step 7: Final

And there you have it. That's how I shade. I've been learning over time and improving, but this has proven to be the most expedient and efficient method of shading. Hope any of you fellow artists have found this helpful. :)