If you followed my first tutorial, then you know that I DO NOT use Photoshop to edit my pics.
Firstly, because it’s too expensive for me, (and this is my own opinion) but I also think the “polished” look in most horror art is, well, lame.
The two primary apps I bounce back and forth between are Snapseed and Facetune 2.0. Why? Because they can achieve the exact same thing Photoshop can, and I believe it looks better/more realistic.
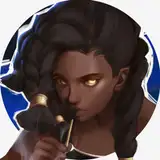
This tutorial is more or less to show you how I achieve the dark tones of the above image so many of you loved.
NOTE: This is all opinion-based and I am NOT a professional.
So, how do you obtain a dark effect on image?
It’s simple.
When you open Snapseed, you’re going to select TOOLS. Once you select this, you’re going to see a choice entitled DRAMA.
This effect will either drastically detail your image, or with a small hint of subtlety. Now, I like to edit images with this effect that is shot in better lighting. Using DRAMA in a poor lighting image will make it appear too dark, and while dark is the theme, it will muddle out your sfx details.
At any rate…
Once you have your selection, choose DARK 1.
“Cory, why not Dark 2?” Because in my opinion, Dark 2 has a tendency to over exaggerate the lighting. I think that an image should stand out, but not to the point of it looking like the HDR is turned all the way up. You can select Dark 2 if you adjust the setting downward, but to give you a tip, Dark 1 and Dark 2 at some point become the same. Again, just my opinion, but I think the latter is just…too much.
DARK 1 to me, is the essentially all you need to make your image look pretty dank. I’m going to do a more in-depth look into the Snapseed options so you all can see exactly what each one does, but that’s basically how I achieved the above image.
NOTE: THE ABOVE IMAGE WAS EDITED WITH FACETUNE PRIOR!!!!
So, if you haven’t read my previous post—please go back and do so!
Happy editing, my sweet loves! ❤️❤️❤️❤️
*any questions I will be happy to answer!