![[How-To] // Alien Footage Scene Break-down](https://img5.xaiju.com/storage/6/lp/ak/d38796-019e84ec-4080-71fe-99c0-790a43acbfd3.png)

I know quite a few of you are fellow creatives, whether static art or making your own games, so I decided to put together this quick break-down of the process that went into making our little Alien Scene (if you haven't seen it yet, go check it out!)
Whether you want to make your own little scenes, or just curious how things are made, I hope this will help you out~ :)
---
[ Tools ] - Here are the programs/tools I used for this scene:
---

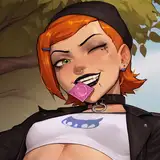
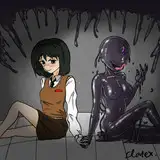
[ Initial sketches of Allie's potential poses for the scene ]
---
[ Step 1 ] - Planning and Sketching
First, you gotta know what you're making. Going forward, I wanted you guys to be more involved in the making of our game, so I did some initial sketches and let you guys decide.
Dev note: I was hoping position B would've won but... C is alright too haha
Once we know what we need to do, we move along and start making the assets.
---

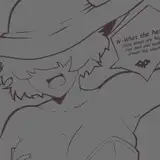
[ Drawing process ]
---
[ Step 2 ] - Making the Assets
Before we can animate anything, we need something to animate. So we bring our character to life in our favorite drawing program.
Dev note: for me that's Clip Studio Paint
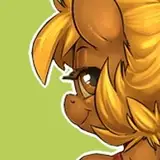
Since I knew this was going to be an interactive scene, I wanted to make sure we had a First-Person perspective on Allie, to add a bit of that immersion.
We also know that each individual part will be moving (such as her hair floating through the air) so we need to make sure these parts are separated. We make sure there are some "bleed" for parts underneath other parts so when things are moving you don't end up with a hole. Basically we draw more than we need for each part even if you can't see it at this point.
---

[ Separating the moving parts for our character ]
---

[ Making the background in Photoshop ]
---
Aside from the character, we'll need a scene to put them into. Again from the poll it was decided that the scene will be "Under the stars", so we go ahead and put that together.
Dev note: Photoshop is good at comping photos together so I switch from Clip Studio to Photoshop. Again Clip Studio is just my preferable drawing program but in theory you can make all the assets in Photoshop.
---


[ Making sure our assets work together ]
---
While working on different assets, it's good to make sure that they're all still meshing together well. While working on Allie, I need to "ground" her into the scene by adding some overlapping grass and a shadow. Otherwise it looks like she was floating, like two pieces that are not working together.
Dev note: Yeah I know the lighting in the scene is weird here. It's night time, there's no real light source to make that shadow, etc... For you, these are things to consider, but for me, I like to think it's just creative direction ;p
With all the assets ready to go, we import them into our game engine (Unity in this case) and we're ready to animate :)
---

[ All our assets imported into Unity ]
---
[ Step 3 ] - Rigging and Character Animation
To get the results we want, we use a technique called 2D Mesh Animation. This is a process of morphing our cut-up sprites to emulate a layered 3D look. This step is a huge chunk of work and I've explained the process in a previous DevLog.
Dev note: Unity has a few plug-ins that can do 2D Mesh Animation. Personally, I use AnyPortrait. It's a good balance between affordable and having the features we need to do the job
It takes time but eventually we'll get to a point like below:
---

[ Rigging and mesh animation process break-down]

[ Result of our animation work]
---
She's alive! But really though, it's not very exciting at this point. So let's jazz it up a bit shall we? To do that, we'll do some post-processing and FX work.
Dev note: I'm definitely planning to animate more than just her face and head for the final interactive Climax Event. But due to time constraints, I wasn't able to get to it for this one :(
---

[ Adding Post-Processing and FX ]
---
[ Step 4 ] - Bells & Whistles
So here we add FX and Post-Processing. We're basically adding make-up to our scene to really sell it and make it pop. For those unfamiliar with Post-Processing, it's the use of camera effects applied to raw footage to get new results.
For our scene specifically, I use some Bloom, Vignetting, Color Grading (mostly for Contrast) and Film Grain.
Dev note: For those following with Unity, you can get the Post Processing Stack v2.3.0 through the Package Manager. Very helpful stuff!
---

[ Post Processing settings for our scene ]

[ Lens-flares and decorative camera HUD ]
---
Aside from the Post Processing, we add a bunch of effects like Lens-flares and non-functional camera HUDs to really complete the look we're going for.
For the flares, I've added an "Additive" sprite shader to it. This is the equivalent of using the Linear Dodge (Add) layer effect in Photoshop. This basically makes our lights more intense.
And now that our scene looks nice and polished, we add the final touch: Camera animation.
---

[ Animating the scene together ]
---
[ Step 5 ] - Animating the Scene
So this is where a good sense of Artistic Direction of Motion comes into play. Basically we take all our elements: our camera, our effects and character, and merge them all together to create one cohesive piece.
Since we want a sort of "found footage, lo-fi alien video capture" look, I mostly let the camera do the work.
As you can see above, I animate the "Scene" (the camera) and also animate the flares and the blur of the camera. With these elements together, I animate the scene to be shakey, and constantly running out of focus. At this point, it's really just using the Unity Animation Timeline to animate everything.
Dev note: To achieve the blurriness, I play with the Depth of Field post processing effect in Unity.
I keep in mind things like timing, making sure to highlight things like when Allie is looking at the camera. Playing with ramping animation curves also makes sure the movement is smooth and polished.
---

[ Ramping animation curves to make motion feel more natural ]
---
And really that's it! With everything put together, we should have a nice final teaser to show off :)
Hopefully that's helpful and/or insightful for those who've come to this point. If you have an questions or comments, please don't hesitate to ask. I'm always happy to help. :D
Anyways, it's still the work week and I need some sleep... so hopefully you enjoyed and I hope the rest of your week will be amazing~
---

---
Thank you and good night~
- Moosh