


Here is a description of the blender settings.
Start the “blender” file “Blender4.2” from “All apps” in “Start” of Windows.
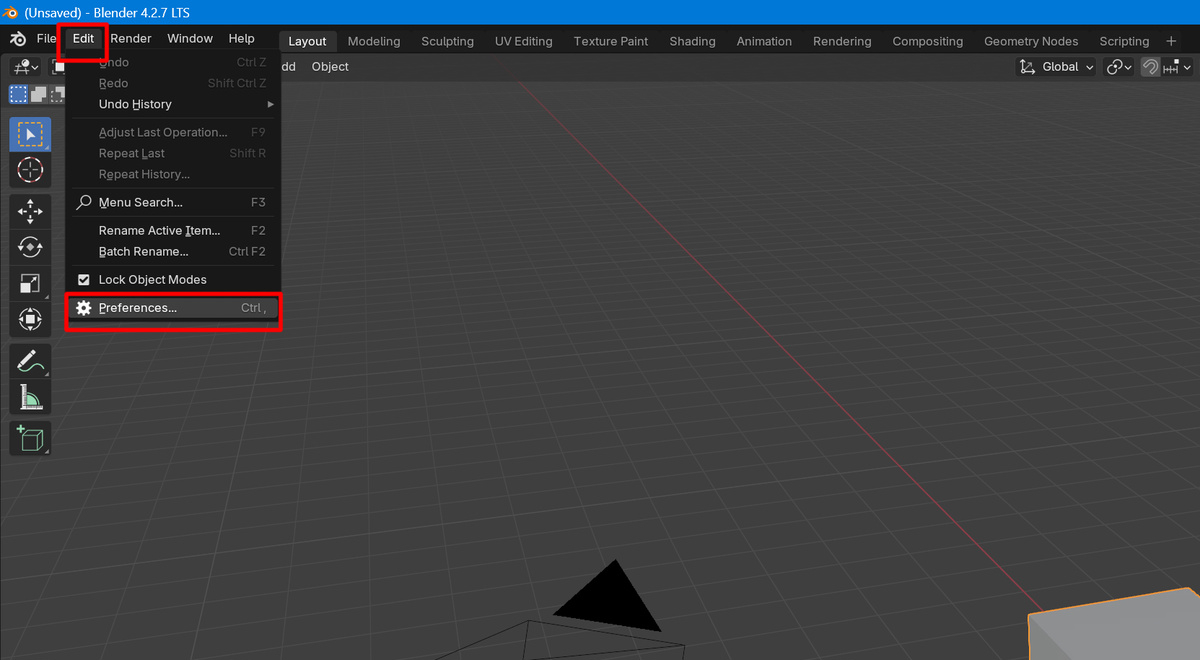
Open Preferences from Edit on the top bar.
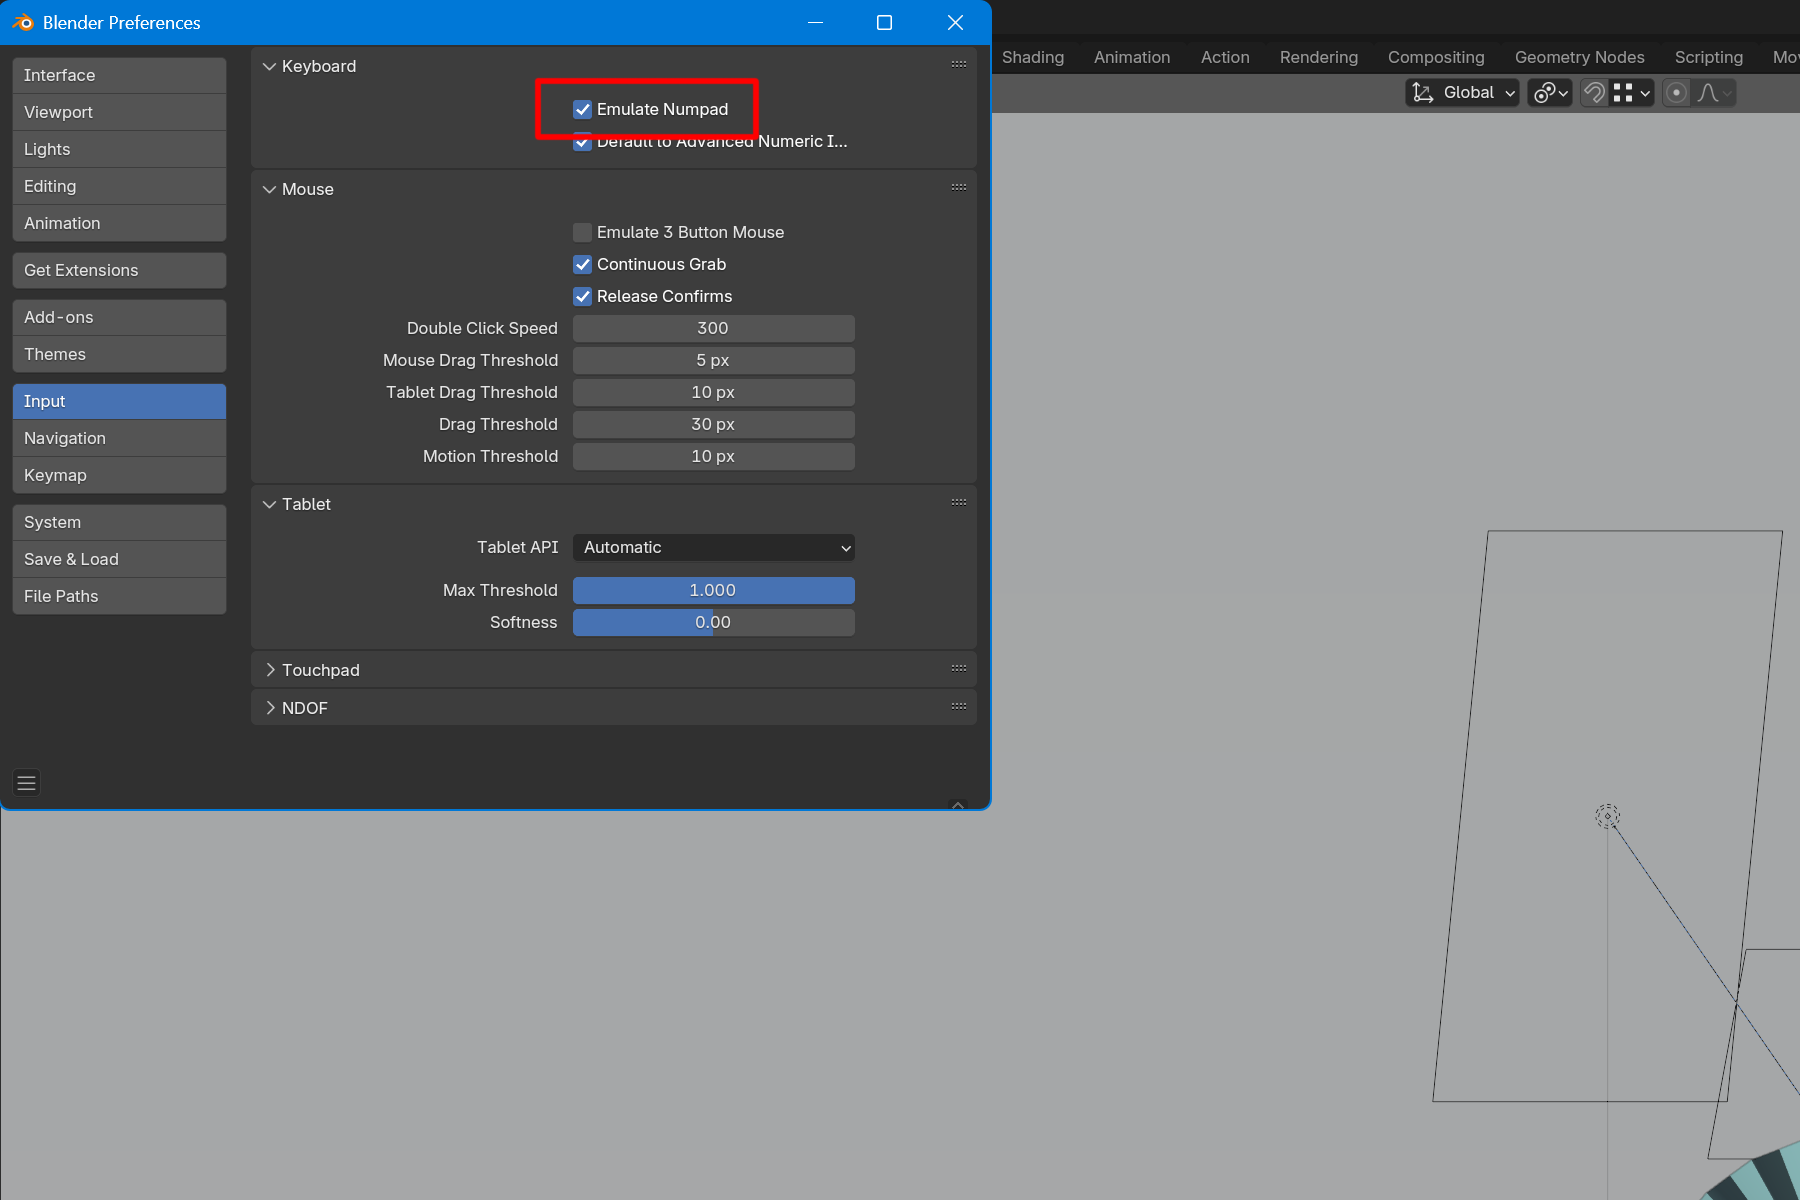
If you do not have a numeric keypad on your keyboard, check the Emulate Numpad for Input checkbox. If you have a numeric keypad, this operation is not necessary.
Input > Emulate Numpad check
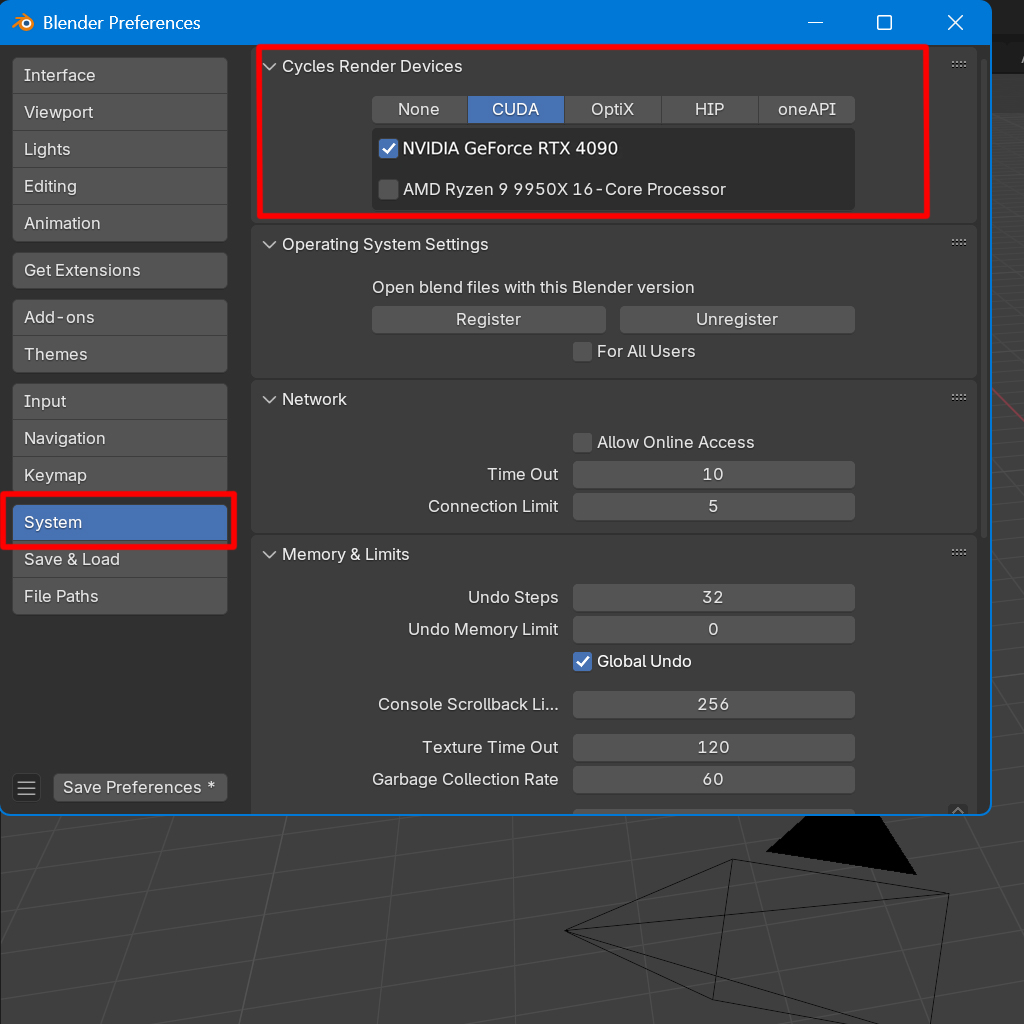
Enable GPU for use in rendering.
Select the respective supported GPU from the Cycles Render Device in the System.
If you are using NVIDIA, use CUDA or OptiX (OptiX is faster).
If you are using AMD, choose HIP.
If you are using Intel, choose oneAPI.
The CPU can also be turned on, but in most cases rendering speed is faster with it turned off.
It is recommended to uncheck CPU.
System > Cycles Render Device > GPU check
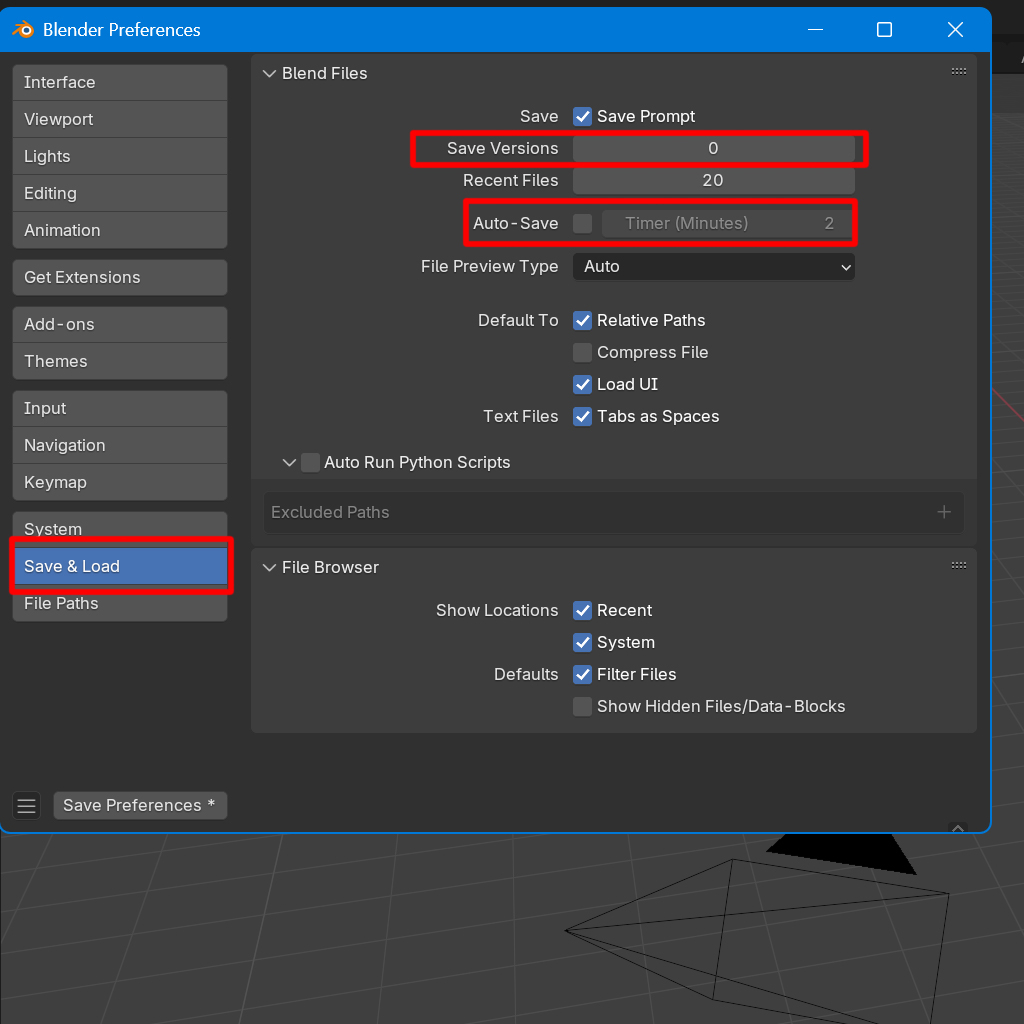
Change the autosave feature.
The default setting causes frequent backups.
Click Save & Load.
Change the value of Save Versions.
This will back up the data before each overwrite save. A file named “.blend1” is created each time you save. If you don't need it, set it to 0.
Uncheck the Auto-Save checkbox. Or set the value to 30 or 60 minutes.
Save & Load > Save Versions > set it to 0
Auto-Save uncheck
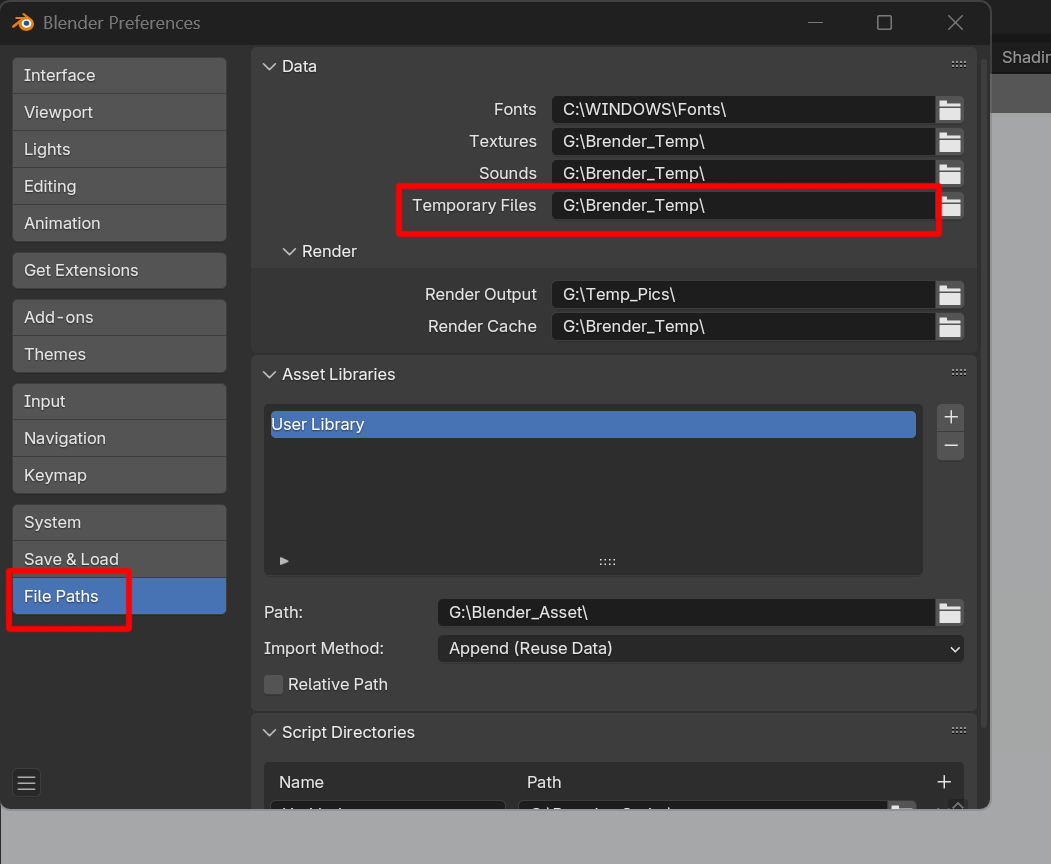
To change the destination of backup data, specify any folder for Temporary Files in the File Paths.
File Paths > Temporary Files
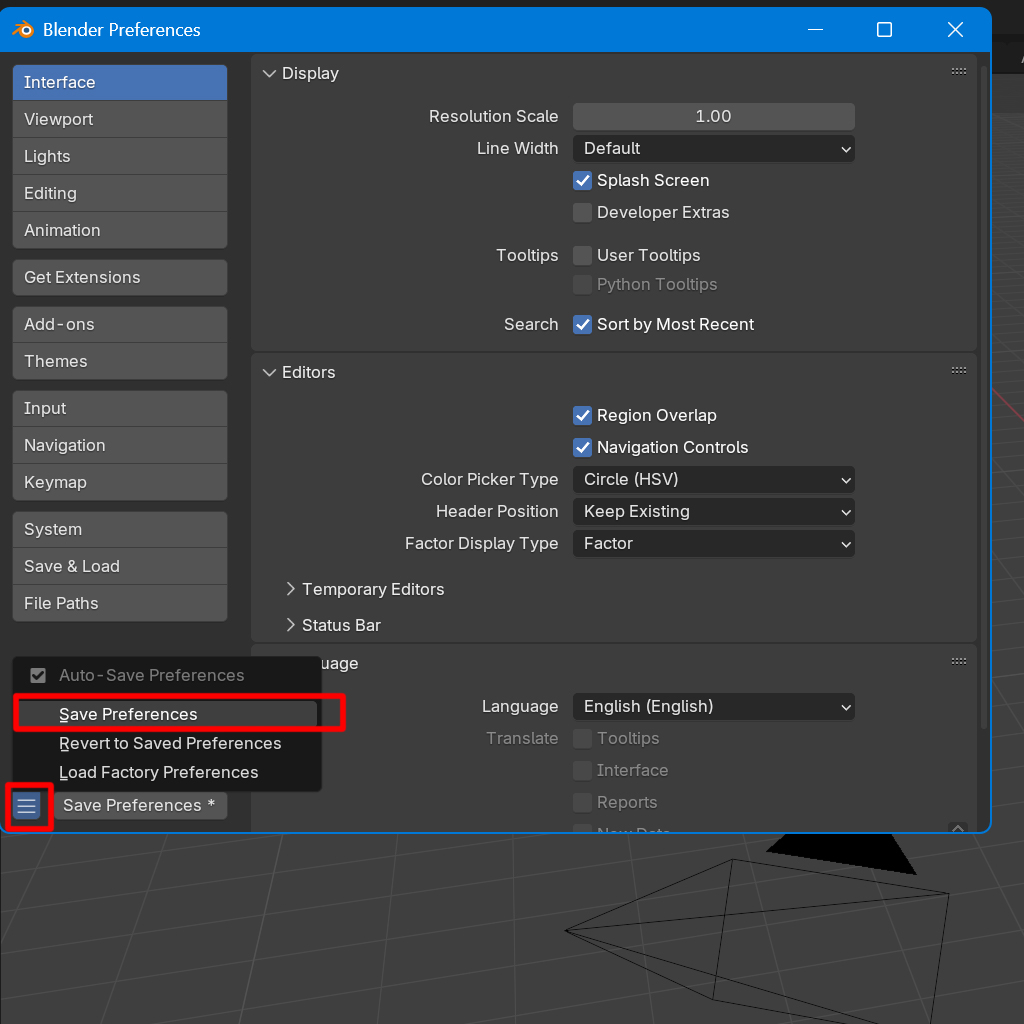
When you have completed your settings, click on the symbol in the lower left corner and click Save Preferences.
Finally, close the window.
Symbol in the lower left corner > Save Preferences
Next, configure the initial screen settings when you start Blender.
This saves you the trouble of changing the settings each time you start up.
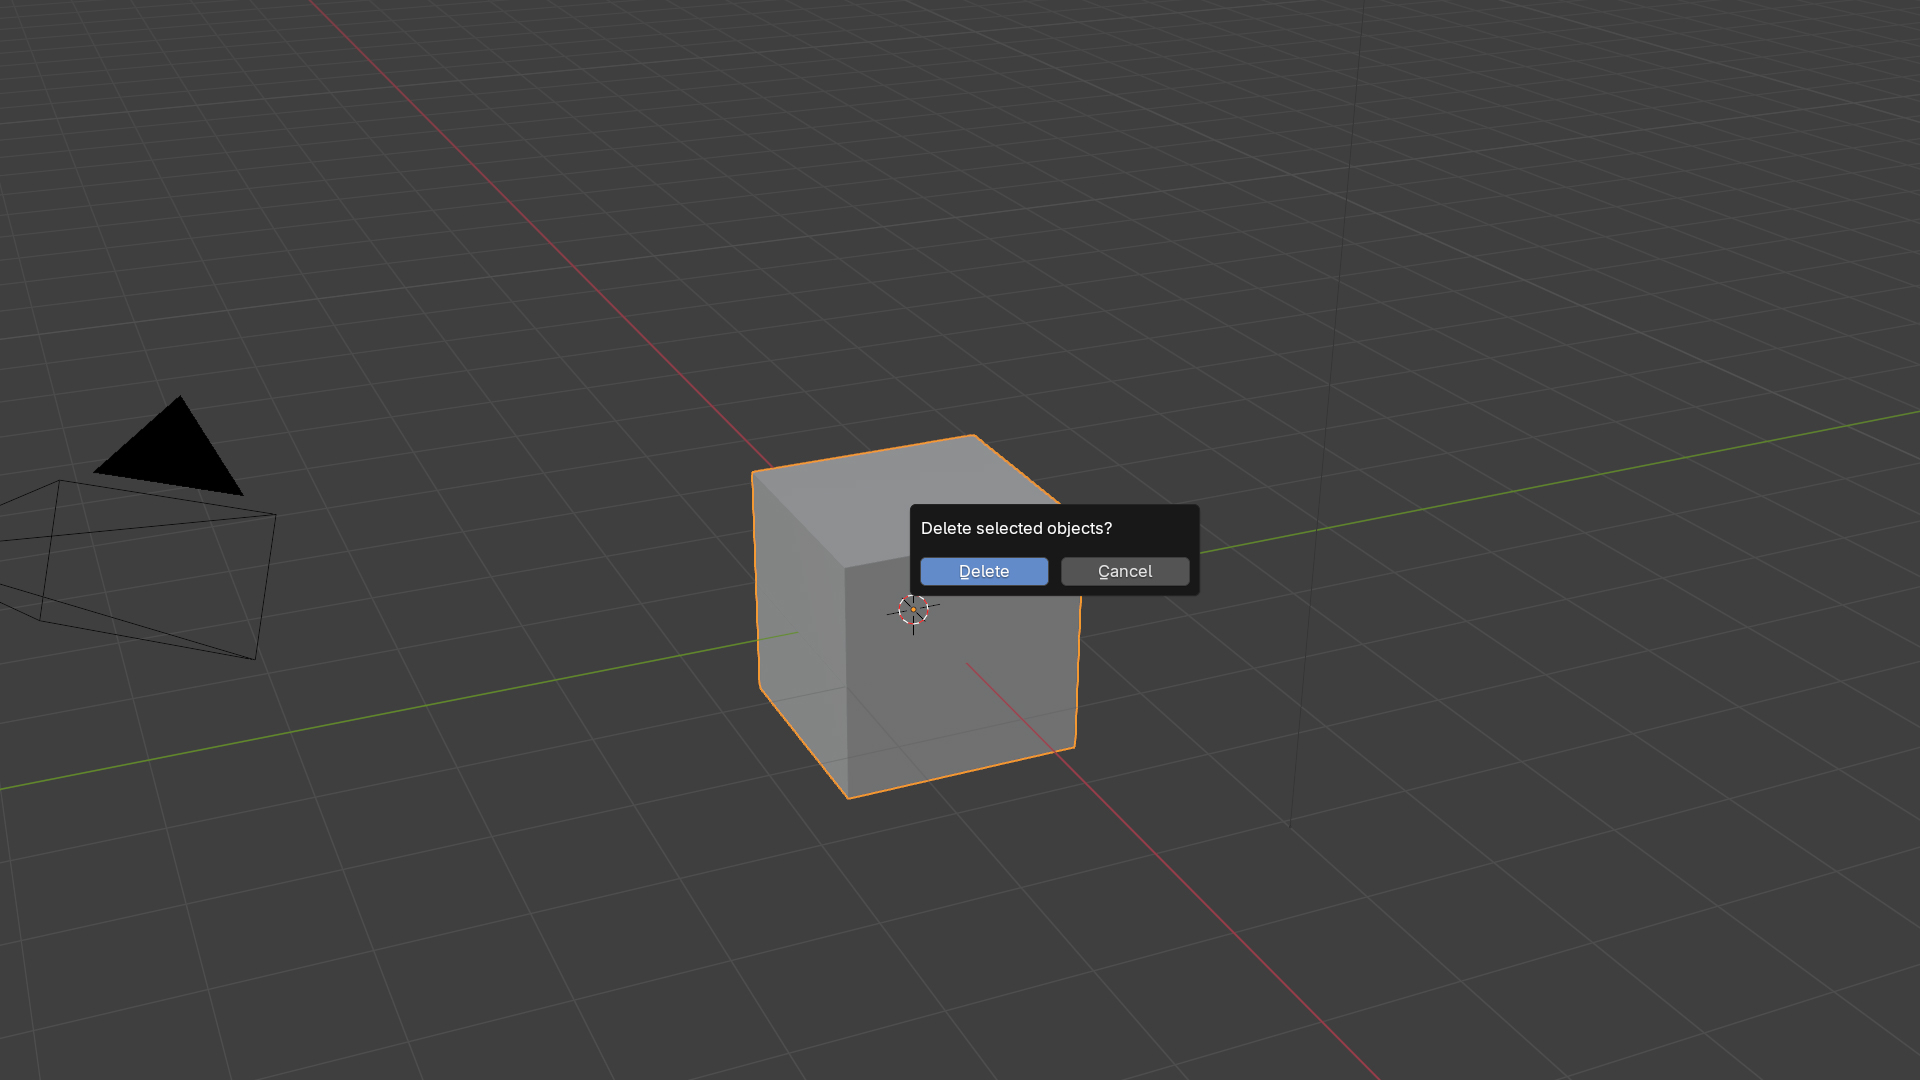
Remove the cube in the middle as it is not needed.
Click on the cube.
The cube will be surrounded by orange.
Press the “X” key.
When asked if you want to delete it, click Delete.
Click on the cube > X key > Delete
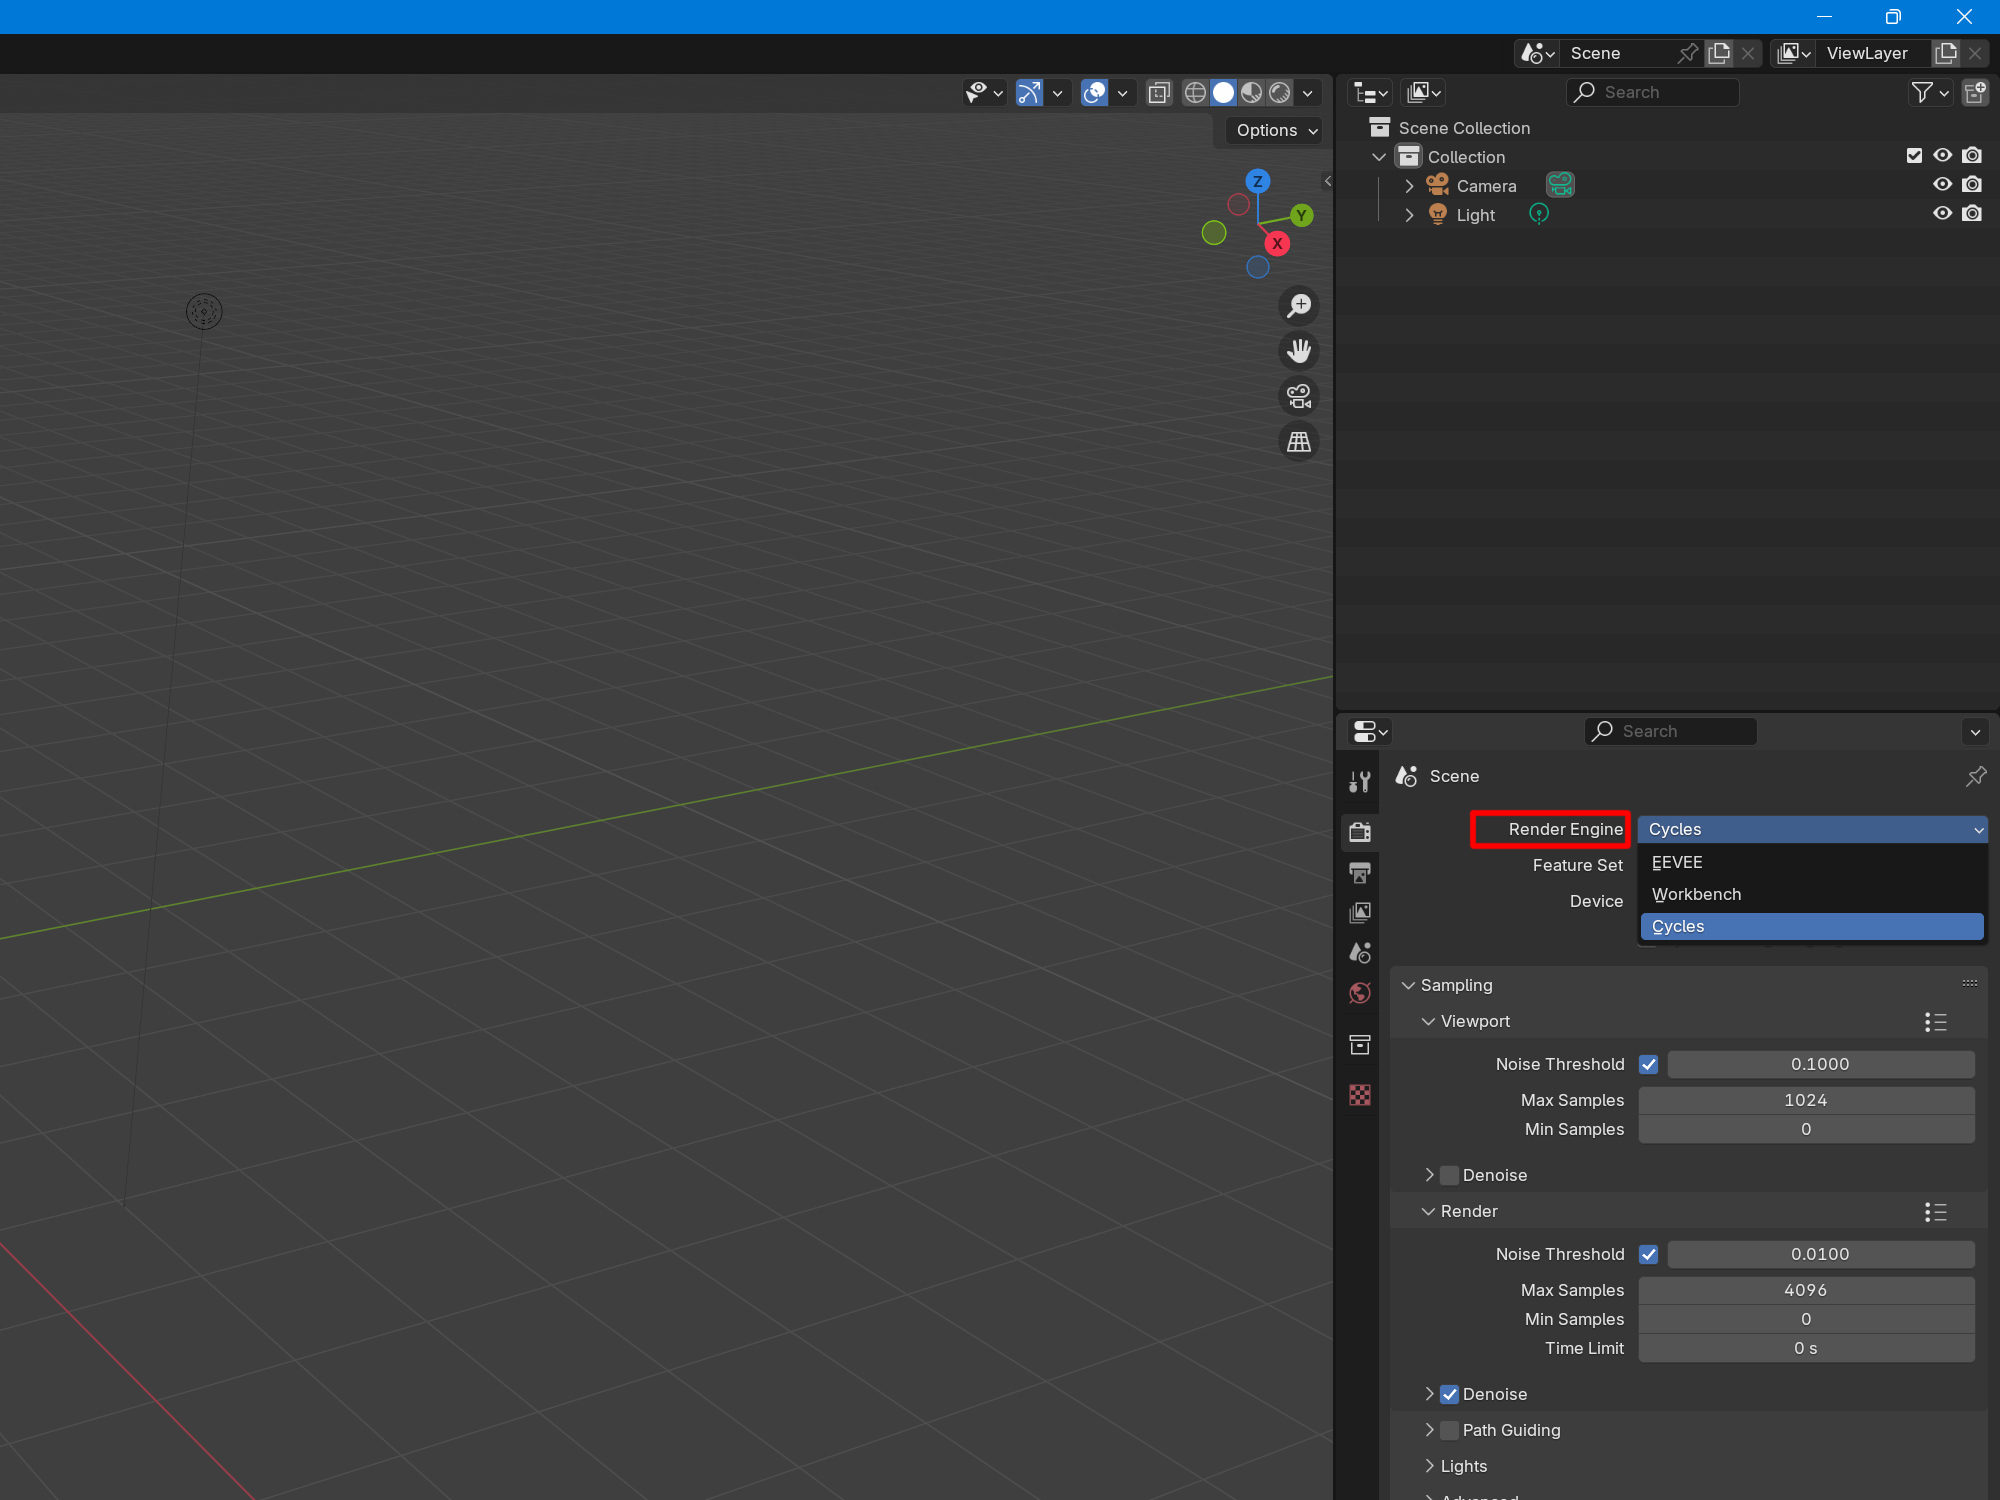
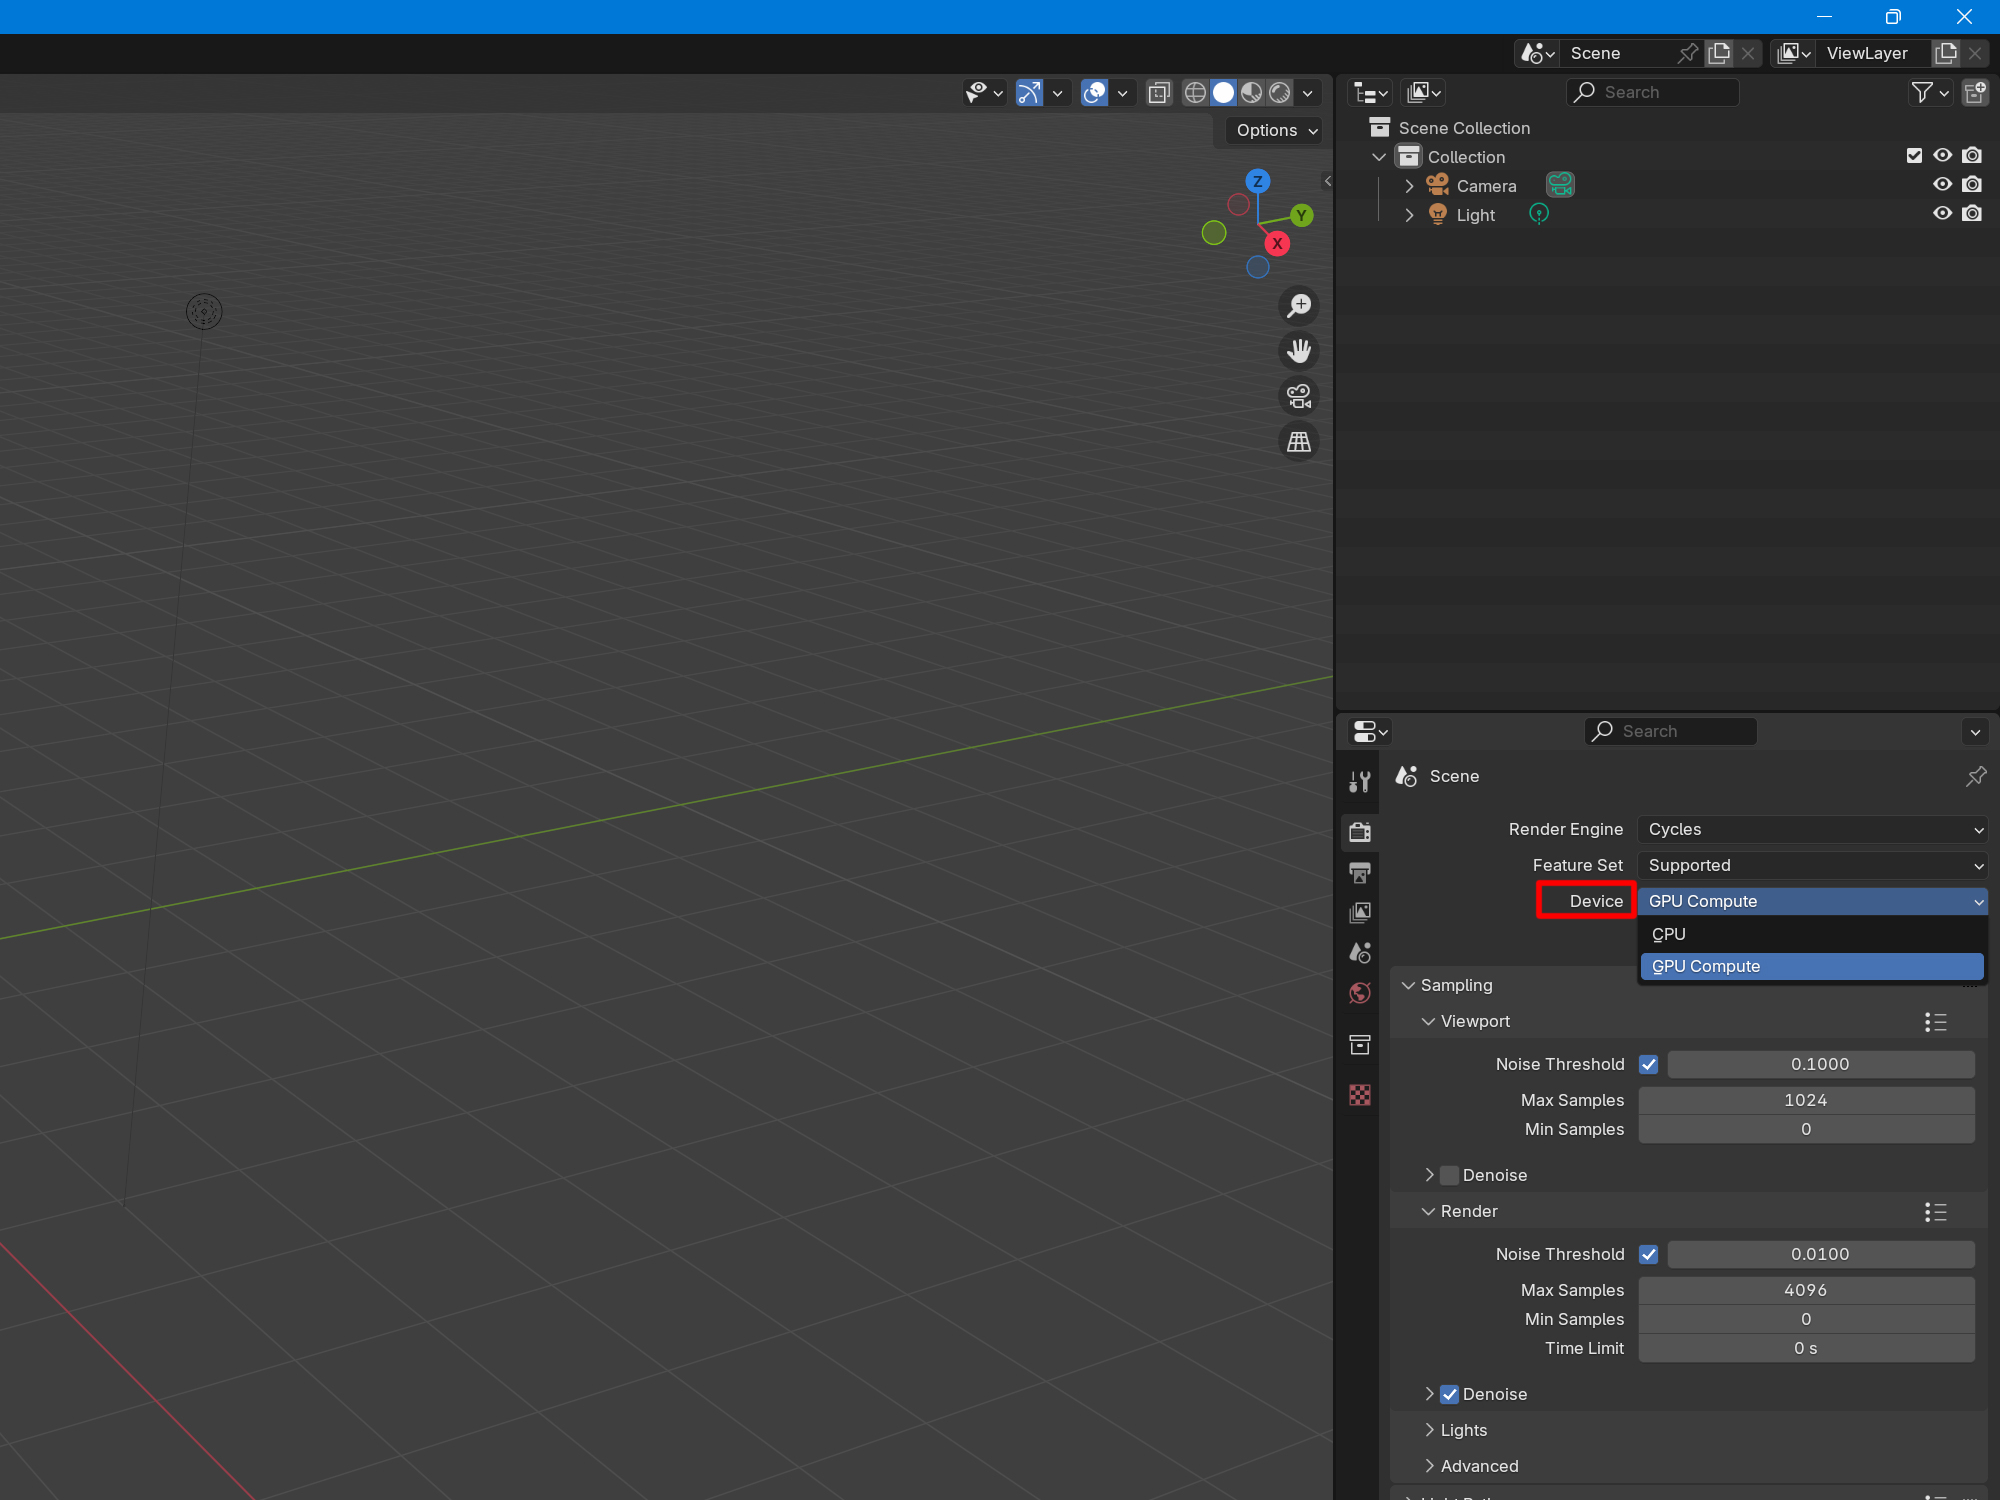
Change the render engine to Cycles.
The difference between EEVEE and Cycles is simply explained: EEVEE is a render engine for animation, while Cycles is a render engine for still images.
In this case, since we will be shooting still images, we will select Cycles.
Render Engine > Cycles
Change the Device to GPU Compute.
The rendering will now take place on the graphics board you have just set up.
Device > GPU Compute
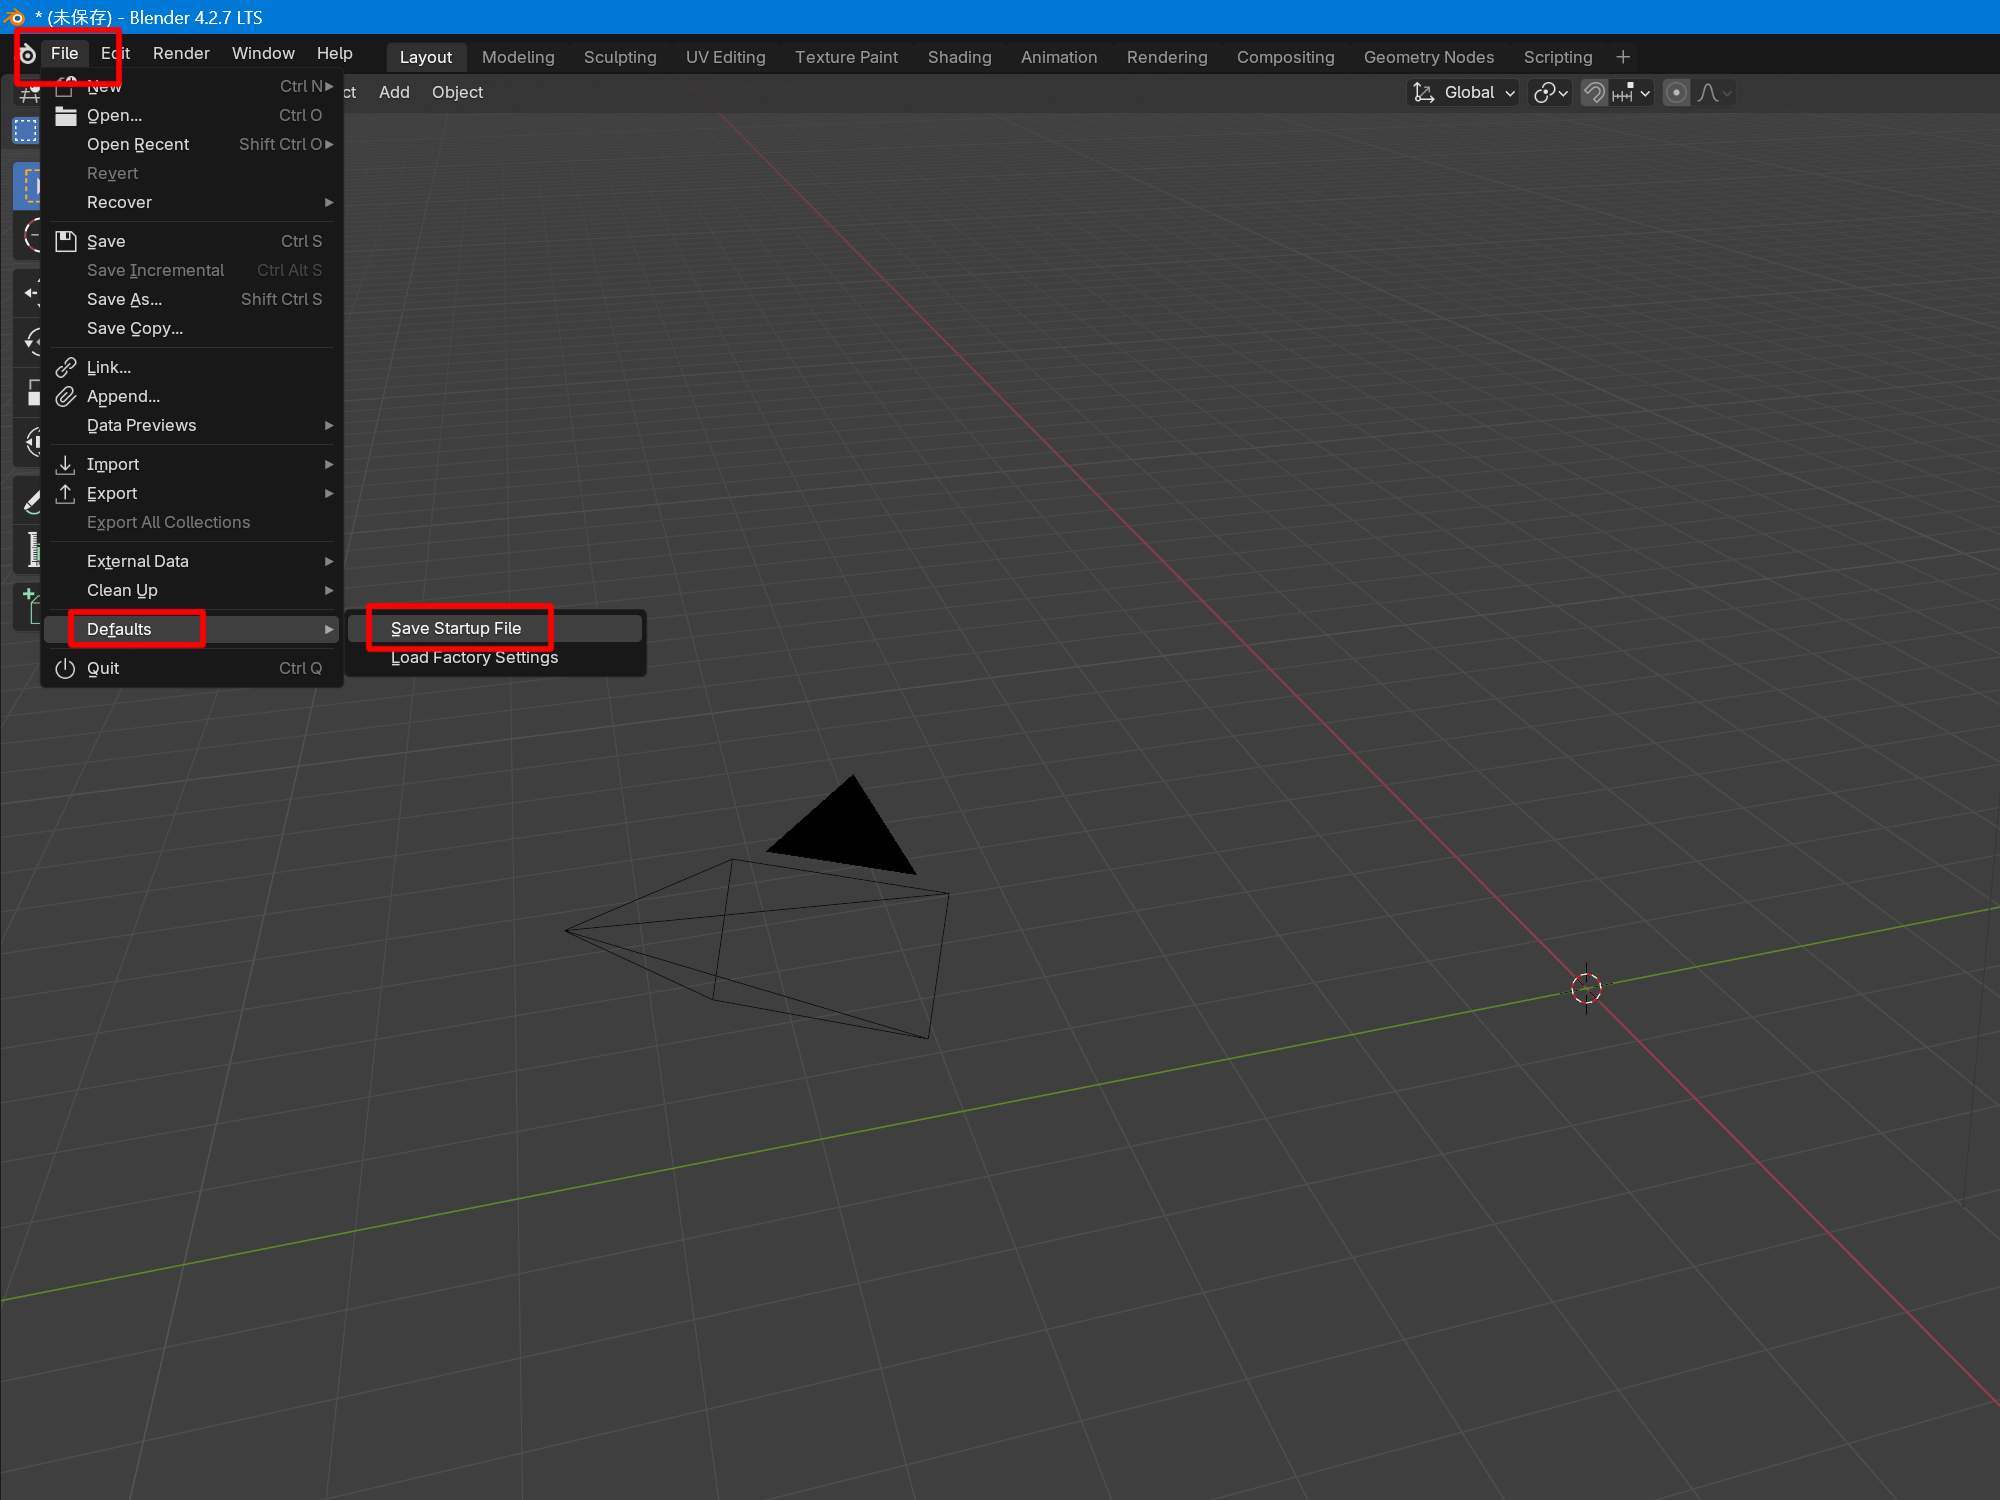
Save the settings.
Click File on the top bar.
Click on Save Startup Files from Defaults.
This completes the initial setup!
Try restarting Blender to confirm.
If the settings are applied, you have succeeded.
The next section explains how to move the viewpoint in Blender.
Here is a description of moving the blender's viewpoint Open File Open the downloaded file “Shiranui_v1_250308”. Click Open from File. File > Open A File View window will open. Select the downloaded file. Click Open to open the file. Select the downloaded file > Open Window configuration The oper...


