It is 1 am here and seems the post become too long again, I will finish the rest part next time and fill the example. I will also post assets of June later.
If you have any questions or would like to discuss anything further, please don't hesitate to:
Leave a comment
Email me at chambersu1996@gmail.com
Join my Discord channel: https://discord.gg/XAfS57Rrj6
I'll respond as quickly as possible.
Thank you for your understanding and continued support!
Part 1. Turn Design Guide,
Character Design Explanation | Patreon "About the character design" part
Part 2. Model Sketch Guide,
Model Sketch Guide| Patreon
Also mentioned "Mesh alignment and texture projection":
Character design update | Patreon "Turn Design and Texture Projection" part
Here is Part 3. Model Detail Guide,
We should create high-poly, shaded, and detailed models from the designs and model sketches.
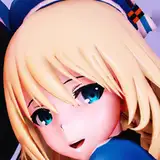
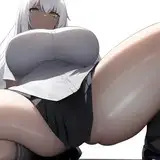
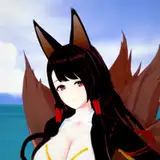
I will use Misaka as an example for detailing a character model below.
We should get some great materials after the turntable designs and modeling sketches, like:
- Suit/Body/Underwear turn design,
- Hair/bald turn design,
- Head/face turn design,
- AI 3D model sketch based on the turn designs above,
- We can use I2I from the designs or AI 3D rendering, or even tweak/draw by hand if needed, to describe the important details further. 
Here is the first version of the Suit turn (by SDXL) and AI 3d model(by Trellis) for Misaka Mikoto,
Before I update to IL and Hunyuan/Rodin, worse than the current designs, but still a good starting point to model further,
and also a good example of how we use I2I (Image to Image on ComfyUI) from them to get better results later, instead of a one-click solution that makes us accept the undesirable results.
After we model her body and hairstyle, we can use them with the suit sketch models to render an image, as input for I2I to get a better suit design, or just the first design as input to improve/tweak it.
(Use different checkpoints to denoise one image can control the result further, too, but I hardly use it.
Loading several checkpoints costs too much VRAM, which works similarly to I2I, actually.)

Here are the rest materials, including underwear, body, hairstyle, head/face, and bald turn design:
I highly recommend we get/know/understand what we want before detailing,
instead of iterations again and again during the process,
which annoys me and becomes the reason why I spend months on AI turn designs,
Forget about the crazy designers being unable to express their idea through their paintings/words,
I try to generate the final design by myself to guide me to model better and suitable characters,
In a word, in most cases, the final models should look the same as/similar to the final designs.
With these materials,
There are 3 main ways I used for the detailed models, including:
- Sculpting,
- Vertex Editing and Modifiers,
- Shaders/Materials.
I. The first one is sculpting.
I'm not good at it and hardly use it now, but there are many tutorials available on YouTube.
When I worked for a company, some guys forced me to try, but it seems it didn't suit me, neither talent nor passion for me to keep digital sculpting, only felt hard and boring.~
But as we know, there are many great sculptors; we should give it a try and may find that we can be one of them.~
II. The second one is vertex editing with useful modifiers.
Here are some key points in my opinion:
- Base mesh/Asset Library/AI 3D, (to get shapes quickly and even nice topology)
- Vertex Editing Operation (another universal modeling solution like sculpting)
- Design Alignment, Projecting or Shrinkwrap (to get detailed shapes along the designs and sketches),
- Loop tool (to get a better and curving mesh topology),
- Proportional Editing, deform cage/proxy(to batch tweak the static area with many vertexs/complex topology)
- modifiers(to generate some complex details in procedural ways, which are hard to rebuild by hand)
II-1. Base Mesh,
For some standard assets, we should create/collect mesh libraries,
Collect and pick the suitable base mesh should guide/help us to get the right structure, and some important detail shapes quicker,
The most common and reusable assets for me are bodies (with different anatomy/style features like photoreal/anime/BJD/Chibi/mixed... for different requirements/projects), 
I tried/read MakeHuman/MBLab(like my old character assets here), DAZ(like posted asset shadow groups), UE(Metahuman), and so on for photoreal style,
But most of them are too complex/many vertices, to easily read/edit, which is unreasonable to use in practice for my serious but mostly lightweight projects.
Similar to the case that I have learned the FACS system facial rig for offline film rendering, which I posted here before, but never used it in practice. (cost too much, too heavy...)
So I created the customized topology for better editing/reading, which is called Avatar/Anime, to make it suitable for most character styles I faced when working as an artist.
Like Misaka Mikoto, Lee Ju-Eun, sci-fi girl (called Trevil), ... and lots of tests before them like Marcille, Frieren, Ryuuko... the more we use, the more the topology improves in practice.
But the customized topology I used is still only for static shapes,
I'm not sure how to improve it for dynamic deformations.
Then I found an interesting project by Chris Jones
Universal Human - Advanced Rig
It really impressed me with the simple but awesome topology, (~5000 vertices to describe all necessary body features with a reasonably and easily readable structure)
Looks great for both static shapes and dynamic deformations (like the shoulders, belly, thighs and butt are still so pretty after posing),
The rigging setting there is elegant too, which runs fast/smoothly(meaning a performance-friendly solution) and allows for easy editing/control.
I must spend time to figure out how we can rebuild these assets within reasonable work hours, which may be the best solution for body topology I've found.
For Misaka's body, I still used the customized anime body topology this time,
But I may update to an Advanced-Rig-like body topology above later, if it works well and is easy to rebuild.
On the part "II-3. Design Alignment..." below, I will explain further about how to convert a base mesh to a special character shape.
Hairstyle library, to guide the vertex placement by snapping/projecting on the surface, with the help of the reference/design picture, to fasten to create some complex hairstyle shapes.
The character library contains hairstyles that can work well too (like the character models I rendered for LoRA training).
Sometimes, AI 3D generation is enough to guide some shapes when we are unable to find a suitable asset.
And as the AI 3D grows stronger, I use AI 3D results more and more frequently.
The clothing base mesh libraries are similar to hairstyles.
For monster/environment modeling, I prefer searching and downloading creature/building 3d scan files on Sketchfab, like this account ffish.asia / Sketchfab
It's awesome for creature models.
And may prepare different kinds of meshes with suitable topology, like the human body above,
for better static shapes to express the shapes with fewer but clearer vertices, which is easier to read/store/edit/reuse/operate...
or better dynamic deformations (like the area around the joints).
If it is hard to find a suitable one, try to use addons like Quad Remesher or AI retopology tools to get a relatively clear topology from the scan files/AI 3D models.
II-2. Vertex editing operation,
Basic but the universal way to rebuild whatever shape from different designs,
There are always lots of strange or fresh ideas and feedback when working on different projects.
Get familiar with the vertex editing operation to make sure we can handle most cases when other tricks are unworkable. 
(Red Circles for features I used in practice, Blue Circles for features I used frequently)
The Blender Manual is a real treasure.
Editing - Blender 4.4 Manual
We won't use the tools until we realize they can help us, which requires us to understand how they work and what they are used for first.
(Please also understand the requirements, to make sure the right keys to the right locks, and the suitable solution for the situation. ~)
If we are tired of reading, (Actually, I think they are awesome and prefer to read, personally)
It may be easier to explain them with videos, which I plan to try after finishing the theoretical guides (to sort up most of the workflows and key points first).
Sculpture can replace most of the vertex editing operations in most cases,
which can be the ultimate skill for 3d modeling too.
Highly recommend picking one of them (or master both) as safety nets for our modeling career, while I prefer the vertex editing operations.
But for standard characters, I can use some quicker ways to finish most the steps.
II-3. Proportional Editing,
and deform cage/proxy mesh for the surface/mesh deform modifiers,
to batch edit the vertices quicker and better.
Proportional Editing - Blender 4.4 Manual
For tweaking the base meshes to align the design, proportional editing is useful, and the corrective smooth modifier with shape keys can help a lot to avoid over tweaking.
Smooth Corrective Modifier - Blender 4.4 Manual
The deform modifiers are used for driving the high-poly meshes by low-poly meshes mostly, to simplify the operations in some cases like scales and the mail armor,
but for me, I used them for tweaking high-poly models after getting feedback between different versions mostly, to avoid edit the dense vertices directly.
Surface Deform Modifier - Blender 4.4 Manual
Mesh Deform Modifier - Blender 4.4 Manual
II-4. Snap by projecting onto faces, or the shrinkwrap modifiers,
to create suitable edges along the base mesh/AI 3D sketch model, like the hairstyle retopo as high-poly version from the base/proxy mesh here.
Snapping - Blender 4.4 Manual
Shrinkwrap Modifier - Blender 4.4 Manual
II-5. Loop Tool,
to smooth the edges, I used Relax and Space mostly, and so frequently that I set hot keys for them (Ctrl + ` & Ctrl + Space),
Take a try, just select the edge we want it become smoother, and press the hot key, and you will find how awesome it is.~
Loop Tools - Blender 4.1 Manual
II-6. Modifiers, besides shrinkwrap/surface/mesh deform, mentioned above,
and EdgeSplit & Solidify & Bevel, to create thickness and maintain volumo after subdividing, useful for fabric clothing and hard-surface mesh like armor or robot, 
Edge Split Modifier - Blender 4.4 Manual
Solidify Modifier - Blender 4.3 Manual
Bevel Modifier - Blender 4.4 Manual
Subdivision Surface (Creases is important too) & Displacement modifiers, which can use the depth map created from the design/photo/render images by DepthAnything on ComfyUI.


Subdivision Surface Modifier - Blender 4.4 Manual
Displace Modifier - Blender 4.4 Manual
GitHub - kijai/ComfyUI-DepthAnythingV2: Simple DepthAnythingV2 inference node for monocular depth estimation
Geometry Nodes are potential and useful, like the Hair Tool and some rock generator I used are based on them,
and I know some of geometry-node-based advanced/customized modifier for soildify/bevel/displace,
but I didn't spent enough time on them now.
Geometry Node - Blender 4.4 Manual
#ToDo
It is 1 am here and seems the post become too long again, I will finish the rest part next time and fill the example. I will also post assets of June later.
III. The third one is shaders/materials,
mostly about the camera-based design projection as textures,
the basic/procedural shader/geometry nodes setting,
and GPU-driven math-operation-only NPR shaders for cross-platform projects.
after the Part 3 Model Detail Guide,
The next guide focuses primarily on cleaning up assets.
Retopology and baking textures,
Rigging by skinning mesh and shape keys(blendshape),
(more optional solutions for rigging and animating, like dynamic modifiers for offline rendering projects like films and videos...)
Animating by the motion data of the skeletons and the shape keys,
and animated shaders like the vertex offset, by displacement maps or expression(procedural maps or baked frames),
and Compositing/post-processing(Global, AO, Gloom, vignette, chromatic aberrations, lens distortion, sharpness, grain noise, depth of field)
Can't help but talk too much when typing the guides, I will sort them up into one article with key points only in the future.
I should record how to create a game character from zero after finishing the guides.
(design, modeling, baking, rigging, and animating)
(Mostly 20-40 work hours for a full-feature character)
After the raw record, I should separate them into 10-minute short videos and explain the key points in the meantime, and I will try different styles/objects to cover most assets used for game development.
If you have any questions or would like to discuss anything further, please don't hesitate to:
Leave a comment
Email me at chambersu1996@gmail.com
Join my Discord channel: https://discord.gg/XAfS57Rrj6
I'll respond as quickly as possible.
Thank you for your understanding and continued support!
Sakigake Furuzawa
2025-07-01 21:22:33 +0000 UTC