GUIDE ON HOW TO CUT ANY CLOTHING ITEMS IN VAM & ACCESSORY MOVEMENT
I was discussing with somebody about custom accessories & clothing in VAM recently and decided to make a public guide for it since it's something that can open up many customization options for everyone.
This is a detailed guide on how to make custom clothing items by cutting existing ones. For people a bit bored with VAM and looking for new things to do in it, this might help with that.
Usually, information and guides about VAM are complicated, and often written for other creators. I try to write this for all vam players. It's a long guide but the steps are very simple. I'm explaining things step by step, with detailed examples, so that anyone can pick it up and customize clothes following along just the guide.
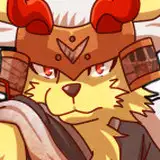
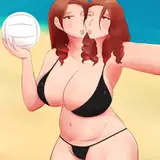
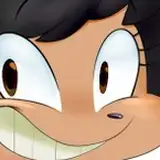
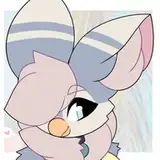
Credits for the cool mask & outfit in the images goes to SAHID.
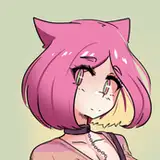
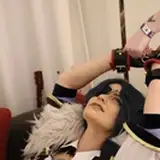
You can cut clothes in VAM using texture images. This works for all the clothing items you have in VAM. You can cut any clothing item in any way you want and create custom clothes. You've seen in some of my recent images for example some catgirl ears:

To make those ears, I repurposed VAM's default "Heat Up Cap". You can repurpose any clothing items you have, including from VARs. But if you do this with VAM's default clothing, some of these items also have helpful controls to scale them, rotate them and move them around:

For head accessories in particular, these are great as they allow you to move the accessories around, all with VAM's core functionality.

The Heat Up Cap is a great item to do head accessories, because you can cut it in so many ways. This is for reference how I cut it, with the cut out pieces appearing as solid white here:

You can tell by this image that you can use this technique to fit in all kinds of accessories: horns, halos, hairpins, crowns, hair bands and so on.
STEP 1: Pick the clothing item to cut
You start by picking a clothing item that you want to cut into.
I recommend using VAM's default clothing items when possible, because of the extra options some of these clothing items have. The "Ultra Cat Suit" clothing item is a great choice for anything fixed on the body: tshirts, pants, neckbands, armbands. The hats and glasses can be repurposed for head accessories.
I'll detail the process of cutting the catgirl ears below, to give a clear example. I'll use for this example the Heat Up Cap clothing item.
STEP 2: Get the clothing map

To start cutting, you first need an image of the clothing structure. The clothing items are 3D, but the textures are 2D images that wrap around. To make sense of how they wrap around, what goes where, we need this texture to map things.
To get the map, you press the Create UV Template Texture button in the Texture tab of the clothing item. In this case the tab is named "Main". Other clothing items have different names or multiple pieces (tabs), and you can cut those separately.
After pressing the Create button, you can press the Open Folder button above it. It will open the folder where that image was saved and it will look like this:

The parts that are fully white don't matter, they're not used. The parts with black lines mark the areas of the image used by the clothing item.
STEP 3: Figuring out what's what
The image will be made out of triangles grouped together that marked pieces of the clothing item. We need to figure out which pieces goes where, to know what to cut. The easiest way to do that is to:
make a copy of the image, to edit it. Open it in Paint or another image editor. I recommend GIMP, it's free. I'll use Paint here to keep things simple.
Draw colored lines over the pieces and save. In VAM you'll then be able to figure out what's what based on the colors of the pieces:

You can load the texture now in VAM in the _MainTex area and the hat will look like this, it will have the lines from above:

You can now tell that the blue line piece is the front of the cap, the red one is the back, and so on. You can go deeper, draw more lines, points , to figure out how the material wraps.
STEP 4: Cutting pieces
Now that we know what the pieces are and what goes where, we can start cutting.
First, you can create a new copy of the map image. This will go in the AlphaTex slot in VAM (4th row in the image above).
The cutting process is very simple. It's done with an image. You can draw on top of the copy image you created above. Based on the colors on that image, pieces will get cut out.
⚫ BLACK - areas marked with black get cut out
⚪ WHITE - these areas stay visible
🔘 SHADES OF GREY - these areas will be transparent based on how dark the grey is
So, if you put a fully white image in AlphaTex - clothing will remain fully opaque. If you put a fully black image, the entire clothing item will be transparent.
For the cat ears, we only need to use the front of the cap, the rest of the hat can be cut out. We know from Step3 which part is the front. So, to cut the rest, we can edit the new image and draw black all over the pieces we don't need, leaving just the front:

If you load this new image on the AlphaTex slot in VAM, the hat will now look like this:

The black parts got cut out.
STEP 5: Snip ✂️
To do smaller cuts, I recommend using the first image, the one with doodle lines, to figure out first what to cut. So, We can try something like this for example, marking with red an area for the ear:

After saving and reloading this guideline image in the MainTex slot, you'll see this in VAM:

We repeat this process until the cut area looks good. We can use the triangles as references. For my example above, I'd like the cat ear to be more inward to the right side. Two extra triangles at the bottom more to the left would do. So I edit the image and reload in VAM:

This looks about right so now, on the other image, we can start cutting on the second image. We need the red part, the ear, to be white, while the rest of the image to be black, on the second image.
If you're good with image editors, you can combine the images for a quick reference . To keep things as simple as possible here, you can just look at the first image and replicate it on the second, counting the triangles:

Clothing items are often symmetrical, they're mirrored. We can use the center line as a guideline to help with counting. We know the base of the ear starts after 1 triangle to the left from the center (the straight line), and goes to the 5th triangle to the left, like in the image. And it goes also up 11 levels.
On the image used for cutting, we can start marking with black what we don't want. We do this just for one side first, trying to keep white the ear area, while drawing black around it.

When we reload in VAM the AlphaTex slot, the hat will now look like this:

The black part was cut out. We repeat the above for the right side too.
And we finally remove the black lines too from the second image. Keep it just black and white, no lines (because those become transparent too since they're black)

Now, when we reload the texture in VAM's AlphaTex slot, it will look like this:

STEP 6: Colors & customization
Once the cutting looks good, we can reset the way the clothing material looks. Above, we still see lines over the ears because of the guideline image we added in step 3 in the MainTex slot. We can hit Clear next to it to remove it.

Or, you can hit Reset at the top, to reset entirely the clothing item to defaults. Then readd the AlphaTex black and white image you created for the cuts.
Since the hat item has the Move tab, which allows customization, the ears can be now scaled up and down, rotated and moved around.

You can save the cut clothing item as a Preset to be able to load it quickly without having to setup textures again.
BONUS
You can find attached the example AlphaTex image I made above (example1). It's recommended to put it in Custom/Clothing/Female/Builtin/HeatUp for quick access when loading textures on the Heat Up Cap clothing item.
I added also my original ears accessory, as example2. This one also has a MainTex texture for the coloring that I used in my images.