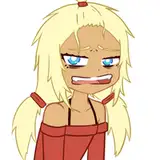
Good day everyone! Today I want to tell you how this art was made, with a detailed description of some interesting features and techniques.

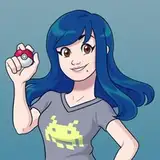
1. I do a significant part of the work based on 3D, but it's still better to start with a simple sketch from my head. To then adjust the 3D scene to the original idea (and not vice versa).

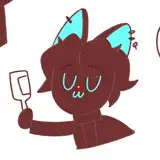
2. After one of my previous jobs, I still have a bunny model in the Design Doll program. In this program, you can adjust the pose of the puppet, and I made the head myself in the Blender program. It turned out like this pose:

3. Next, I exported the model to the Blender program, tweaked my hairstyle, and also made a surface with a sand texture, and added several characters to the background (they are taken from one of the previous projects):

These characters on the background were not useful because I decided to make the background with the beach and the sea blurred, and for this you can use a collage of photos. But as for the background, I'll write a little below.
4. The final render looked like this:

5. Based on the render and on the initial rough sketch as references, I made a more detailed sketch:

6. Background.
As I wrote above, I decided to make it blurry (out of focus). To do this, it is not necessary to draw a picture manually or make a detailed 3D scene. It will still be blurred.
Therefore, you can save yourself time and effort by combining the sand from the render and the background from the photos found on the web.
It turned out like this: my sand from the render is at the bottom, people and water from one photo are in the middle, and greenery and sky are from another photo. Everything is connected quite roughly, but this is more than enough.

To match the furry world, I even painted the ears and tail of the woman on the left 😺
It's a pity that in a blurry form it became invisible))
7. A good tip about blurring the background.
Try not to use the usual "Gaussian Blur" filter for this. Use the "Lens Blur" filter - this filter creates a good "bokeh" in the form of half-blurred hexagons in the places of illumination, and in general it looks more like what you can see in a photo with defocusing.

8. Next, I drew a lineart and a flat color, together with the resulting background, now everything looks like this:

9. Then I took my render and manually, using transformation tools and a brush, adjusted the layer with the render so that it corresponded to my linart.
Notice how the original render (on the left) does not match the line. This is because I don't draw 3D contours, but try to draw artistically.

Although the rendering from the 3D program is taken as a basis, but all these curves, muscles, strands of hair are hand-drawn. So I combine 3D and 2D.
10. It's time to combine the resulting volume, linart and flat color. Here's what we have:

Please note that the "Ambient Occlusion" layer is the shadows I drew in deep places (between the rabbit and the towel, inside the ears, under the eyelids), as well as where I wanted to separate the front surface from the back (leg, boner).
11. We combine all these layers as follows:

I didn't specify this in the screenshot, but I'm applying "Ambient Occlusion" in "Multiply" mode.
The render layer (which I called "Volume") I duplicated 4 times (and placed each in its own folder, for convenience). They overlay in the modes "Multiply" (the bottom two), "Divide" and "Normal" (the latter with an opacity of only 10%).
I applied a mask to these two layers, which is just a copy of the layer itself (in the second case, inverted).
You can probably see this more clearly by opening the PSD file. But if there are any questions, I will try to answer them in the comments
12. The result looks like this:

13. I colored the linart using the method that I described in detail in the previous post (link). The drawing immediately became softer and more pleasant:

14. And one more detail. I would call it cheating, but if it gives a good result, then it's very good. It's about texturing the penis.
Initially, for the 3D model, I used a penis model with a texture. I usually delete the texture (after all, I only need information about the volume), but here I decided to render it separately and somehow put it on top.
In the screenshot you can see from above - a piece of the original render, and how I distorted it to fit the desired shape and overlay it in the "Hard Light" mode:

This added subtle but very nice details :3
15. I applied glare to the rabbit's eyes (and in a couple of other places) using the method I wrote about a month ago (link)

16. And final edits.
Using the "Liquify" filter, I tweaked the overall shape. Added saturation. And then I added chromatic aberrations and noise, about the reasons and ways of adding which I wrote earlier (link).

And now you can see the wonderful result available at this link:
https://www.patreon.com/posts/beach-bunny-2-69656253
If you want to dig into all these layers, how they are superimposed on each other and what is happening there, then here is a link to the PSD source:
https://disk.yandex.ru/d/dPY4DgcYMnDjeA
I hope it was useful for you. And see you soon! =^_^=