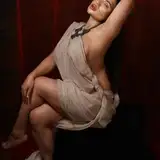
Okay, guys. This drawing was intended as a small sketch of a young mouse posing with his pants down. But it was a big drawing. I used the Skelly app and SketchUp as additional tools.I will write more about this next. So, let's dance.
1. I started with a rough sketch of the poses, of which I preferred the one on the left.

2. I wanted to better understand the anatomy of the character in this pose, and I used the Skelly app on my phone (links: for Android and iOS).

3. Using this cute skeleton, I drew the structure of our mouse.

4. Added muscle.

5. I finished drawing hands and clothes.

6. Carefully circled everything with a black brush. Linart is ready.

7. I wanted to create a real environment for this cute mouse (not an abstract background). I came up with the idea that he would pose on the stairs leading to the crossing of the railway tracks (there is something romantic about this).
To avoid drawing a perspective grid and manually plotting how and where the shadows should fall, I built a scene in the SketchUp 3D program.
I placed the human sprite (it's a standard flat model there) on a step and added two balls at the places of the head and pelvis to see where they would cast a shadow.

8. I chose the right angle, the right evening lighting, and rendered the scene. Now I understand where the shadows should fall. The balls later helped me draw light and shadow correctly on my character.

9. Then I took up the grass. In places, the ground should be visible from under the grass, and I drew it first. Not too detailed, it will only be visible in a few places.

10. This is not a neat lawn but wild grass on the side of the road. I drew individual mounds from which the grass will grow.

11. I used a special brush to draw the grass, changing the color layer by layer from dark green to light yellow-green. You can find this brush in the archive with the PSD source.

12. I drew rubble and rails on the background. Schematically outlined the cloud. Made linart stairs and railings and painted them and the mouse flat color.
An attentive reader may notice that it was at this stage that I came up with the idea of adding a little boner, visible from under the t-shirt. I also added panties under his shorts. The image became more sexy :3

13. I thought about changing the lighting to something else. Made 3 rough versions of the main light. I chose the third one that I had originally planned.

14. Made detailed lighting (rendering) for my Mouse. I have a separate tutorial about this stage.

15. I painted the contours and finished drawing the eyes.

16. In much the same way as I did the mouse rendering, I applied the same lighting to the background, leaving a shadow in the same places as in the 3D rendering from step 8. Added a bit of warmth, outlined the clouds in more detail.

17. And I added shadows to the clouds, added a little light from the upper-left edge, and shaded the edges a little. Everything is ready!

Thank you for your support! I hope this was helpful.