Glad I could finally publish this. It took a surprising amount of time to make.
The overall process of doing another random anime review was pretty similar to my last one. Other than the fact that I had to make my own website for it this time. But I have a video talking about that if anyone is interested.
So for this behind-the-scenes I want to focus a bit on my editing, and show you how I go from rough footage to final video.

So the first step is obviously recording all my footage. For a random anime review in particular, I like to record my wheel spin and the entire viewing of the show I'm watching, even if I don't plan on using most of it.
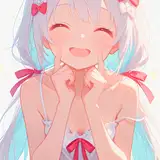
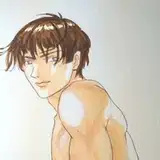
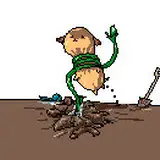
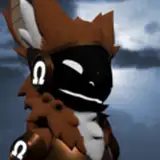
I watched all three shows while recording in OBS, and you can see each of them is labeled and separated by color. The first short clip for each color is me spinning the wheel to pick it.
My OBS settings basically record a 2160x1920 image (two 1080p videos stacked on top of each other) where the top is my camera feed, and the bottom is my desktop. That way they're both 1080p on their own and synced up to each other automatically. I also use two separate audio tracks for microphone and desktop audio, which are synced as well. This way I can just split the video into two layers, where my camera is the top half and the desktop recording is the bottom half of the original. And I can edit them both separately, for that nice fullscreen to corner reaction transition.
It's a bit complicated to explain, but it basically just means the final recording can be thrown into Premiere and is all one big synced recording with two video layers and two audio layers that I don't have to do much with. Which is perfect.
(I do also download HD versions of all of the shows I'm watching separately, specifically so I can edit non-subbed footage for the recap)

Next I record my green screen segments. I've already scripted them out before recording, and read from a teleprompter, but it still takes me a long time to get useable footage.
(Usually 2 hours for every 30 minutes of final video. I'm not someone who does anything good on the first take)
I also split up the recordings into different sessions (to give my voice a break) and you can see those split up by color as well. Something you'll notice is I record my intro last, alongside my outro (both in purple, originally one recording). This way I can give the intro more energy, since I tend to build up confidence over the course of a recording day.
The video for these segments is recorded directly to my camera's SD card for the highest quality, and my microphone is fed directly into my computer via Adobe Audition, so I do need to sync up the audio and video for this. It's already done in the above screenshot, but all I do is clap at the beginning and end of each recording session and line up the sound with the video.
Then the final step is applying my ultra key to remove the green screen, and add some small color correction, along with a subtle shadow. It's all presets, so I just drag and drop and adjust as necessary. But it gets me from raw footage to nice-looking green screen cutout.

The first actual bit of editing I do is a rough cut. Which is actually two steps in one.
The first step is just cutting out any long pauses and botched takes to reduce the length from about 2-4 hours to 30-50 minutes. As I get better at reading scripts this will probably become faster, and require less cutting.
The second step is stiching those chunks of video together and cutting out all the mini pauses, breaths, and other slowdowns in the video. I just like the feel of my videos to be a bit faster than I currently talk naturally, so there's a lot of jump cuts made to speed everything up.
As you can see, I've also spliced in the wheel spinning segments where they're supposed to be, as it makes for a good marker of each "chapter" in the video.
This whole segment takes quite a bit, and is mostly incredibly tedious. But I can easily just listen to music and grind through it.

After the rough cut is done, I move my green screen up a few layers so I can put stuff behind me, and go through and add all my visuals.
Here I've added blurred background footage (marked in dark blue), text on screen (marked in beige), all of the video clips from the recap segments (marked in whatever color the show was: red, orange, or yellow) and final, extra video clips or images (marked in green)
Something you'll also notice is the very top layer (and some others) have a bunch of grey stuff added on top. Those are my adjustment layers. Basically, everywhere there's an adjustment layer, all the footage below it gets some effect applied to it (mostly zooms). It's the best way I've found of zooming in on myself and the background and everything all at once, since applying it to each layer would take much more time.
Now this is by far the longest part of editing, since I just go through beginning to end and add all the relevant footage, images, and text that I want. None of it is too complicated, since I keep my editing rather simplistic with zooms and text effects. But it is very tedious, and takes longer than every other step combined.
One final thing to note is there's some green markers on top of the timeline. This is me marking off any parts that I might want to bleep or blur for the YouTube cut. I'm still playing around with what I want to censor language-wise. Honestly, I might give up on bleeps entirely outside of the first couple minutes, since YouTube hasn't demonetized me for it yet. But it's something I'm playing around with. And I definitely blur any nudity or excessive violence, which fortunately these three shows had very little of.

The final real stage of editing is adding music. Which you can see is all labeled in pink at the bottom audio layer. All of my music is checked for copyright before I think of using it in a video, and is taken from artists and genres I really like. I then sort it into folders based on "vibes". So I have folders for ambient, energetic, relaxing, upbeat, etc.
This way I can just drag and drop different songs depending on the current vibe of the video. If it's an energetic segment, I add energetic music. If it's a slow segment, I add ambient music. And I usually pick songs that fit thematically. Especially with the recap segments, where I want the songs to fit the show I'm talking about.
All the music is added as I go through the video one last time, and is faded in and out to blend together into a nice soundtrack (I also tend to cut it out abruptly for comedic effect).
This part goes surprisingly quick, but that's because I spend a lot of time setting up good songs to use beforehand. The actual process of going out and finding new music is a pain sometimes.
Once the video is cut up, visuals are added, and music is good to go, the only thing left to do is export the video. I then duplicate the timeline and make all the necessary bleeps/cuts/blurs, and export that separately. And then I have a finished video for Patreon and YouTube ready to go!
My editing process is nowhere near as complicated as other YouTubers. I basically avoid After Effects and harder edits at all costs. But I think with my pacing and simple visuals I get across all I need to for a final product that's interesting and fun to watch.
Overall, I'd say the time spent editing any given video can be broken down like this:
So if you have any questions about my editing, or want to see breakdowns on any other part of the video making process, let me know!