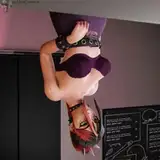
![[making process] Blue Archive Ogata kanna swim suit ver. Process & tips1](https://img5.xaiju.com/storage/6/ki/rt/d38796-019e8e83-94a1-7262-92ba-233ae93c5bbc.png)


Hello! Thank you for your support.
This time, I would like to introduce the making process of Kanna, a swimsuit made by toshi molding, which I helped the other day.
The kit itself is a simple one that even beginners can tackle, so I don't think it needs any special explanation, but please note that there are some processes that are not mentioned in the video.
Production process 1-Parts check, surface treatment
The first thing I do when I buy a garage kit is check the parts.
・Do you have all the necessary parts?
・Are there any damaged parts?
Visually inspect each part with these two things in mind. This is a common sense if you have been touching GKs for years, but please note that some people who have recently started may not know that there is a time limit for parts replacement support if there is a problem with a part. Most dealers generally set a deadline of 2 weeks to 1 month, so be sure to read through the instructions enclosed in the box when you purchase at an event or by mail order.
This Kanna consists of 22 parts in total (1 clear part and decal).

The next step after part checking is surface preparation. The division lines and gates are removed to make a clean part. This Kanna has a layer left over from the 3d printer output (the area indicated by the arrow).

It may look like there is nothing in the image, but you can clearly see it when you touch the real thing. It can't be helped because the layers left on the prototype before replication will remain on the cast as it is. Let's do our best to sand it.
Incidentally, there were no microbubbles and the cast was clean, so I don't think there is any concern about bubbles appearing due to excessive sanding.
The poolside parts should not have rounded edges, so you may want to be creative with the sanding method.

Halo is also sanded with a metal file because the surface should not be rounded.

The inside is also sanded with a square metal bar file. I wanted a square file for models a long time ago, but I couldn't find one on the Internet that I could use, so I think I bought one at a nearby home improvement center.
 This file is very useful for sanding areas that require a certain amount of edge without losing detail.
However, this file alone is not wide enough for the surface, so I also used a metal file of the fish cake type.


This cloth file, which was glimpsed in the video, is Kovax Super Assilex (#360).
 I have been using only God Hand sponge files, but Super Asilex is also a file that I personally recommend because it is quite easy to use and the polishing power lasts for a long time.
So, I'll skip what I'm doing because it's basically the same process as usual, but I was under the impression that I probably wouldn't have any trouble with sanding.
┃ Mating process for three-point ball type
After the surface treatment is finished, the shaft is struck and temporarily assembled. The arms and legs of this canner are positioned not with dowels, but with a traditional three-point ball type positioning process, so if they are assembled carelessly, they will be misaligned and leave gaps.

However, since there is a guide for the axis in the center, you can just follow it and insert a pin, so you don't have to think too hard.
If you use two pins because you are afraid that a single pin will slip, you may end up with a gap. If a lump of Cyanon forms at the base of the shaft, it may also cause a gap to be created. If you see any unnecessary gaps, suspect them.

The trick is to apply cyanon in a way that is not too much. Check from various angles to make sure there are no unnecessary gaps.


Use the center pinning guide for the arm parts as well. Other parts are mostly dowel, so you should have no trouble.

 ┃ A little detail up the poolside
I'm darkening the photo because it's hard to see the white, but the poolside parts are just grating grooves without any processing.

To bring the atmosphere closer to the poolside, I dug a trench for the tiles.

Grating to be further processed.
 I dug a line drawn with a pen.

 This should give the poolside atmosphere.
This level of detail enhancement can easily be done with a sujibori type tool, so please give it a try.