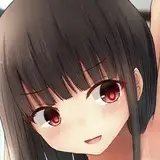
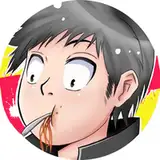
![[making process] Fujiyama sankaku Blue Archive Sexy seia de sumanai...Process & tips1](https://img5.xaiju.com/storage/9/fj/rs/d38796-019e8e83-9ba7-7534-ba73-2986ec361b91.png)


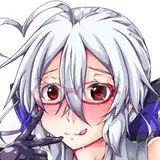
I helped with the color sample of the ”セクシーセイアですまない・・・。” from the new Blue Archive by Fujiyama Sankaku, which was anounced the other day.
This kit was simple, but interesting because the original illustrations were in monochrome, so we had to decide on the colours from official illustrations and fan art.
I'm going to introduce the production process as soon as possible because it's a long preamble. Of course, you don't have to make it exactly like this, so I hope you will just use it as a reference.
This kit will be sale at WF2024 summer. Check out Takatori's X for more information.
https://x.com/takatori_4692/status/1806574407361671501
┃Parts check

The first thing to do when you buy a garage kit is to check the parts.
・Are all the necessary parts present?
・Are there any damaged parts?
These are the two things to pay attention to as you visually inspect each part. This is a normal feeling when you have been working with GKs for years, but please note that some people who have started recently may not be aware that there is a time limit for dealing with parts replacement if there is a problem with a part. Many dealers generally set a deadline of two weeks to a month, so when you buy a part at an event or by mail order, read through the installations enclosed in the box.
This Seia has a total of 47 parts (5 of which are clear parts). (The petal group for the hair is one part each).
┃Surface treatment
The next step after the part check is surface preparation. Split lines and gates are removed to make a clean part.
 File with Artima or sponge paper (around #240-#400). The seamline can lose its shape if it is just flattened, so it is necessary to work with Cyanon to remove the bumps, depending on the condition of the part.
 It is better to fill such areas with Cyanon than to file them. If such areas are filled with Cyanon, the marks of the seamlines may be visible after painting. (Sorry I don't have a photo ・・・・)
In this case, a thin coat of white surfacer can be applied before painting to hide them. If you feel that the seamlines might show through after painting, take measures to prevent this.

In addition to filing, figure engravers, carbide scrapers and design knives can be used to remove seamlines.
・Figure engravers.
→ seamlines in the deepest parts.
・Carbide scrapers
→seamlines at the edges and in areas where there are no intricacies.
・Design knife
→seamlines in areas that are not deep but are finely intricate.
You could use them in different ways like this.
Figure engravers are versatile and can be used in areas where carbide scrapers excel. So I don't get to use it much these days...
The design knife is especially good for removing things like the thin skin of resin between the fingers or in the hair. It is not suitable for removing split lines on flat areas, or you might injure your fingers too vigorously, so I often use a figure engraver in those places.
Figure engravers are easy to use in these areas.

 Use a design knife in these areas.
 In these areas, a design knife is used to remove burrs, as figure engravers are too thick to fit in these areas.
 This is a flower to be attached to the ribbon at the waist, which is also an intricate shape and would be easier to work with a design knife.
The same goes for this area of the bangs.


 After removing burrs to a certain extent, sanding with a paper file (or cloth file) will clean the area. This is because sponge files are thick and difficult to use in such intricate areas.
 File from various angles, but be careful not to file the same part all the time, as this may result in localised overshaving.

 If you want to file the arrow part, heat the part with an embossing heater and move it from place to place.
 The gap was widened by heat so it can be filed.
Heat bending is useful to remember as it is often used

It is easy to return to the original shape as it is simply heated by an embossing heater (be careful not to overdo it as it can break if you bend it too much).
Generally speaking, if you treat the surface in the way we have told you about here, I don't think you'll have too much trouble - I think.
┃About the flower to be attached to the back of the hair
Seia is designed with petals in the hair, so the part also has petals, but this part has an axis.

There are two possible methods: cut the shaft part and fill it with brass wire, or leave the shaft and fill it with brass wire and drill a larger hole in the hair, but I think it would be better if you could work in a way that is easier to do.
As explained on the photo album page, it does not look good if the petal shaft is left visible.

So either way, please treat the flower shafts so that they are not visible.

┃Pinning with attention to the balance of the centre of gravity

When the surface treatment is finished, it is time for dry fitting. The Seia is posed in a forward leaning posture and has a heavy head, so using a slightly thicker and longer shaft will make it easier to stabilise. However, if you casually use a thicker shaft, it will be difficult to fit the parts together, and the gap between the parts will easily become larger.
Simply put, the thicker the pin, the more severe the mating adjustment becomes. So if it seems too difficult, I think you won't have so much trouble if you mainly use φ1.5 to φ2.
If you use brass wire, φ2, or φ3, aluminium wire is easier to handle. (Because φ3 brass wire is hard and difficult to handle.)
Personally, I find φ3 axes quite hard to handle, so I generally used φ1.5-2 axes for the parts shown in red this time.
The right leg is stabilised by striking the axis so that it penetrates from above the ankle to the base.
Incidentally, I tried hitting the axis of the fuselage with ø3 and it failed spectacularly....
 Finally, a φ1 axis is installed on both sides with φ2 as the centre.
 I used ø3 for the right foot and ø2 for the base of the left foot.

Left foot. The pin looks short in the image but is installed reasonably deep.
To penetrate, first mark the right leg with a magic marker.
 If holes are drilled along these marks, straight pinning can be achieved.
 Drill holes at an angle true to the mark. If you match the angle of the part, it will be misaligned and the brass wire will not fit.
The side of the foot dowel is prone to cracking because the shaft hole is drilled at ø2. You don't need to worry about this as the shaft is threaded through, but it is a bit scary.
 Try the shaft through and if there are no mating problems, it is OK.
 Leave a longer margin because you want to fix it strongly to the plinth. The pedestal was to be made of 1 mm thick acrylic sheet, so leave a margin as long as that.
 If you can penetrate the brass wire from above the ankle to the heel like this, it will be stable and secure.
 This is generally the above where the body's shafting can be problematic.

The sleeves of the clear parts were fixed with φ0.5 brass wire, but because of the high degree of difficulty, they can be glued with Cemedine for high-grade models after painting. It is a water-based adhesive, so I am glad that there is no worry about the painted surface melting.
When the axis beating of the part is generally completed, I stand it on a temporary pedestal.

 If there are no ruptures, install it on an acrylic pedestal.
The checkpoints for temporary assembly are the areas marked with red ◯.

Check that the right hand is in the hollow and that the right bracelet is in the correct orientation. If it sticks out strangely, it is facing the wrong way.
And as reported in the previous chapter, flowers attached to the hair will look better if the shaft is buried OR if it is processed and installed so that the shaft is not visible.
Skully
2024-06-30 05:02:13 +0000 UTC3amsleep
2024-06-30 04:58:42 +0000 UTC