Originally scheduled to be sold at the Summer WF in 2022, Jose-san's "Chiel (Seigakusai ver.)" was postponed until TFO9 due to various reasons. Following on from the previous Shiroko, we were able to assist in the production of this model as well.
I was not able to check the color matching due to lack of time to work on it, but he carefully supervised the work by writing on the photo. I think it will be quite useful as a reference material, so I share it within the post. (Permission has been granted.)
Following the Siroko, the division is easy to assemble and paint, so I think that those who purchased it can try to assemble it all at once.
In terms of difficulty, the ribbons, catsuit, and checkered pattern on the collar are difficult, but as long as you don't make mistakes in color choice and paint density, it won't be too hard to finish quickly (as someone who has repainted it says, so it's definitely not that difficult).
■ surface treatment - dryfitting
Let's start with the parts check as usual.
There are 47 parts in total.

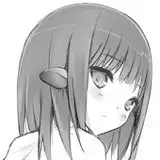
The star parts to be placed on the bangs are small, so be careful not to lose them while working!
The thighs and other parts of the body have a certain amount of seam lines, so it is necessary to fill in the bumps with cyanon or something similar.

I will omit this section because there is no particular problem with sanding. As long as you use the appropriate tools as I have told you in previous articles, there should be no problem.
Since this kit is one-legged, you need to think carefully about how you do the pinning, but I am axing it this way.

The following metal wires were used for this part.
The brass shaft leading to the ankle should be installed a little longer for better stability.
For the one-legged pose, if the axis is weak, the possibility of it falling and being damaged by the load increases, so we want to strike the longest possible axis.
The shoelace part and the main body are separated, but I thought it would penetrate if I struck the axis, so I installed a 2mm x 1mm magnet by burying it in the body. I had not used magnets recently, but they are effective when used on these parts.


The parts are marked with the letters L and R so that it is difficult to make a mistake. This kind of attention to detail is really helpful....
By the way, God Hand's Spin Mold is used for drilling holes for this magnet embedding. I recommend using it in combination with God Hand's power pin vice, as it is quite easy to operate.

If you can snap it together, there is no problem. The string part with an "X" is drilled with a 5mm drill. It is a small part, but it is a good idea to do it because it improves the detail.
Since this Chieru is posed standing on one leg, if you use a disk such as acrylic as a base, you can center the silhouette by placing the shaft leg part a little to the right of the center when viewed from the front.

If you make a mistake and drill a hole in the center of the disk or at the edge, you will end up with a strange arrangement.
Also, when temporarily assembling the hood, use Φ1 brass wire for the hood connection part indicated by the arrow to eliminate unnatural joints.

Please note that I completely overlooked this when I was tentatively assembling lol

Don't forget, when you pin it, it will look like this!