After dry fitting, the next step is painting.
This time, I had a bit of a tight schedule, so I proceeded with the coloring in a short period of time, and as a result, I had to ask Jose-san to confirm the coloring without being able to match it up.(Because the delivery date was so close)

However, I really appreciate the feedback I received, which was quite detailed as shown below, so I was able to review and repaint the colors immediately.

This is a so-called supervised image, so it cannot be translated, but this careful supervision makes it very easy to understand and easy to modify!
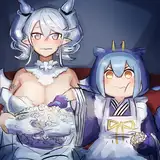
Here is the result of repainting the hoodie, strings, catsuit collar, microphone, and hair, etc., based on this (I omitted the smallest parts).

I will write about the main changes that have been made.
・The pink color of the hoodie
It was a reddish, slightly dull pink, so we used fluorescent pink to increase the saturation. I had rarely used fluorescent pink before, but without it, the color would have been low in saturation and high in lightness (i.e., it would have looked pale but dull), so I took the plunge and used it, and it was the right choice. In comparison, the first one was closer to red.
・hoodie strings
I masked and painted only the strings with yellow mixed with white, but for some reason the saturation was too high, so after masking, I whitened them once with surfacer white and then painted them with yellow mixed with white to lower the saturation. I am happy to say that it no longer looks bad.
・Catsuits and collar

The color was too dark at first, so I applied a thinner coat when repainting. Since there are no photos of the process, I will just write a description of the painting process, which is as follows.
1. apply a light coat of red
2. masking with 4mm wide masking tape, apply a thin coat of white leaving the base color
3. remove the first masking tape and apply the next masking tape (as shown in the photo above)
4. adjust the color with clear red and remove the masking tape.
A basic but often forgotten rule when masking is not to apply a thick layer of paint when masking. If you try to hide the base layer by applying a thick layer of paint, the border between the two layers will be roughened. Therefore, it is important to apply thin layers of paint.
It is rather challenging and difficult to explain, but I think it is better to do it several times to get the hang of it. The final result looks like this.

The catsuit is sandwiched between the front and back hair, but the checkered pattern can be seen in the gap.

So it is better to make the pattern all the way to the edge.

The collar part is almost invisible on the inside and back side of the head, so it should be fine roughly.
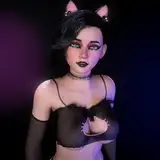
・The hair was pink with a clear orange overcoat
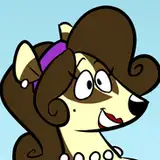
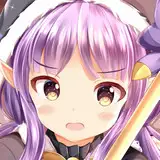
The hair had the low saturation and high lightness color described above. In short, it was a dull color. If you check the official illustration carefully, Chieru's hair color is more of a pinkish orange than pink.
Checking the bangs in the official illustration with the eyedropper tool, the color is like this.

So I overcoated it with clear orange to make it an orange-ish pink.
I left the pink on the underside of the hair.

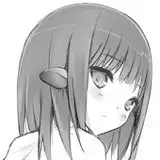
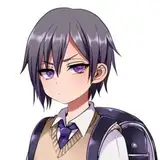
It is eye paint, but I have the impression that it was quite easy to draw because the eye indentations are quite firm and Chieru's eyes are clearly color-coded. Moreover, only one eye needs to be painted in.
The first step was the preliminary drawing. Many of Saige's characters have gradations of brown on both ends of the eyelashes, so I thought it would be a good match.

The eyebrows are almost hidden by the bangs, but since the left eye is closed, I drew them a little lower.
Apply Tamiya Enamel Smoke on top of this underpainting. It can be used as a clear black, so it is not too dark and easy to make a gradient.

The application method for this area is the same as usual, but smoke can be used to get a good gradation at both ends.

Remove the masking and wipe off the unwanted areas, then close with clear, and then apply brown to the double area and eye contour as well. If only the eye contour is painted with black, it will float, so brown must be used.

Next, the eyes are painted with different colors in stages. Since there is no need to create a gradation, I did not use an airbrush, but painted everything with a brush.

When drawing this eye oval, I drew it all at once because it would take forever to finish if I had to mask and clear coat every time.
Clear coat and close it once here.
Next, draw in the brown highlights and shadow color in the upper part of the eye, and the yellow highlights in the lower part of the eye.

After another clear coat is applied, white highlights are drawn in.

Incidentally, the eye color is used while toning the color of the eyes in this area.

I recommend that you keep these paints in stock instead of putting them away, because they will be useful when you need to make corrections later or when you create another kit.

Once this is done, clear coat the entire area and apply skin color.

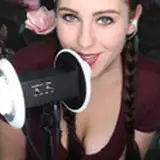
The tongue and eyebrows, which are perched after the skin tone is applied, are painted.In addition, the diagonal line of blush is drawn in the photo above.
Here I had Jose-san check it out and give me feedback. (Again, no translation)

I made the blush gradient a bit darker, and added a more pointed drawing on the lower side of the star.

It is quite difficult to paint stars freehand...
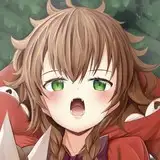
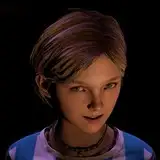
The painting of the face is now complete. The eyes should be protected with Gaianotes Masking Coat R, coated with matte finish, and the lips, tongue, and eyes should be glossy.

Now all that is left is to draw highlights into the bangs and adjust the overall gloss.

Like the previous Shiroko, there is little to be troubled with in this kit as long as the color mixing is done properly. The face is so cute, I recommend those who were able to purchase it to assemble it before the heat dies down!
PDubs
2022-12-09 11:34:54 +0000 UTC