It would be troublesome to apply and harden it all at once, so it is better to add a few coats little by little to save time and effort in making unnecessary shape repairs.I would like to summarize the production process of Jose-san's swimsuit Siroko, which I have been secretly producing as a sample.
Since this Shiroko was made only for a test shot, the seam lines and Halo may be slightly different from the actual cast to be sold. Please be aware of this point.
But, the number of parts and colors are small, and the parts are divided in such a way that they can be painted easily, so even beginners can paint and assemble the kit relatively quickly.
Masking is only necessary for sandals, hair elastic, and the white line of the swimsuit.
Therefore, I highly recommend this kit to those who are just starting out and want to work on an easy and cute garage kit.
Here is the table of contents
Halo in the sample is a 3D printed part. Let's review the processing method for the parts with rafts and supports.
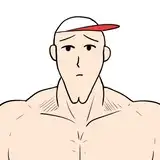
We will start by checking the parts!
The total number of parts, including Halo, is quite small (23 parts in all), so we think we can quickly check and surface the parts.

Thighs and other parts of the body should be able to be sanded crisply without any trouble.

If the seam line has large bumps, it may be cleaner and easier to sand after filling with Cyanon.

In some kits, air bubbles may be concentrated around this seam line, so careless filing can lead to hell. I think it is quite useful as a preventive measure.

Seam lines are also present in these deep areas and should be carefully removed using a sculpting knife, figure engraver, etc.

Around the sandal area, detailing tends to be lax, so it is best to re-carve it in the same way.

The fingertips are quite narrow, and using a reverse tension sander tends to make the fingers lose their shape. Therefore, it is sometimes easier to use a design knife to cut the dividing line steadily and easily without using unnecessary nerves.
This is a test shot, so the fingertips are buried (I don't know about the condition of the kit sold).
In this case, I use a figure engraver and a design knife to roughly shape the figure. It may be easier to understand this area if you watch the relevant part (from 3:00) in the video.


It is easier to remove unwanted lumps by moving the blade of the figure engraver from the inside of the finger toward the fingertip.
After some shaving and shaping, it is most likely to be gouged out like this.

So we fill Cyanon here to shape it.

It would be troublesome to apply and harden it all at once, so it is better to add a few coats little by little to save time and effort in making unnecessary shape repairs.

I think it would be a good idea to remove burrs from this thin gap in the hair with a design knife. Recently, I feel that it is less wasteful to use a design knife for these areas. (Just a feeling, haha! )

The sandal has a hole for the base to fix it to the base. You can use this hole as a guide when fixing to an acrylic board, etc.

The foot dowels on the body are super large, so you don't have to worry too much about them breaking. If you are going to apply Cyanon to the four corners and fix them to fill in the gaps as shown in the video, do not make it too tight. You will not be able to remove the leg parts.


As you can see when you dry fitting the arms and body, there will be a gap on both sides in the area circled by the square. It is better to fill in this gap, so I suggest you fill in the arm side with putty mixed with cyanon and baby powder.

Also, this time we did not fill in the joints of the neck, but it will be more complete if you do. If you want to improve the quality, fill in the joints and do your best in masking and painting.

When you hammer a pin for fixing in the base, mark the position of the hole that has been drilled from the beginning with Gaia masking coat, etc.

If holes are drilled vertically here, they will not shift in most cases!

OK, the Halo for the test kit was a 3D printed part.
The board on the bottom is the "raft" and the "support" extends vertically from the "raft" to support the part.

The first step is to remove these rafts and supports. The rafts, however, can be left alone.
Nippers for 3D printer output products are available, but frankly speaking, there is no problem with ordinary nippers.
Just separate the supports one by one from the raft side.

You may have seen garage kits sold as 3D printed output kits that have pimple-like marks on the parts, but that is the state in which the support has been minimally removed.
Therefore, in order to make the parts ready for painting, it is necessary to sand the parts to make them even smoother.

This amount of sanding is generally sufficient for this Halo.
If the clear output parts are uneven or distorted, they can be filled with craft UV resin to correct the shape.

If the hole in the area where the Halo is to be installed is filled in, use a Godhand spin blade or similar tool to re-drill the hole so that it can be installed.
If you have completed the garage kit to some extent, you should be able to temporarily assemble it without any particular difficulties.

SUKIMA SANGYO
2023-01-27 04:11:24 +0000 UTCRoy
2023-01-27 03:51:20 +0000 UTCSUKIMA SANGYO
2022-10-17 04:56:36 +0000 UTCHadas Benyamin
2022-10-16 17:18:46 +0000 UTC