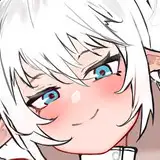
I was painted sample of Laplace Darkness (sculptor: Takatori), the secret Holox general, at the 6th Hololive! YMD!
In this article, we would like to share with you the process of its creation. Please refer to the Asuna bunny article for a summary of the tools used for surface treatment.
The table of contents of the production process is as follows.
You can see the whole sequence of events in the video. The details are explained in this article, so please read it if necessary.
Takatori's kits are of a very high level of difficulty in terms of both modeling and production, but if you take your time and work carefully, you will be able to achieve a high level of completion.
I would be happy if this article could be of some help to you.
◗Parts check
So, the first step is to check the parts.

The number of parts for this YMD is 91. The number of parts is about half if you only want to make one of them with or without coat and the face is of composite specification, respectively, but if you want to paint all of them, do your best.
From the latest, the installations (parts list and instruction manual) are in the form of downloading by scanning the designated QR code.
Please note that there is a DL deadline.
It is easy to lose track of where to start with a kit that has many parts, but if you think in block units, the work will proceed smoothly. In the case of this kit, it is a good idea to classify the parts as follows.
The order of priority for assembly is chair > hair > body, but it may be more fun to assemble from your favorite parts. Incidentally, the base used in the example is a 6mm thick, 25cm diameter acrylic board. 25cm is just about the right size, so if you are worried, prepare a 26cm one. How to fix the chair and the acrylic board will be explained later.
So, first of all, let me give you a rough idea of the process up to the temporary assembly.

The first step is to remove the tabs from the chair. It's quicker if you treat it carefully with a zirconia bit. Be careful not to overcut!

The area that was cut with the zirconia bit is carefully sanded with Artima7. I usually stick on a #240 Kami Yasu.

Carefully remove the seam lines from the cushion part as well, so as not to destroy the wrinkle modeling. Of course, a carbide scraper or a Kami yasu can be used.

Tab that eats into such detail can be easily handled by digging it out with a figure engraver, edging it, and polishing it with a sculpting knife.

The blade should be inserted from the outside to the inside. Be careful not to dig too deep.
If detail is lost, extra time will be spent to fix it, so do not rush and handle it carefully.

After shaping is complete, use a conical bit, sculpting knife, or similar tool to sand the deepest areas and finish.

I was planning to use a gloss finish for the final treatment, so this was enough.

In fact, it is not that noticeable, so to some extent it is fine.

This is a hair process, but a cone-type bit makes it easy to work on curved parts like this.

Figure engraver is more useful when the seam line is in such a narrow groove.
But basically, Artima7 can handle most of these situations. The motor tool is essential to shorten the time required for the work.
Sanding intricate parts requires a full range of tools and techniques.

This is a smaller bit I made myself out of brass wire for Artima7. There are quite a few things that can only be sanded with this size.

These areas with both bubbles and bumps are filled with Cyanon and then sanded.


Areas with spaces are treated using a reverse-action sander with just enough force to keep the shape intact.

We will do our best with a certain amount of perseverance.

There is a well-defined, large seam line at the back of the head.

A reasonable amount of air bubbles were found in this area and should be filled in well after sanding.

You may want to shape the hair bundles after some filling.

The bangs are also treated inside the bundle with a reverse-action sander. Careful here as well, as too much shaving will result in loss of shape.

Opps, there are some bumps in these places that are not so obvious, so fill them with cyanon.

This part is also fragile, so we are very careful and meticulous in this area.
...and generally, all parts are carefully processed like this.
It would be too long to explain it all, so you can just generally work as we have explained so far.
I would like you to prepare the tools for surface preparation described in the Asna bany article and get the hang of it.
◗ Dry fitting
After surface treatment of all parts is completed, dry fitting them.
The chair will look better if you fill in the gap between the cushion part where the arms are placed and the leg part.

First, apply oil-based cream such as Vaseline or other oil-based cream to the foot side parts as a mold release agent.

Then, with the parts in place, pour Cyanon into the gaps.

Once the gap is filled, harden with hardening spray.

Cyanon will adhere to the parts that are not coated with mold release agent, but there will be some chipped areas, which can be shaved off or heaped up to make them ready.

This level of detail is sufficient.
Assembling the back hair is more difficult and requires pinning the shaft in the correct position.
It may be better to use 0.5mm brass wire than 1mm brass wire.
Drilling holes for pinning is also somewhat difficult, especially for this bundle.

Since it is tough to drill perpendicular to the dowel portion, it is safe to strike the pin at the area indicated by the arrow (□ is the dowel portion).

If it penetrates to the other side, it is no problem if it is filled in later.

It is more stable to use not just one but two shafts.
The back hair will be glued to each part and the gaps will be filled in when painting, so there is no problem even if it cannot be firmly fixed with the shafts.

Since the tail is not strong enough as it is and will surely break, a brass shaft (pin) is installed in the area indicated by the arrow.

Dare to cut the middle part and insert 0.3 or 0.5 brass wire.

Be careful not to drill too far in or the hole will penetrate too shallow.

The same process is done for the four-pointed star part. After the brass shaft is finished, it is sanded to shape.

The faces are designed to be recombinable, but if you want to recombine them, you will need to shaft strike them in about the same position.

The Laplace has a short convex dowel on the back of the face, so it is not possible to use Cyanon on the side to make it easier to fix the dowel in the recess. Therefore, we used a pin.

The easiest order of assembly is to install the face parts on the body and then on the hair.
The pose is to put the cheekbones, but they are not actually touching and there is a slight gap (it is correct that there is a gap).
If you touch this area after painting, it may cause the paint to peel off, so you should be careful not to touch it as much as possible.
When fixing the face to the hair parts, the way to judge if they are properly inserted is to see if there are any strange gaps near the ears. This is a good point to keep in mind when assembling after painting!
◗ How to fix the chair to the base

I was not quite sure about this, so I asked Takatori-san how to fix it, but he told me that in the sample for WF exhibition, it was fixed with screws from the back of the acrylic plate. So I decided to follow the example and fix it with screws.
Before drilling the holes for fixing the chair, be sure to temporarily assemble all the parts once, find the best position on the base, and mark the position of the chair legs on the base.


Stainless steel countersunk wood screws (2.4 x 16) were used as fixing screws.
Incidentally, to keep this countersunk screw from sticking out of the base, an inverse triangular counterbore must be machined. Therefore, I used a conical diamond bit for the process.

Acrylic sheets are not recommended because they melt under heat and stick to the bit, so they are not a good match. If you have another good tool for counterboring, we recommend using that one.
After machining the chair legs and base is finished, try to fix the screws.


Fine adjustment is required until there is no overhang from the back and sides.

The front drape of YMD's coat will look better if you adjust the shape so that it hangs to the left, i.e., does not float, by using an embossing heater.
Pikk
2022-09-26 10:01:49 +0000 UTCSUKIMA SANGYO
2022-09-26 09:33:04 +0000 UTCPikk
2022-09-26 01:08:53 +0000 UTC