![[全体公開]久々反省会とメイキング](https://img5.xaiju.com/storage/9/cr/nk/d38796-019e8e9e-f4ea-71d3-9f52-e5fbe8790798.jpg)
![[全体公開]久々反省会とメイキング](https://img5.xaiju.com/storage/7/xy/hg/d38796-019e8e9e-f4ee-7bd0-b96c-d20eb4e858a9.jpg)
![[全体公開]久々反省会とメイキング](https://img5.xaiju.com/storage/6/ak/ab/d38796-019e8e9e-f4f1-774c-912f-25e5b9aa2640.jpg)
![[全体公開]久々反省会とメイキング](https://img5.xaiju.com/storage/11/rs/wi/d38796-019e8e9e-f4fd-742d-ac78-98afc41974a7.jpg)
![[全体公開]久々反省会とメイキング](https://img5.xaiju.com/storage/4/wu/nd/d38796-019e8e9e-f508-791d-a579-1a9cb029c5dd.jpg)
![[全体公開]久々反省会とメイキング](https://img5.xaiju.com/storage/2/rj/ai/d38796-019e8e9e-f511-7a2e-8353-eb3dbb49d2ef.jpg)
![[全体公開]久々反省会とメイキング](https://img5.xaiju.com/storage/2/bf/ik/d38796-019e8e9e-f516-79ce-ab52-5f214eaabeda.jpg)
![[全体公開]久々反省会とメイキング](https://img5.xaiju.com/storage/3/kr/kb/d38796-019e8e9e-f523-7d1a-bf99-6e9ded2e5534.jpg)
![[全体公開]久々反省会とメイキング](https://img5.xaiju.com/storage/12/qy/xy/d38796-019e8e9e-f52b-7aa6-a714-fd1125fac6d4.jpg)
![[全体公開]久々反省会とメイキング](https://img5.xaiju.com/storage/10/zh/zc/d38796-019e8e9e-f52d-794c-b9ec-e3f2278efc30.jpg)
![[全体公開]久々反省会とメイキング](https://img5.xaiju.com/storage/9/bf/ls/d38796-019e8e9e-f531-7ef1-bc72-250d64646578.jpg)
![[全体公開]久々反省会とメイキング](https://img5.xaiju.com/storage/1/fe/lk/d38796-019e8e9e-f536-7c38-9de3-543760df3260.gif)
![[全体公開]久々反省会とメイキング](https://img5.xaiju.com/storage/10/rs/ub/d38796-019e8e9e-f53f-74d3-a72f-8b05cd518a76.jpg)
お世話になっております、永地です。
久々にメイキングと反省会です。
(Hello! It's been a while since I've done a making and reflection.)
本当はタイムラプスを残して描くつもりでしたが忘れてしまいました。
(I really wanted to leave a time lapse and paint it, but I forgot.)
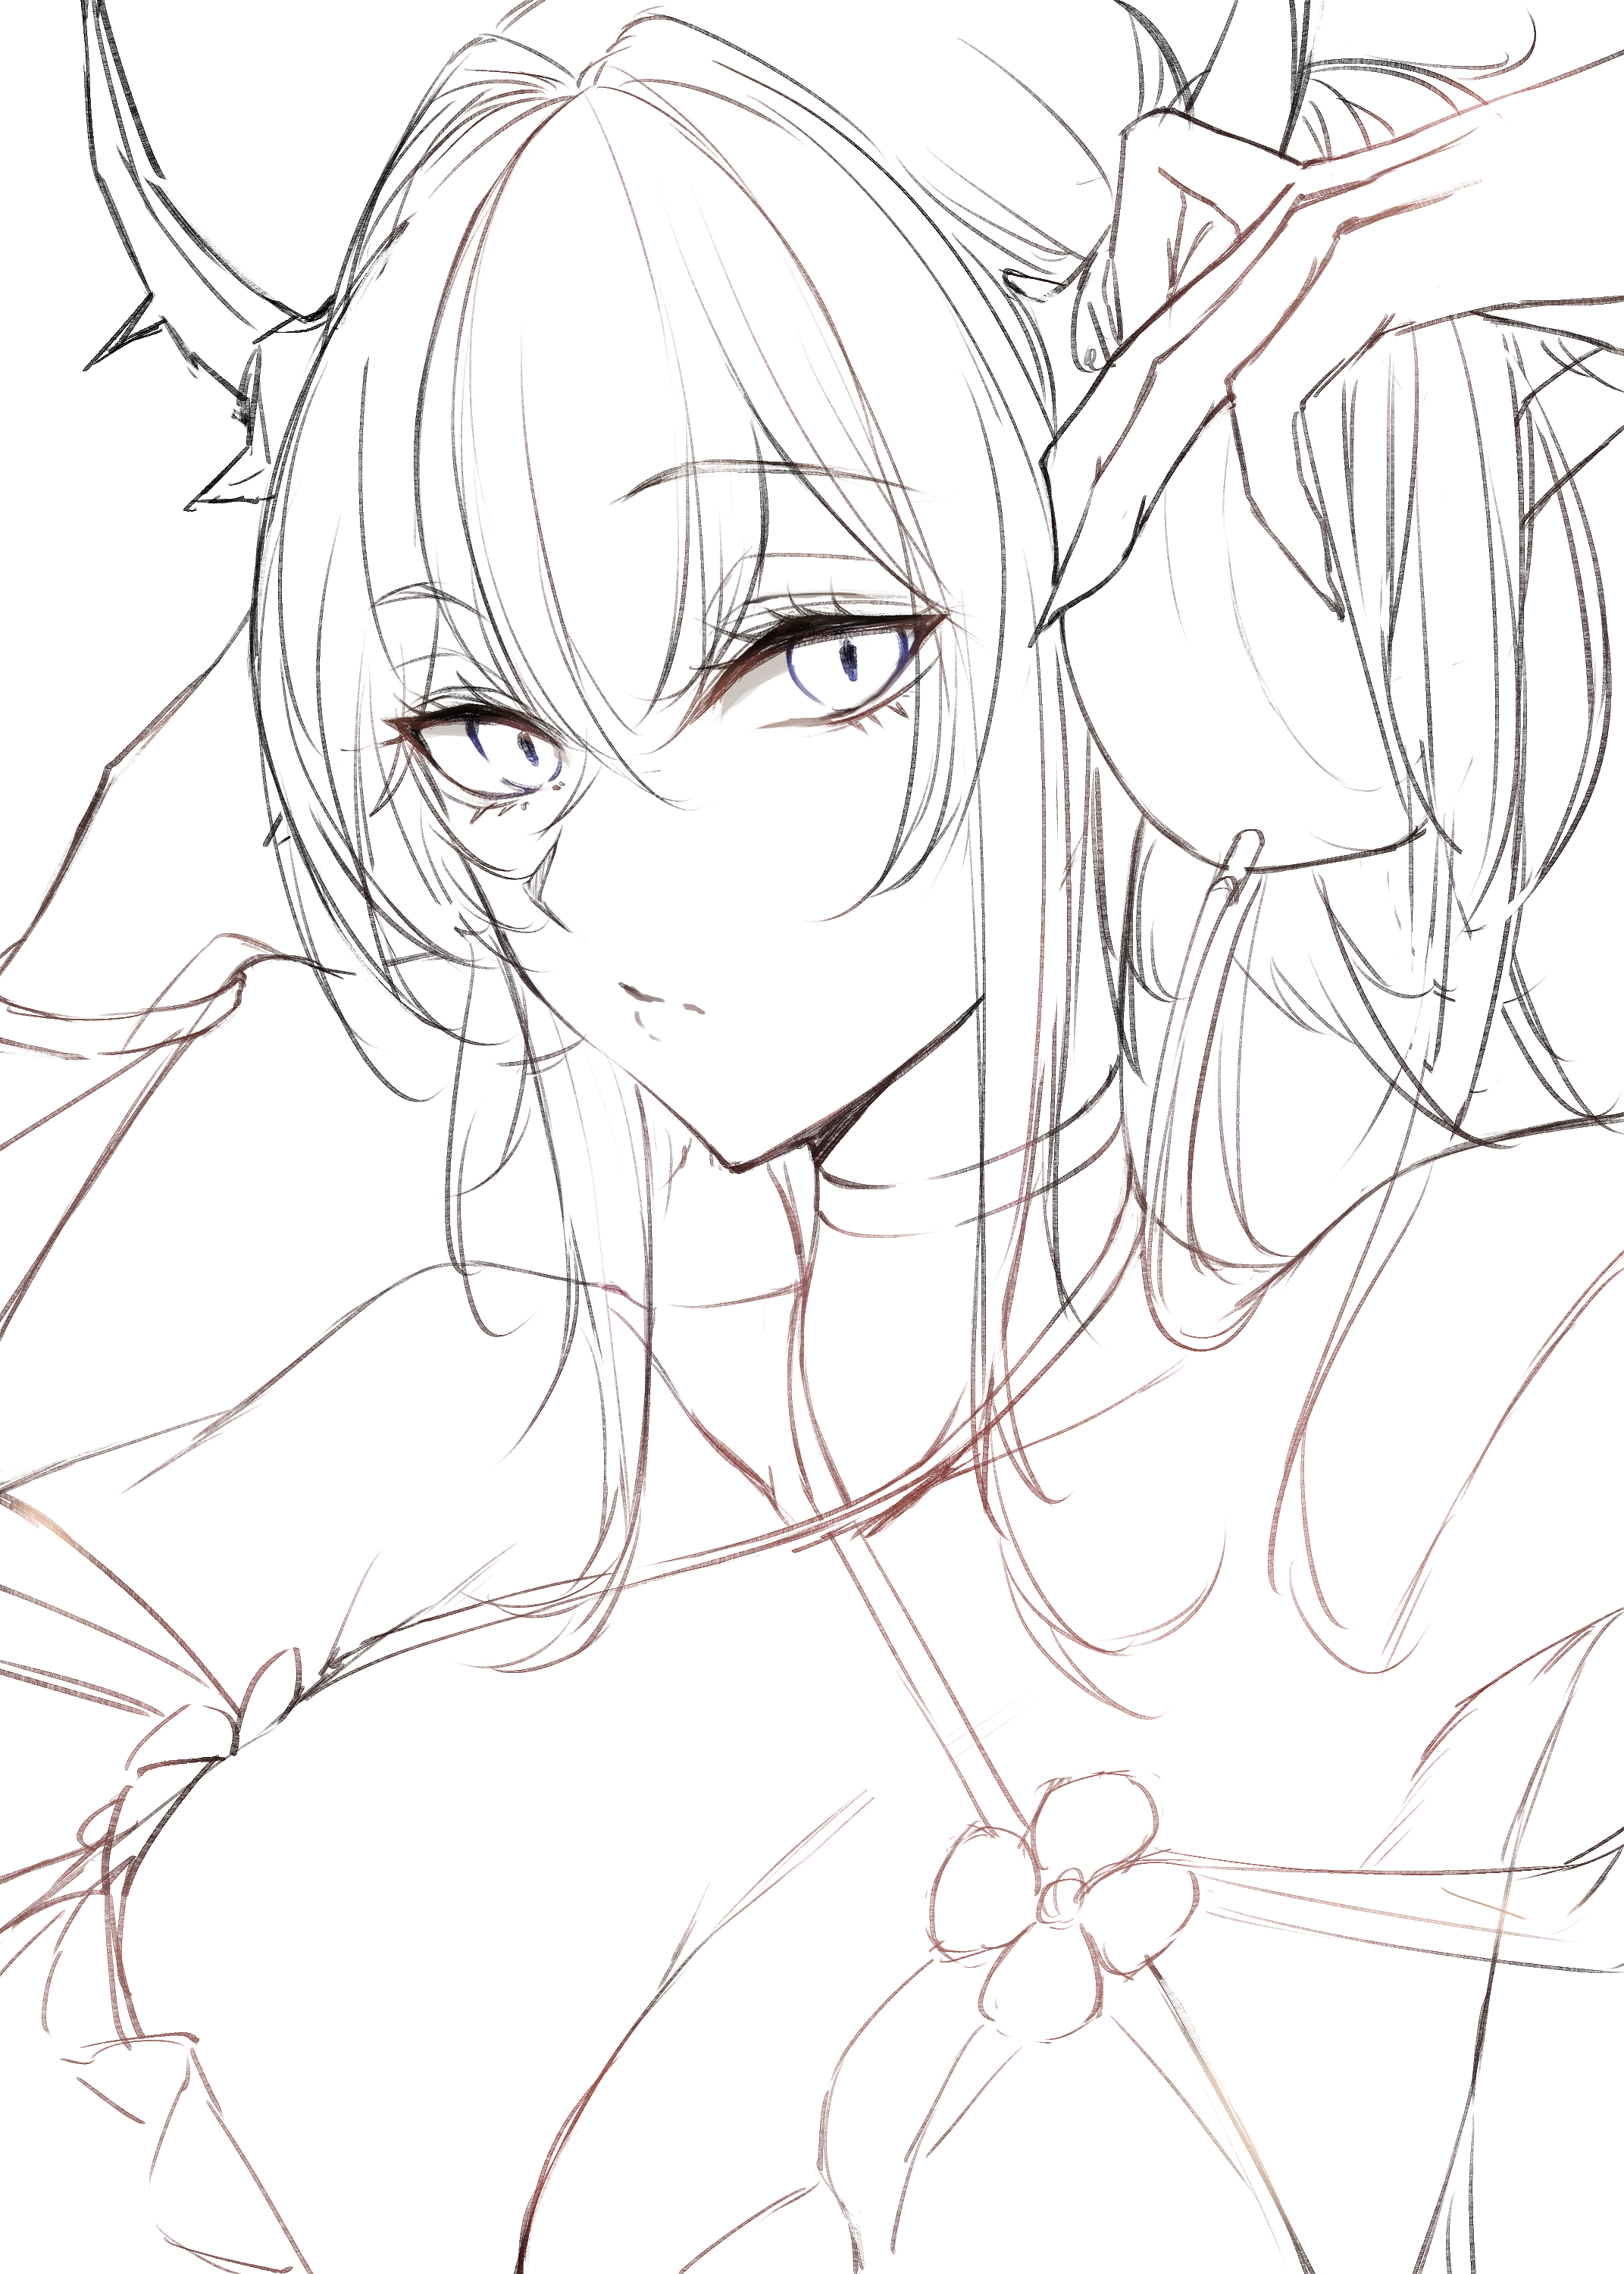
1,とりあえずラフ線(rough line)
水着スルトが描きたいのと、ヘッドフォンが描きたくなってこんな感じにしました。
今回はあまりアタリなどとらずガシガシ描きます。
ここで直せることは大体直しておきます。
ぶっちゃけると手があまりキレイではないので修正すべきでした。
(I wanted to draw Surt in his swimsuit and headphones.
I fixed most of the parts that could be fixed here.
To be honest, my hands are not so beautiful, so I think it would have been better to fix them.)
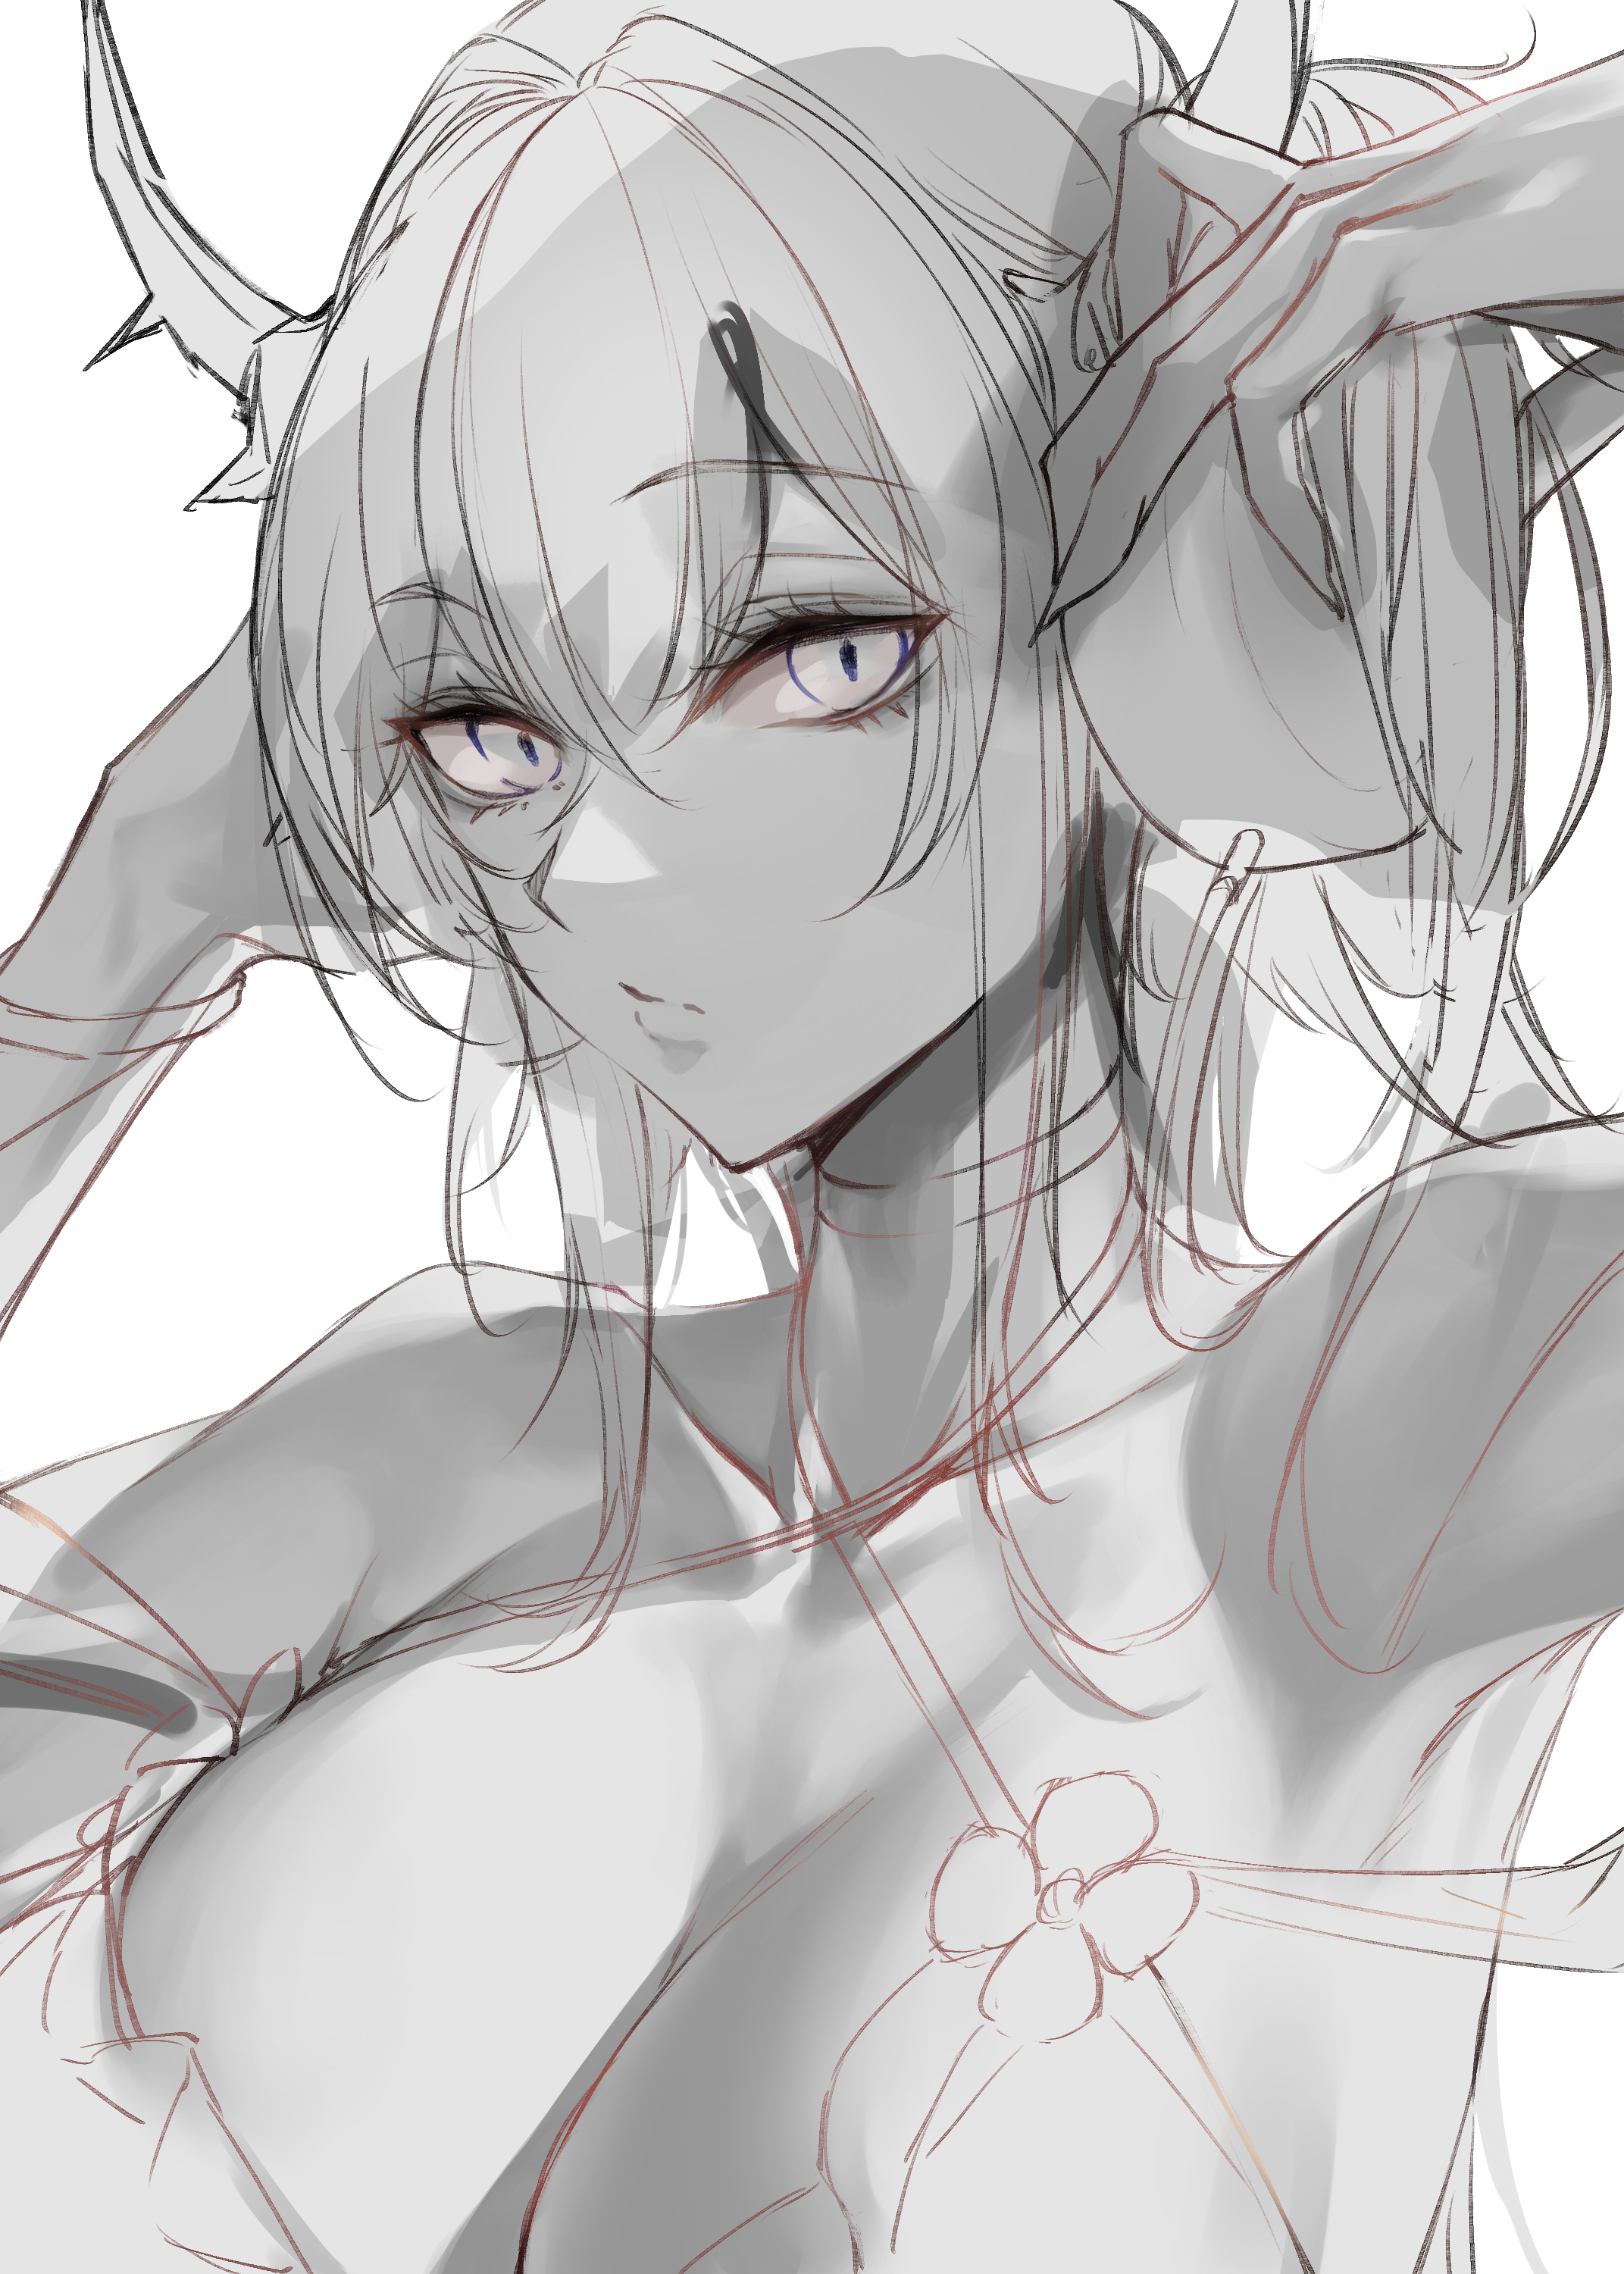
2,グレスケ肌塗り(paint with gray)
試しにグレスケを使って塗ってみました。
(I used Greske to apply it as a test.)
3,グラデーションマップ適用(Using gradient maps)
予め容易しておいたグラデーションマップを適用します。
これだけですとあまり具合はよくないですが後ほどオーバーレイレイヤーで調整を行います。
(Apply a gradient map that has been prepared in advance.
This alone is not very good, but we will adjust it later with an overlay layer.)
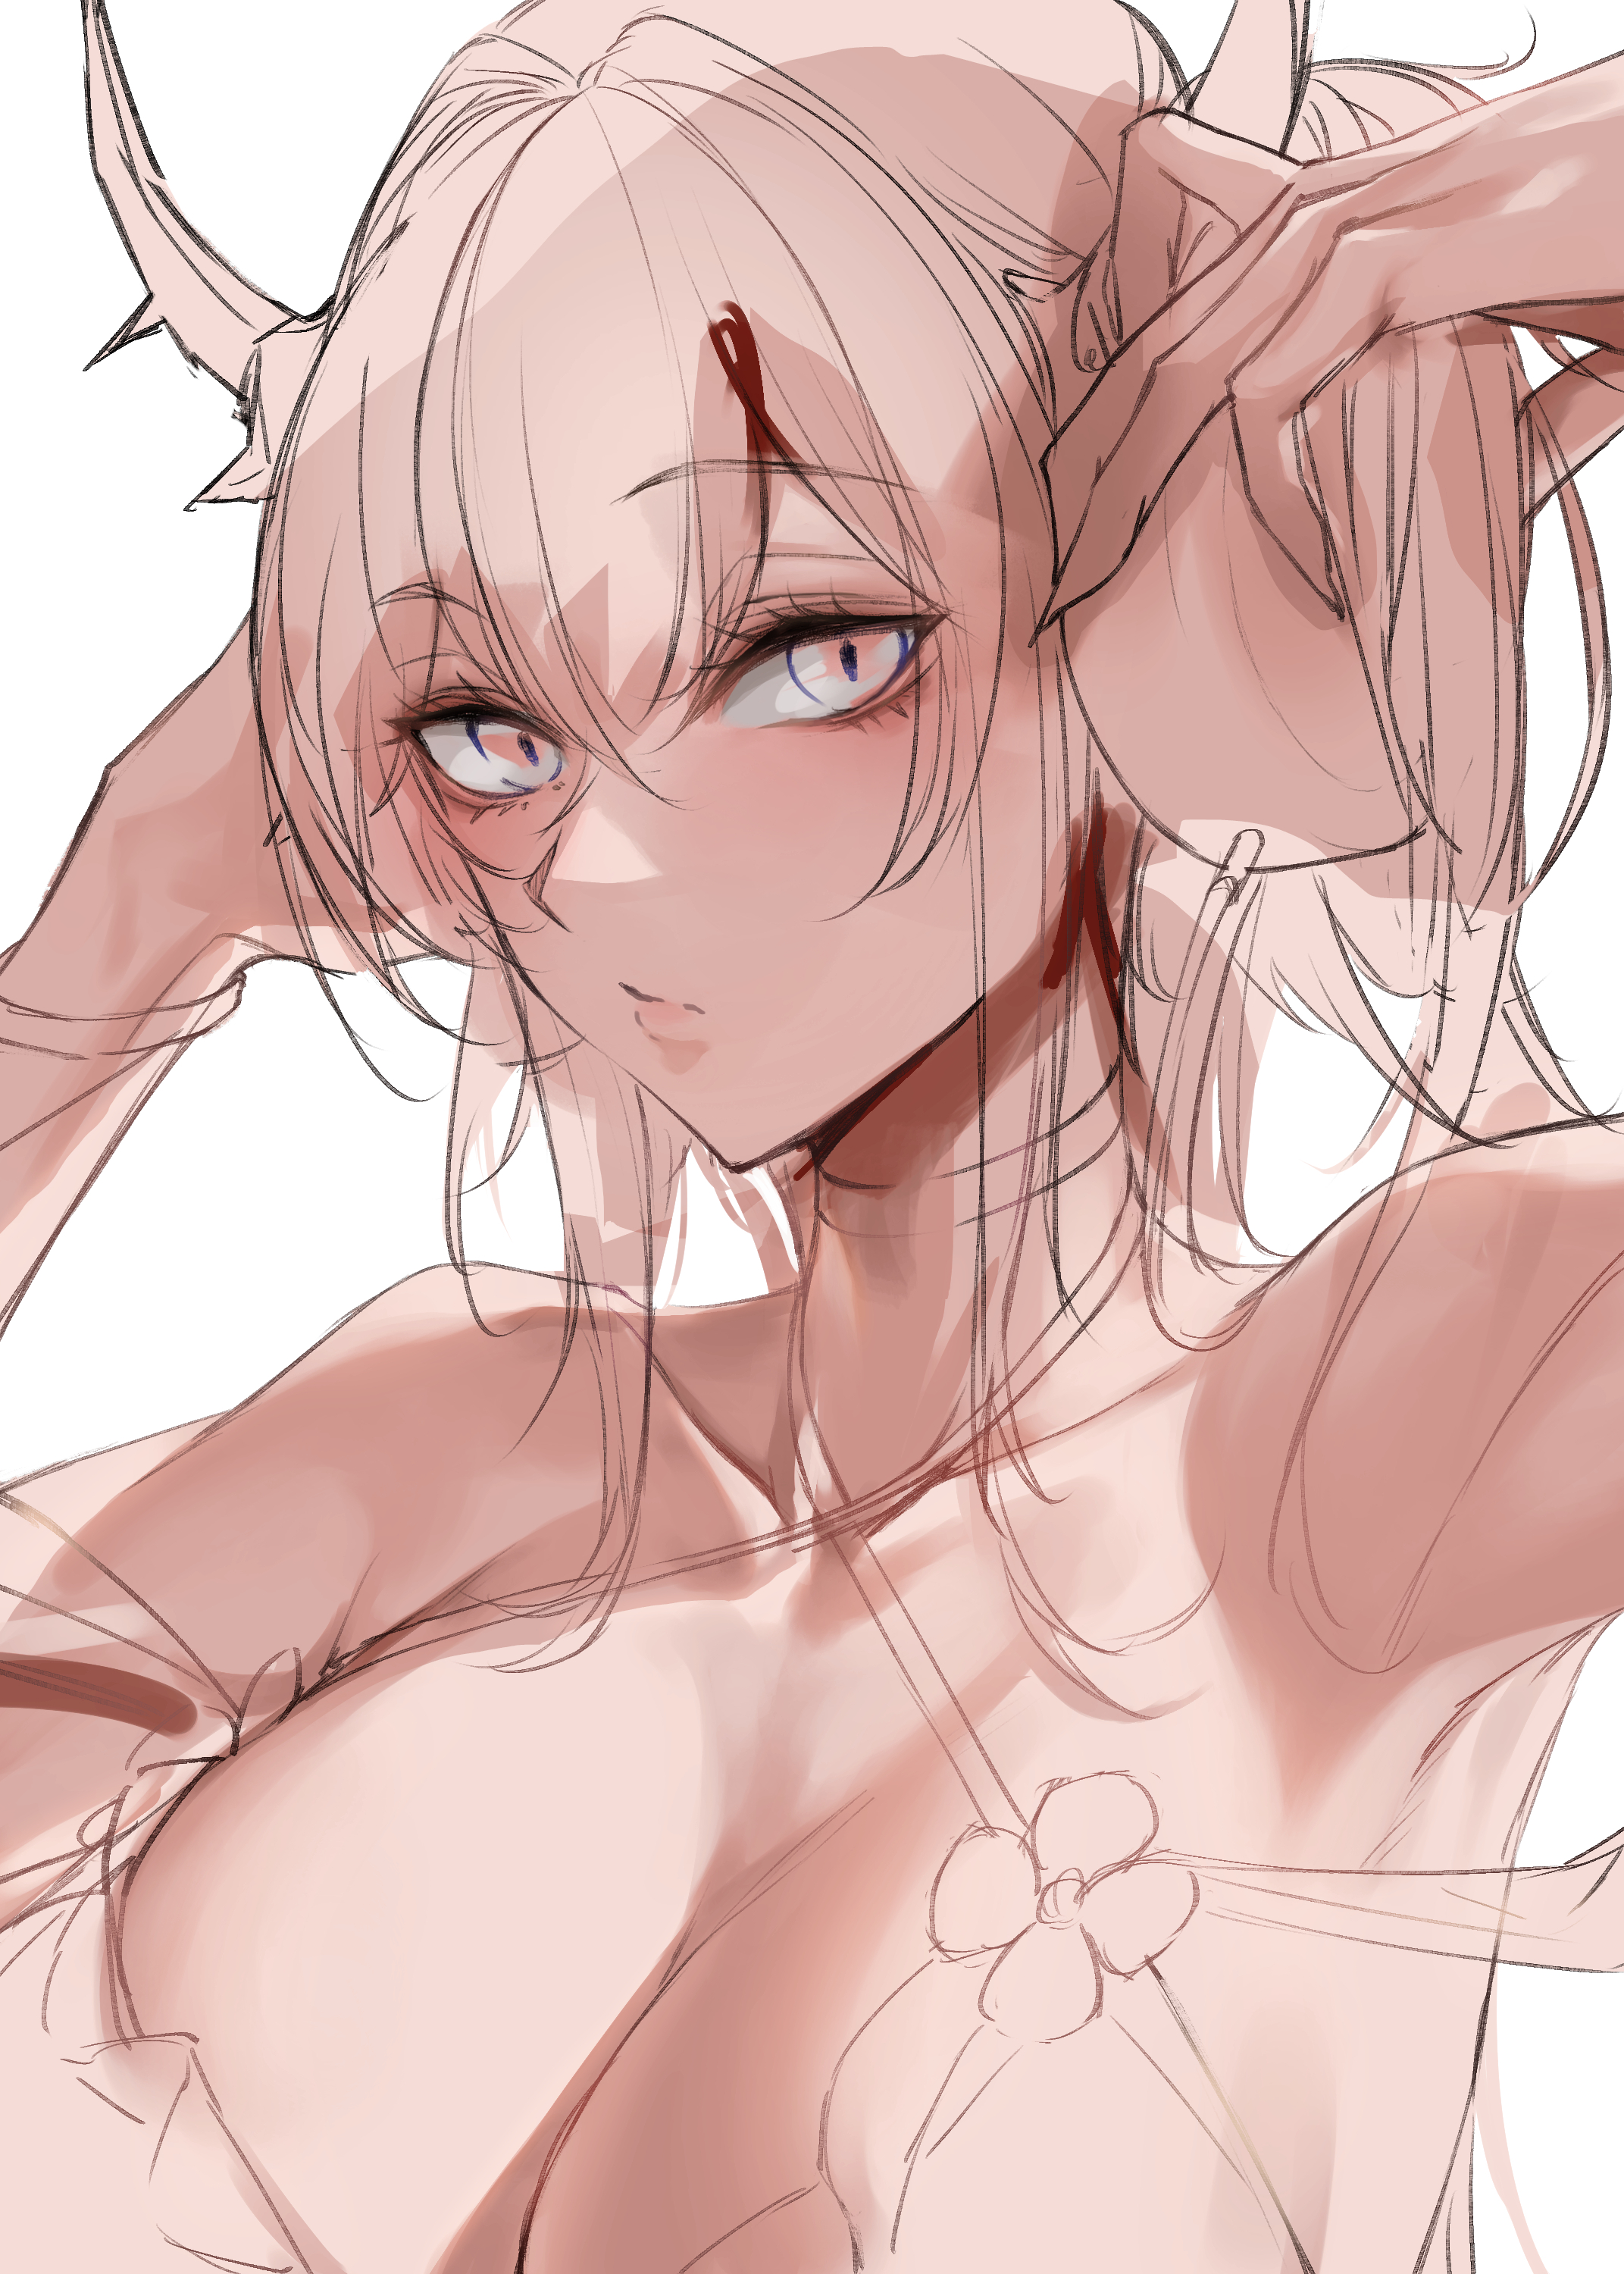
4,下塗り(undercoat)
色分けですね。
(Color coding.)
5,ざっくり影入れと色調整(Shadow and color adjustment)
今回はここで線画も含め一度レイヤーを統合します。
時短作戦なので一枚でガリガリ塗ります。
(This time, we will merge the layers once, including the line drawing.
Since this is a shortcut strategy, we will paint in a single layer.)
6,荒い部分を修正(Correct rough areas)
ほぼ変わりませんがひたすら1枚レイヤーで塗っていきます。
(It is almost the same, but we will continue to paint in one layer.)
7,ひたすら塗り込み(Dutifully applied)
念じるがままに塗ります。レイヤーの透明度を保護するなどで綺麗に塗れます。
ブラシ自体に乗算設定をするなども有効です。
(Paint as you wish. Protect the transparency of the layer, etc. to paint beautifully.
It is also effective to use a multiplier setting on the brush itself.)
8,パーツバランス修正(Part balance correction)
ちょっと面長にしすぎた感があるので歪みツールで直します。
透明度を保護して目の位置を修正しました。
(It looks a little too long in the face, so I fix it with the distortion tool.
I protected the transparency and corrected the position of the eyes.)
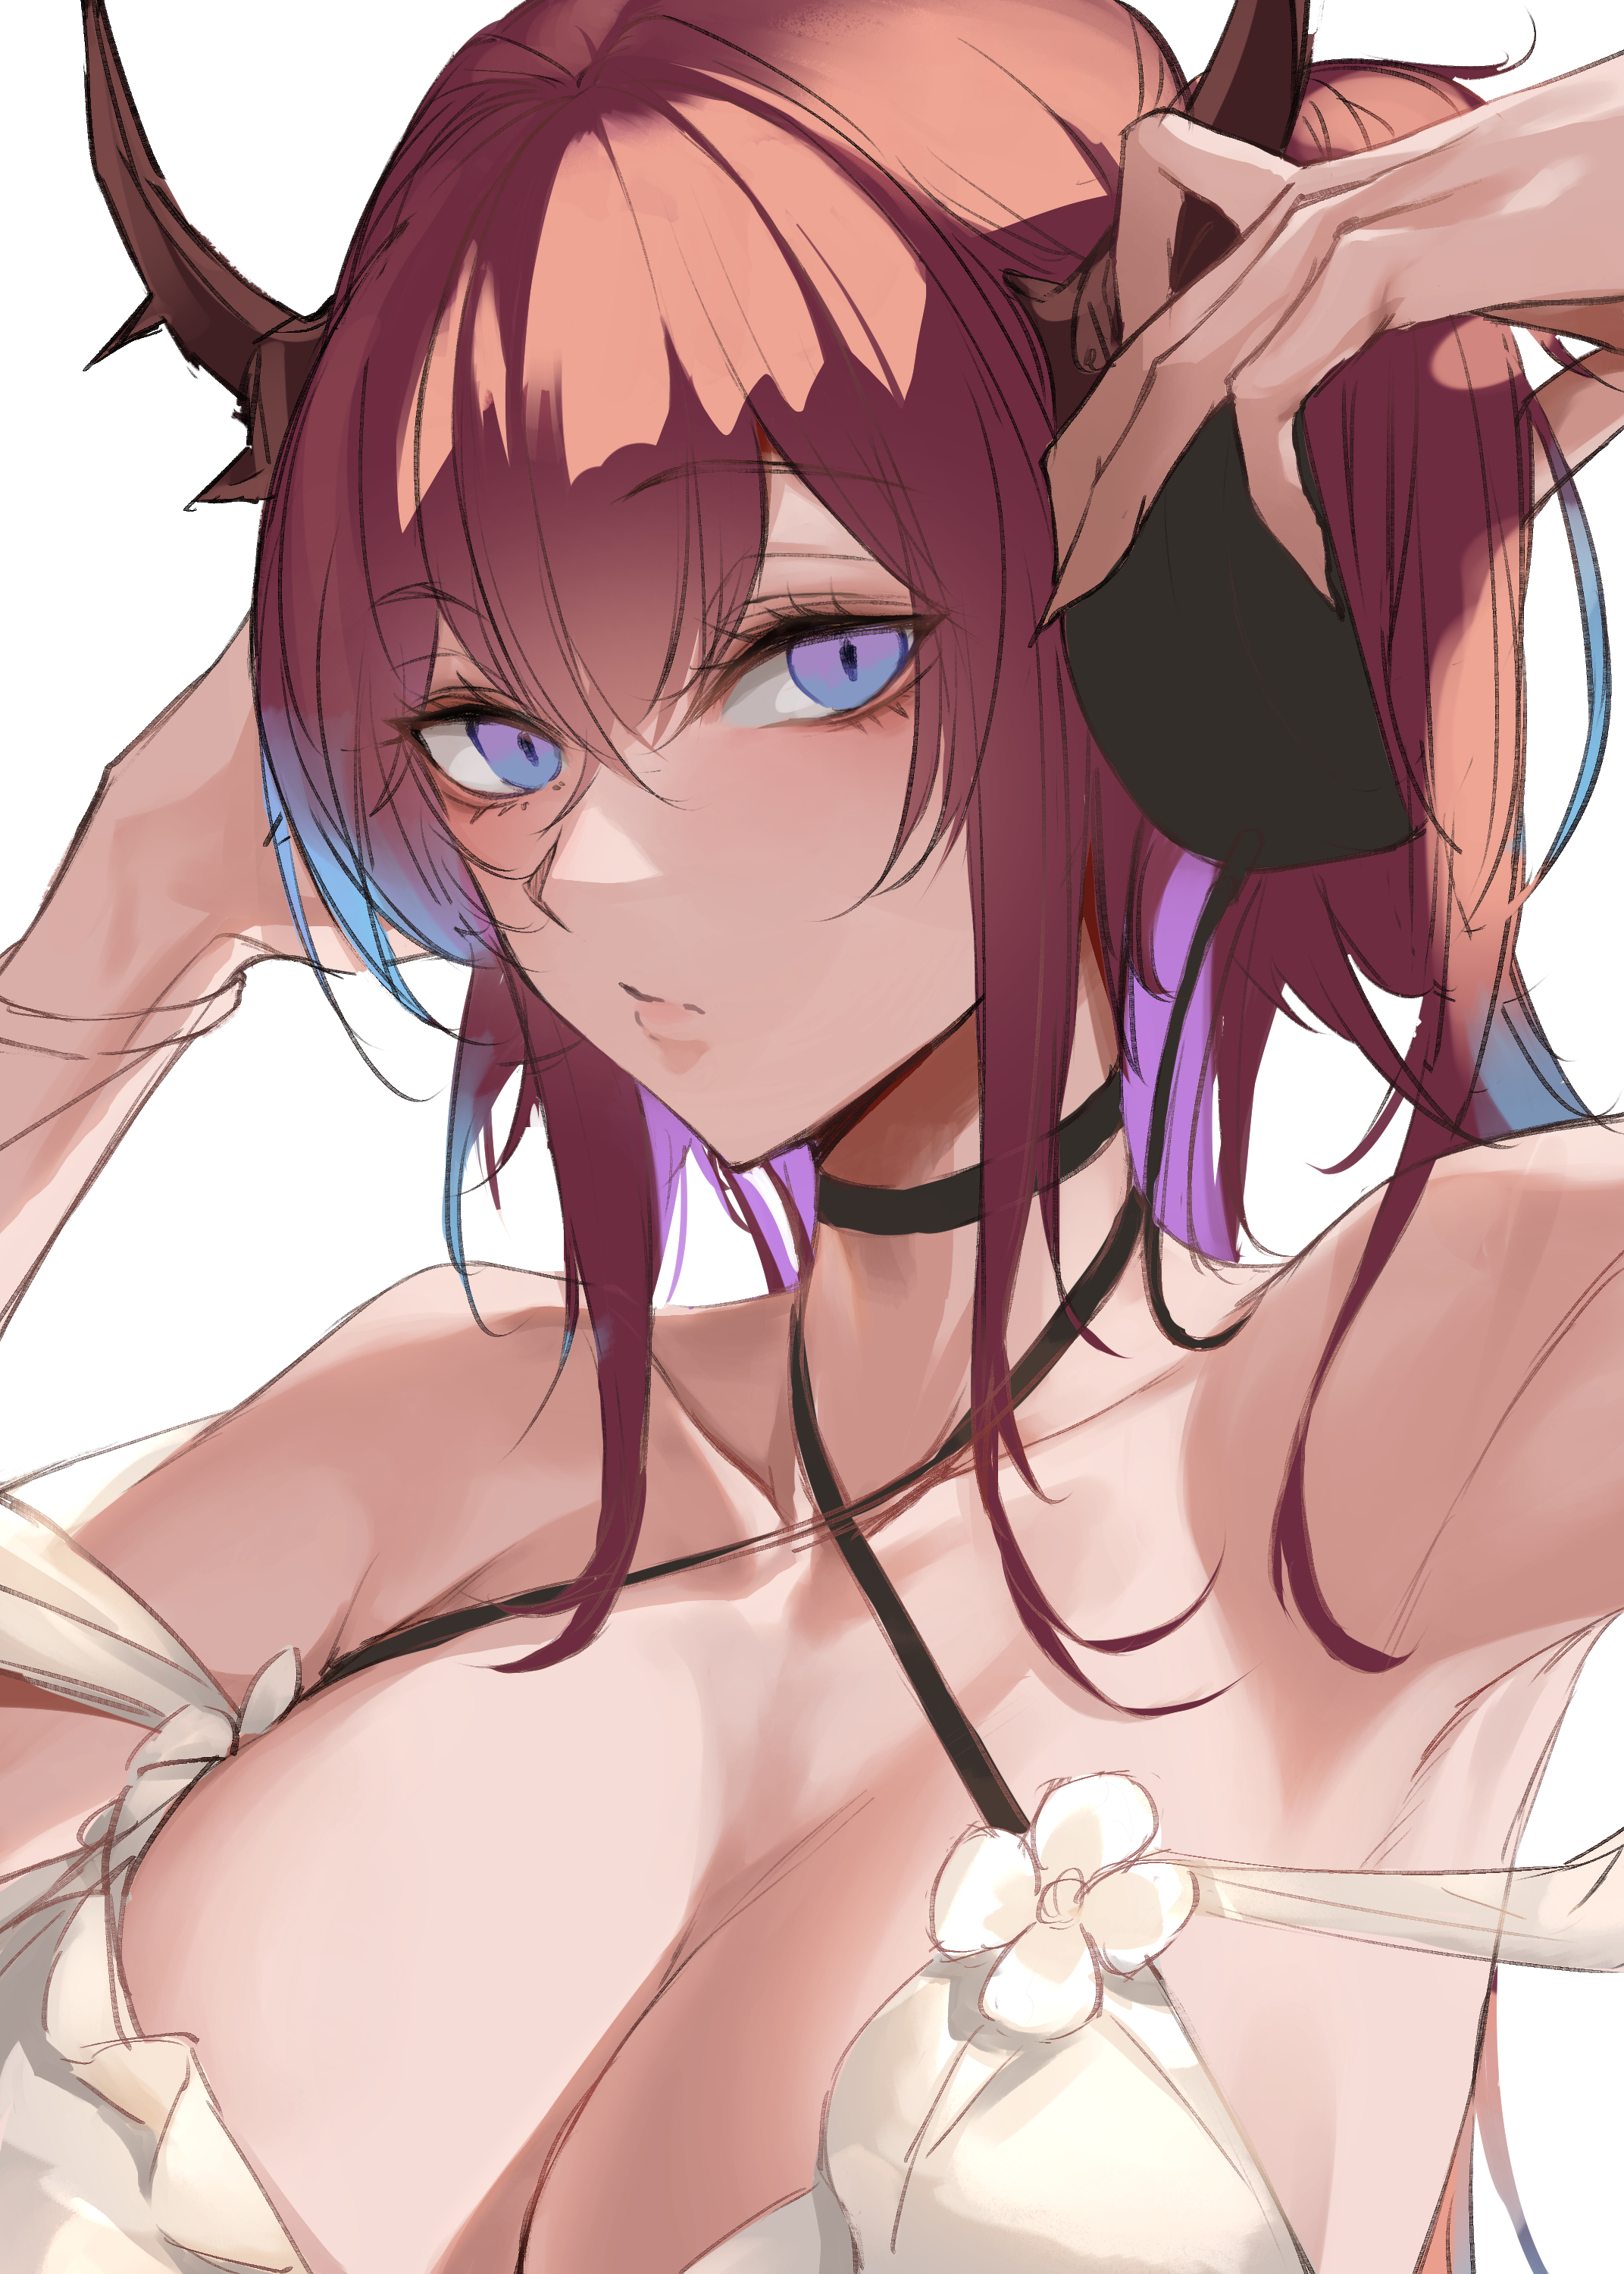
9,更に塗る(Further painting)
中間保存地点がなくかなり飛びました(すいません)
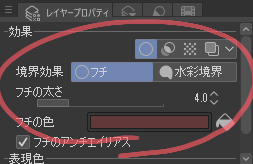
髪の一部は一旦別レイヤーを使い境界効果のフチで情報量を足しています。
(I didn't have an intermediate save point and jumped around quite a bit (sorry).
Some of the hair is on a separate layer, with information added to the edge of the boundary effect.)
また、随時色調補正を行っています。
トーンカーブと色調補正はかなり有能ツールなのでショトカも覚えておくと便利です。フォトショとかでも基本同じキーだったと思います。
(It also corrects color tones as needed.
The Tone Curve and Color Correction are quite capable tools, so it is useful to learn their shortcuts, which I believe are basically the same keys in Photoshop, for example.)
ctrl+U=色相・彩度・明度(Hue/Saturation)
ctrl+M=トーンカーブ(tone curve)
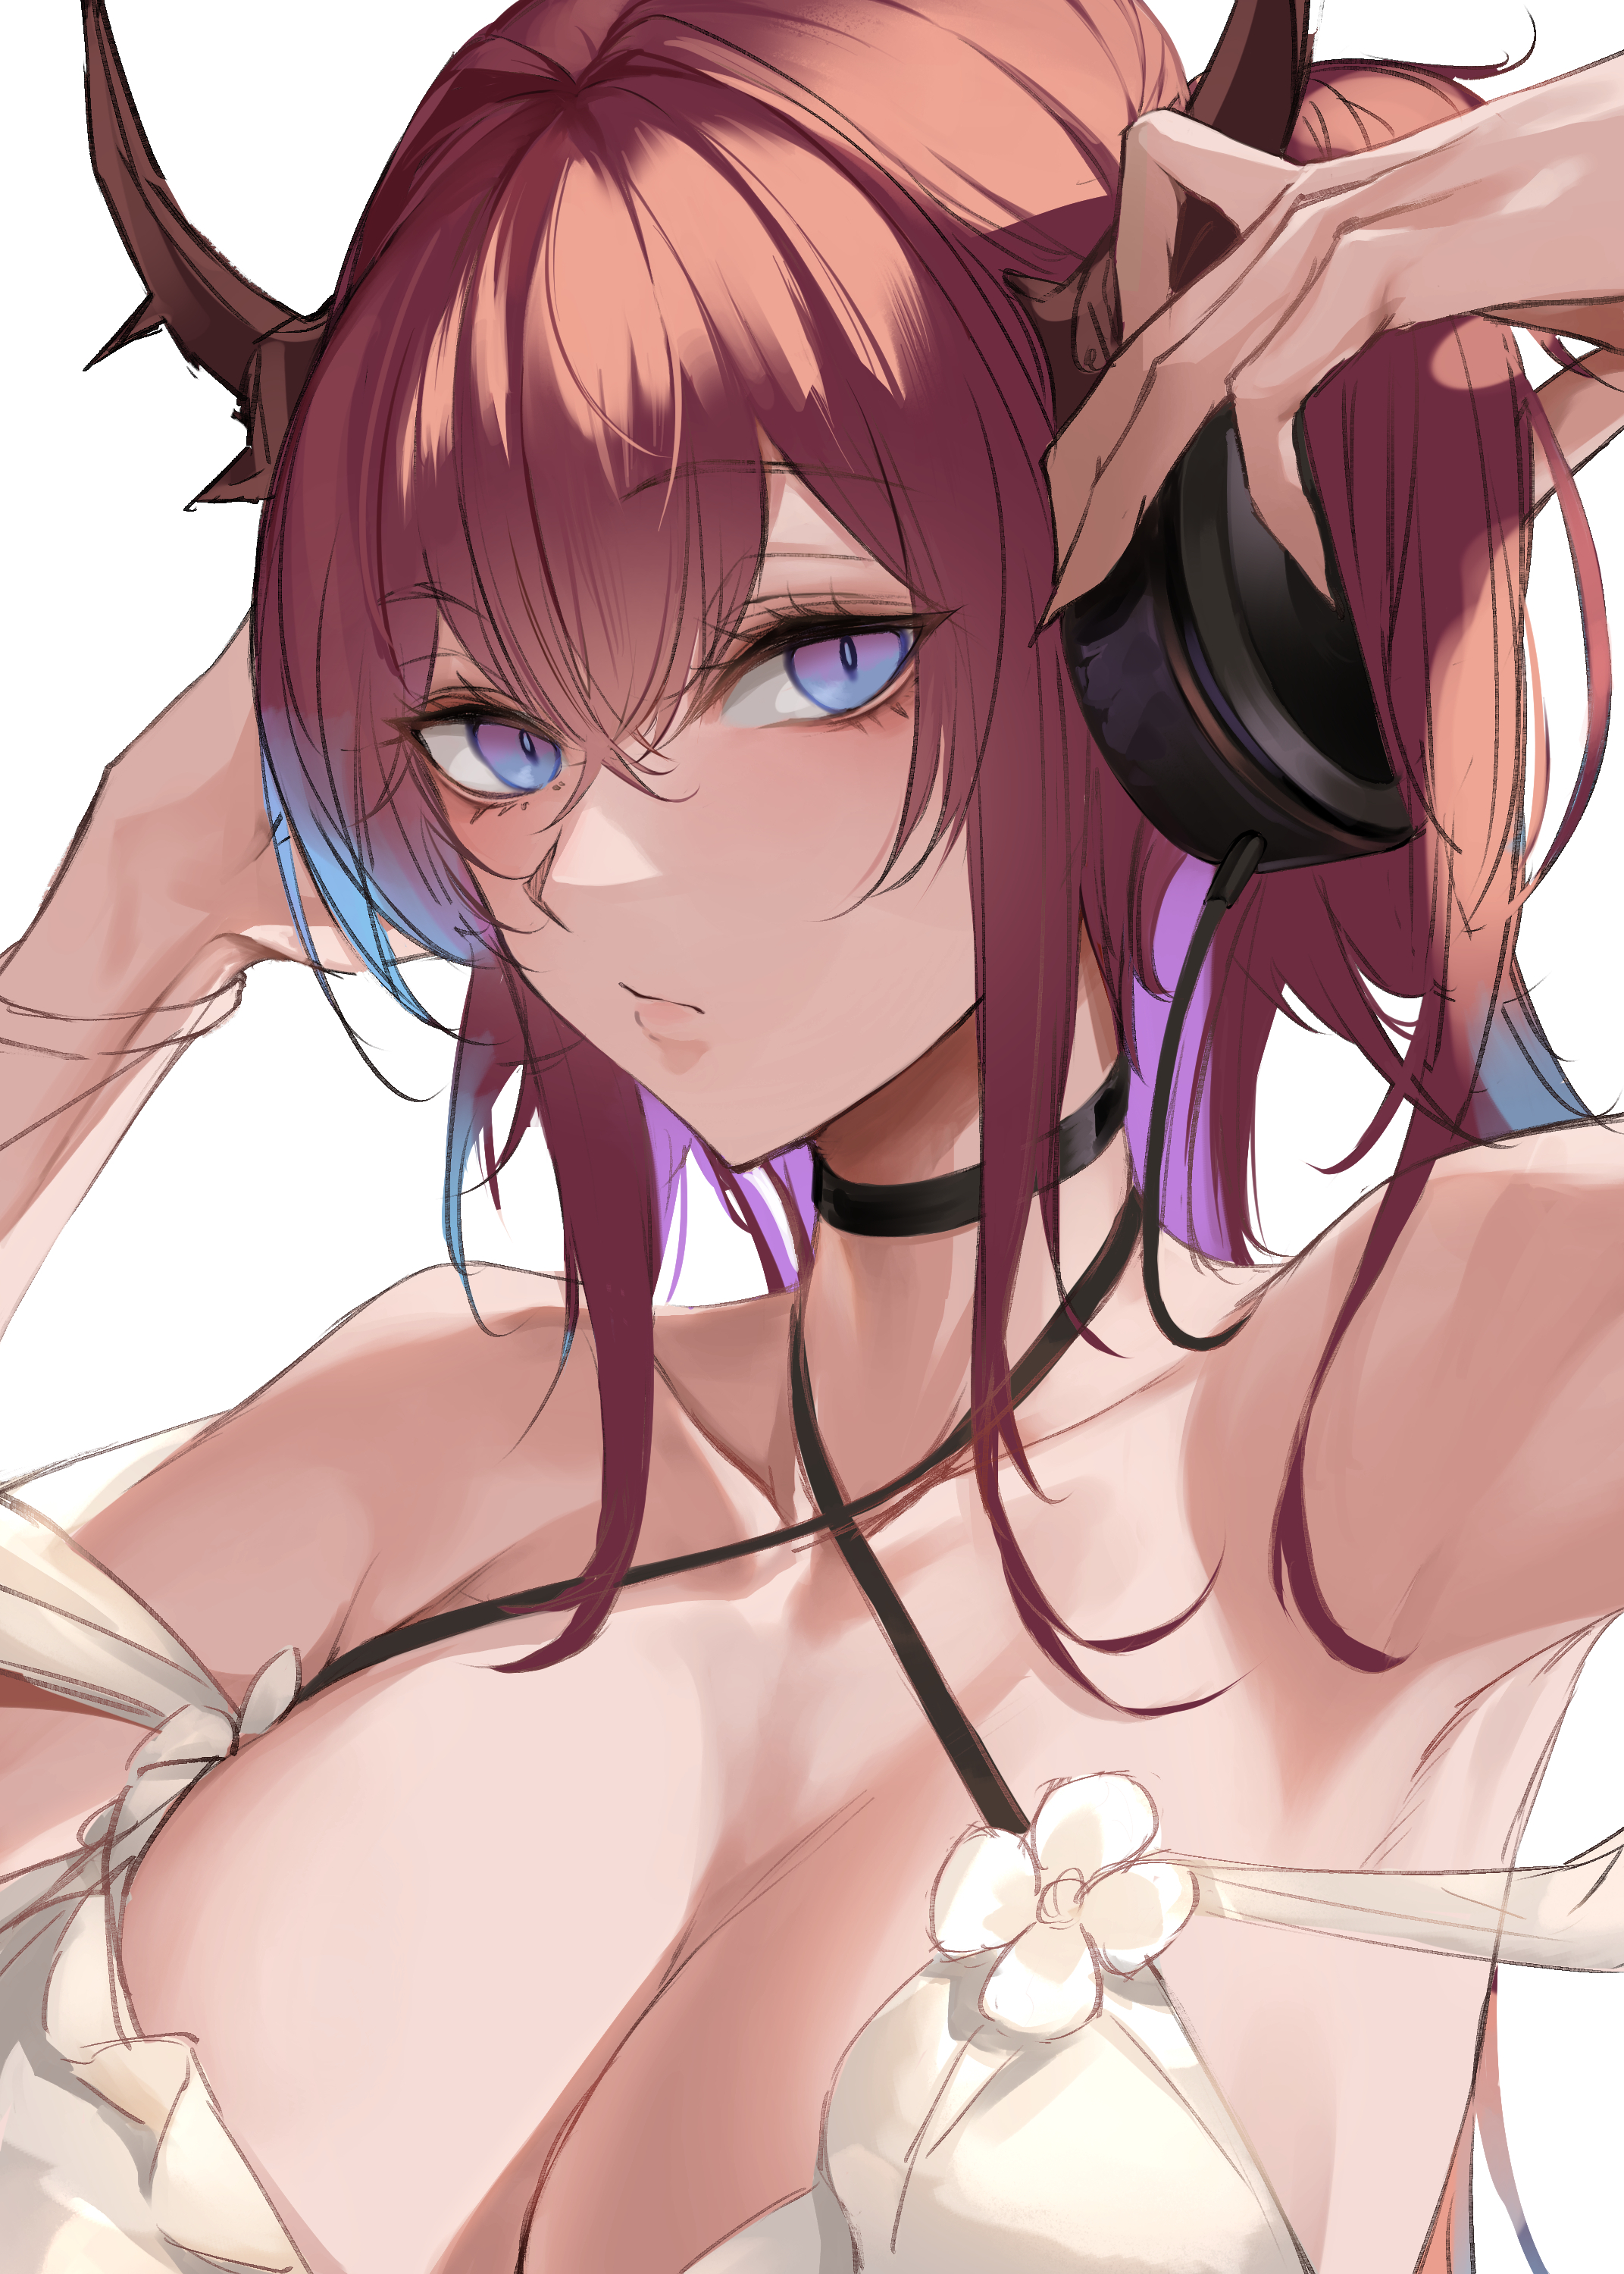
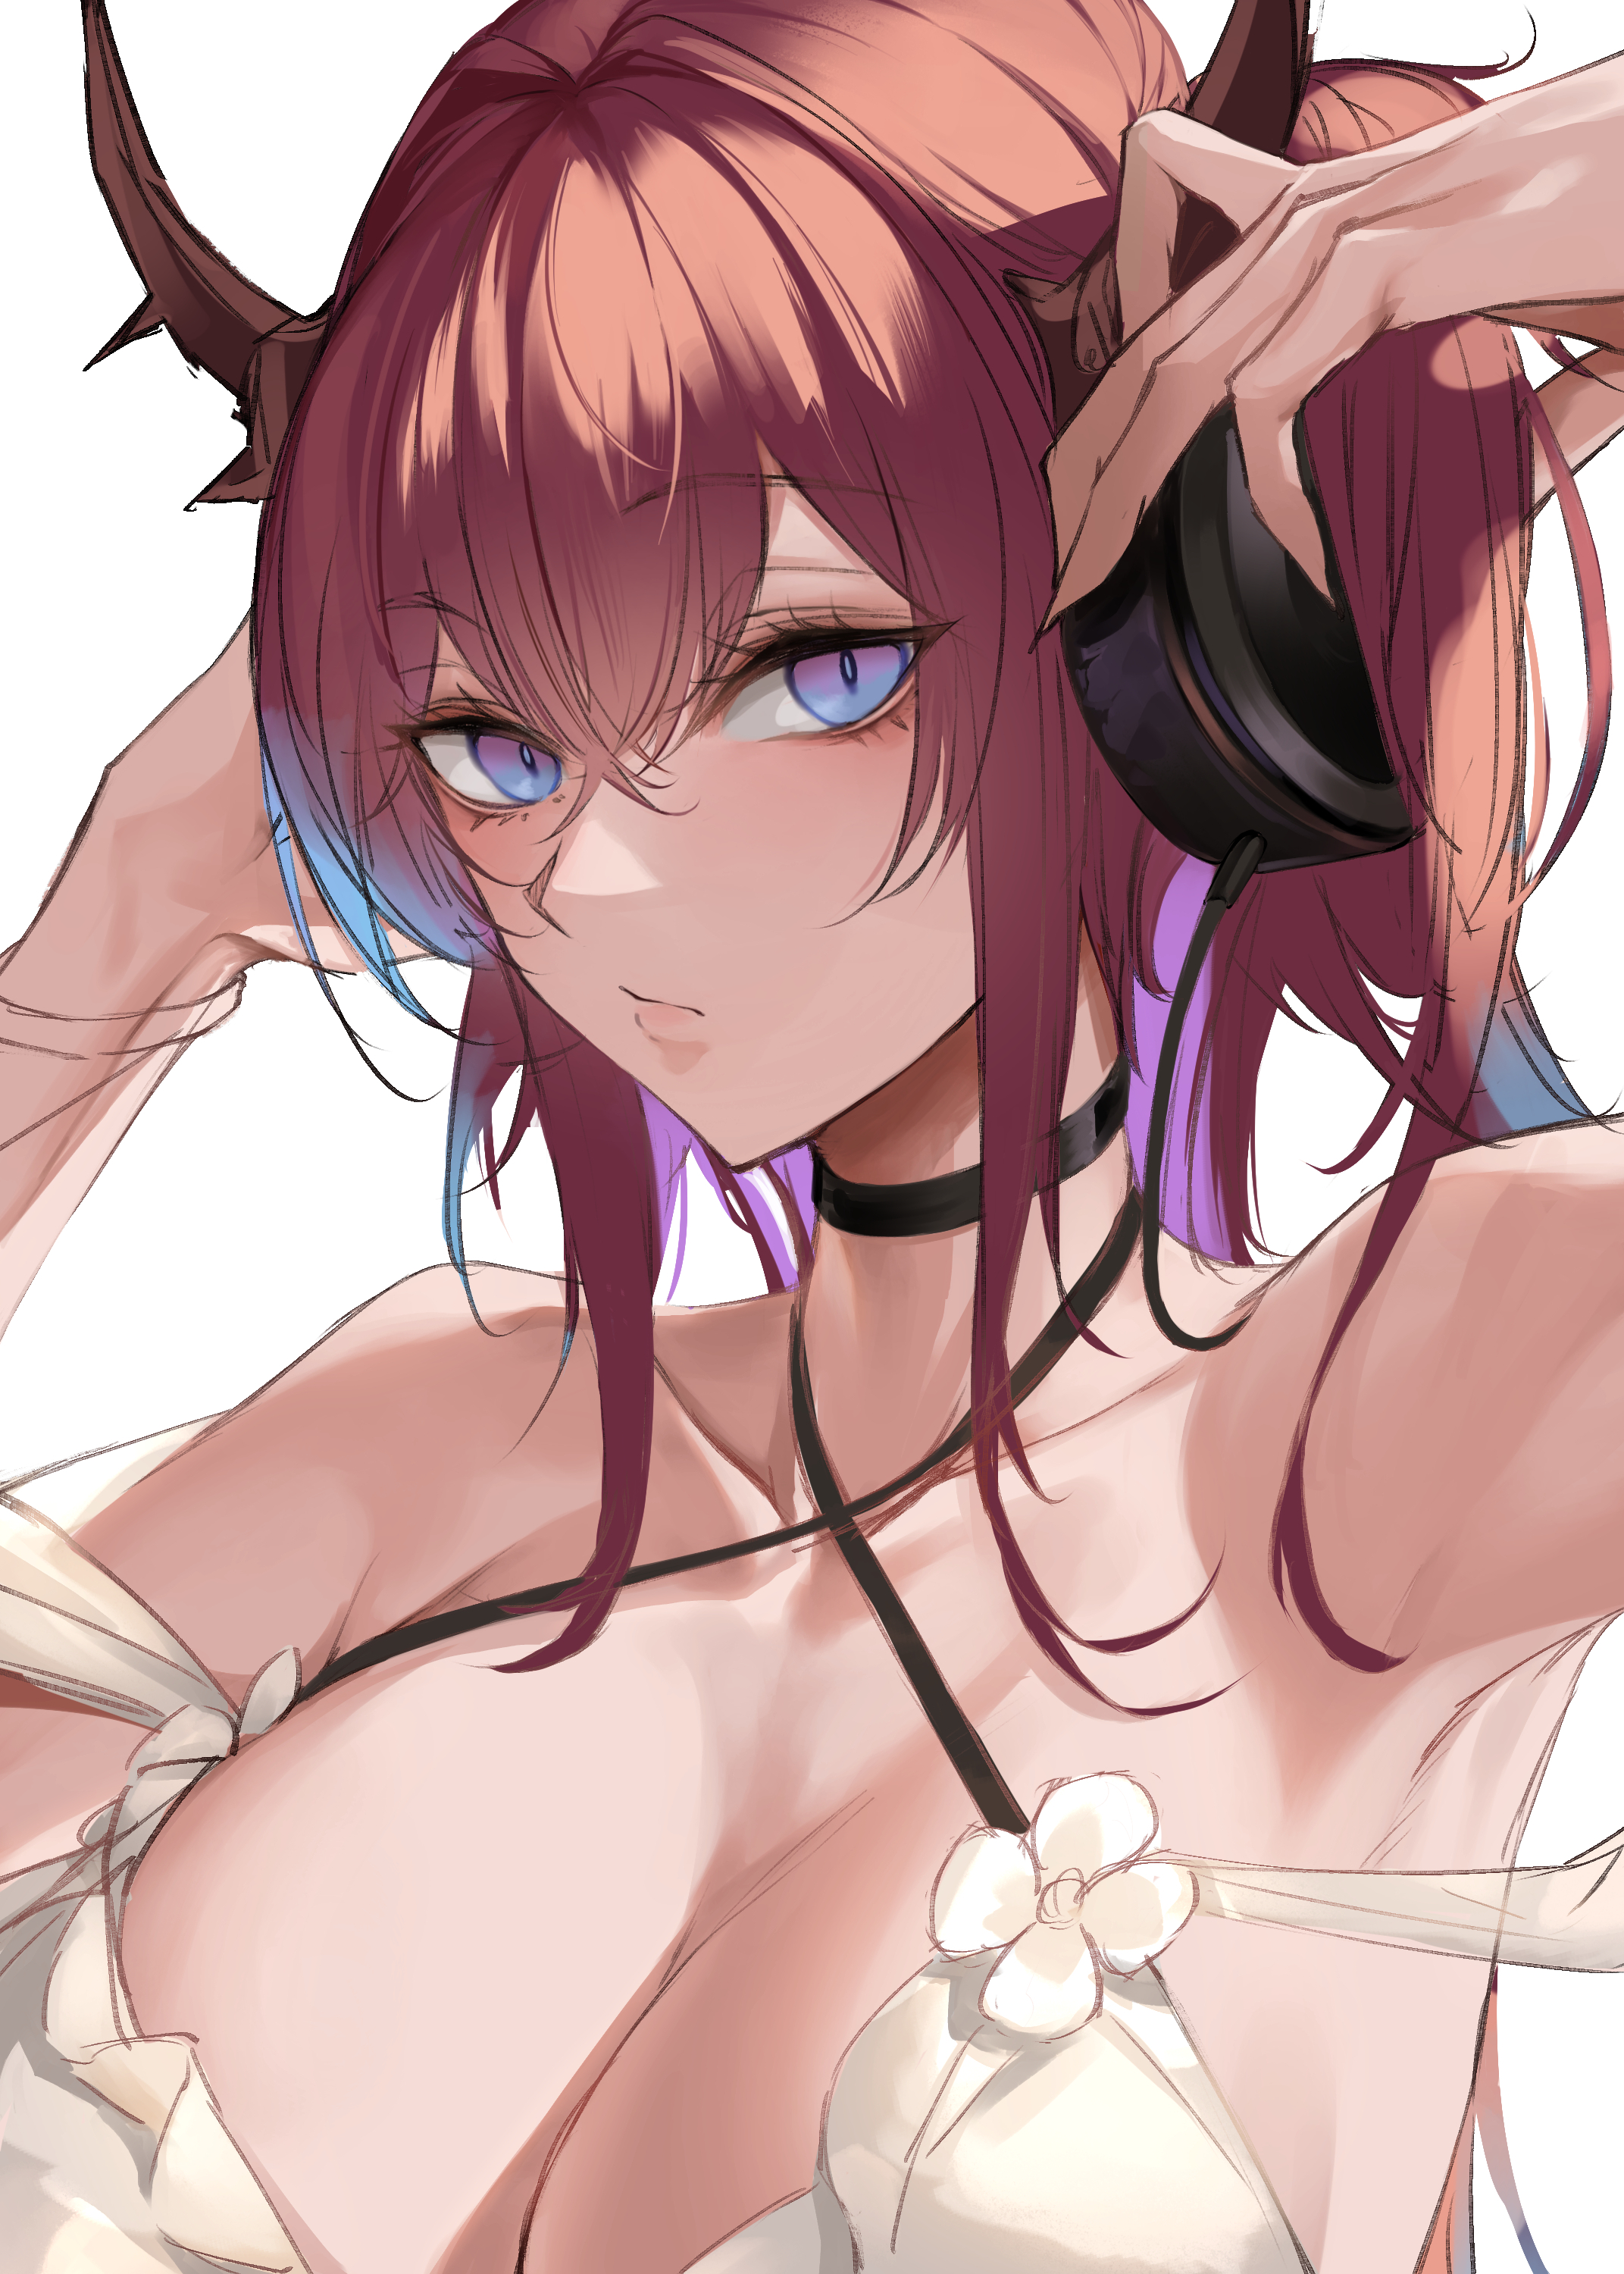
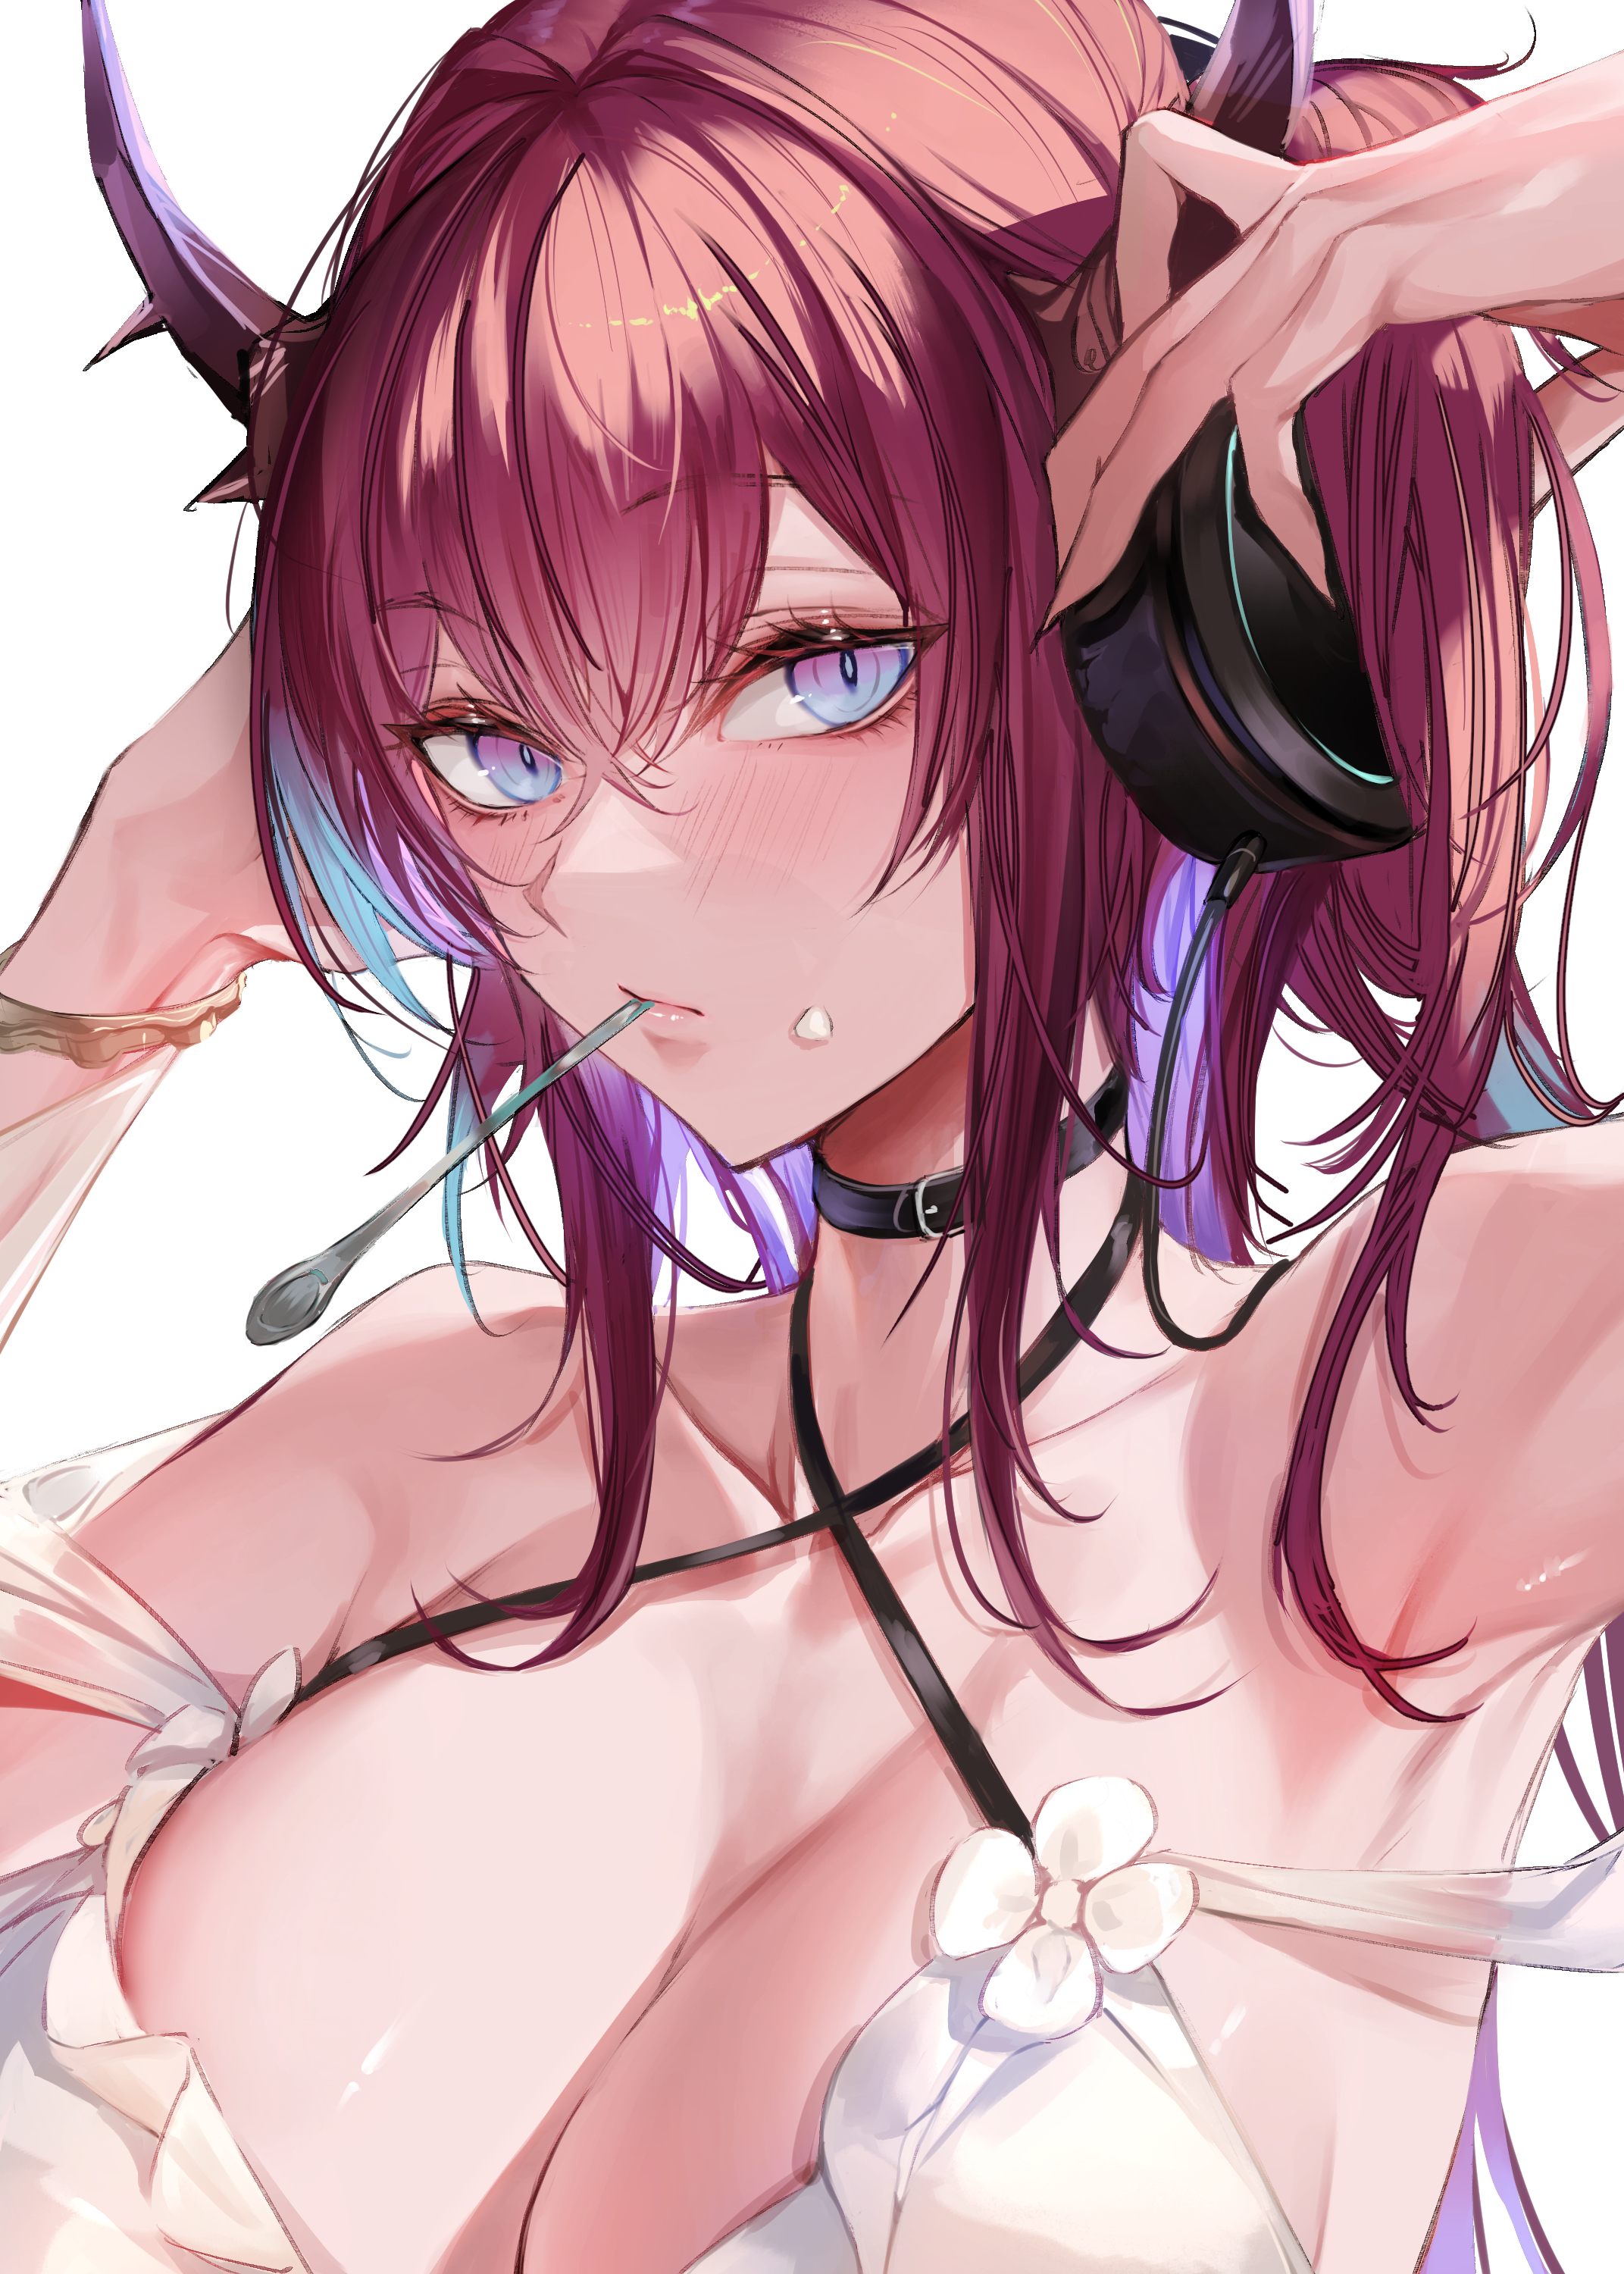
10,色調補正とスプーンの描き足し(Color correction and additional spoon drawing)
肌の鮮やかさがほしいのでオーバーレイで肌や前髪に肌色を乗せます。
また、スルトといえばアイスクリームなのでスプーンと口の横にクリームをつけました。
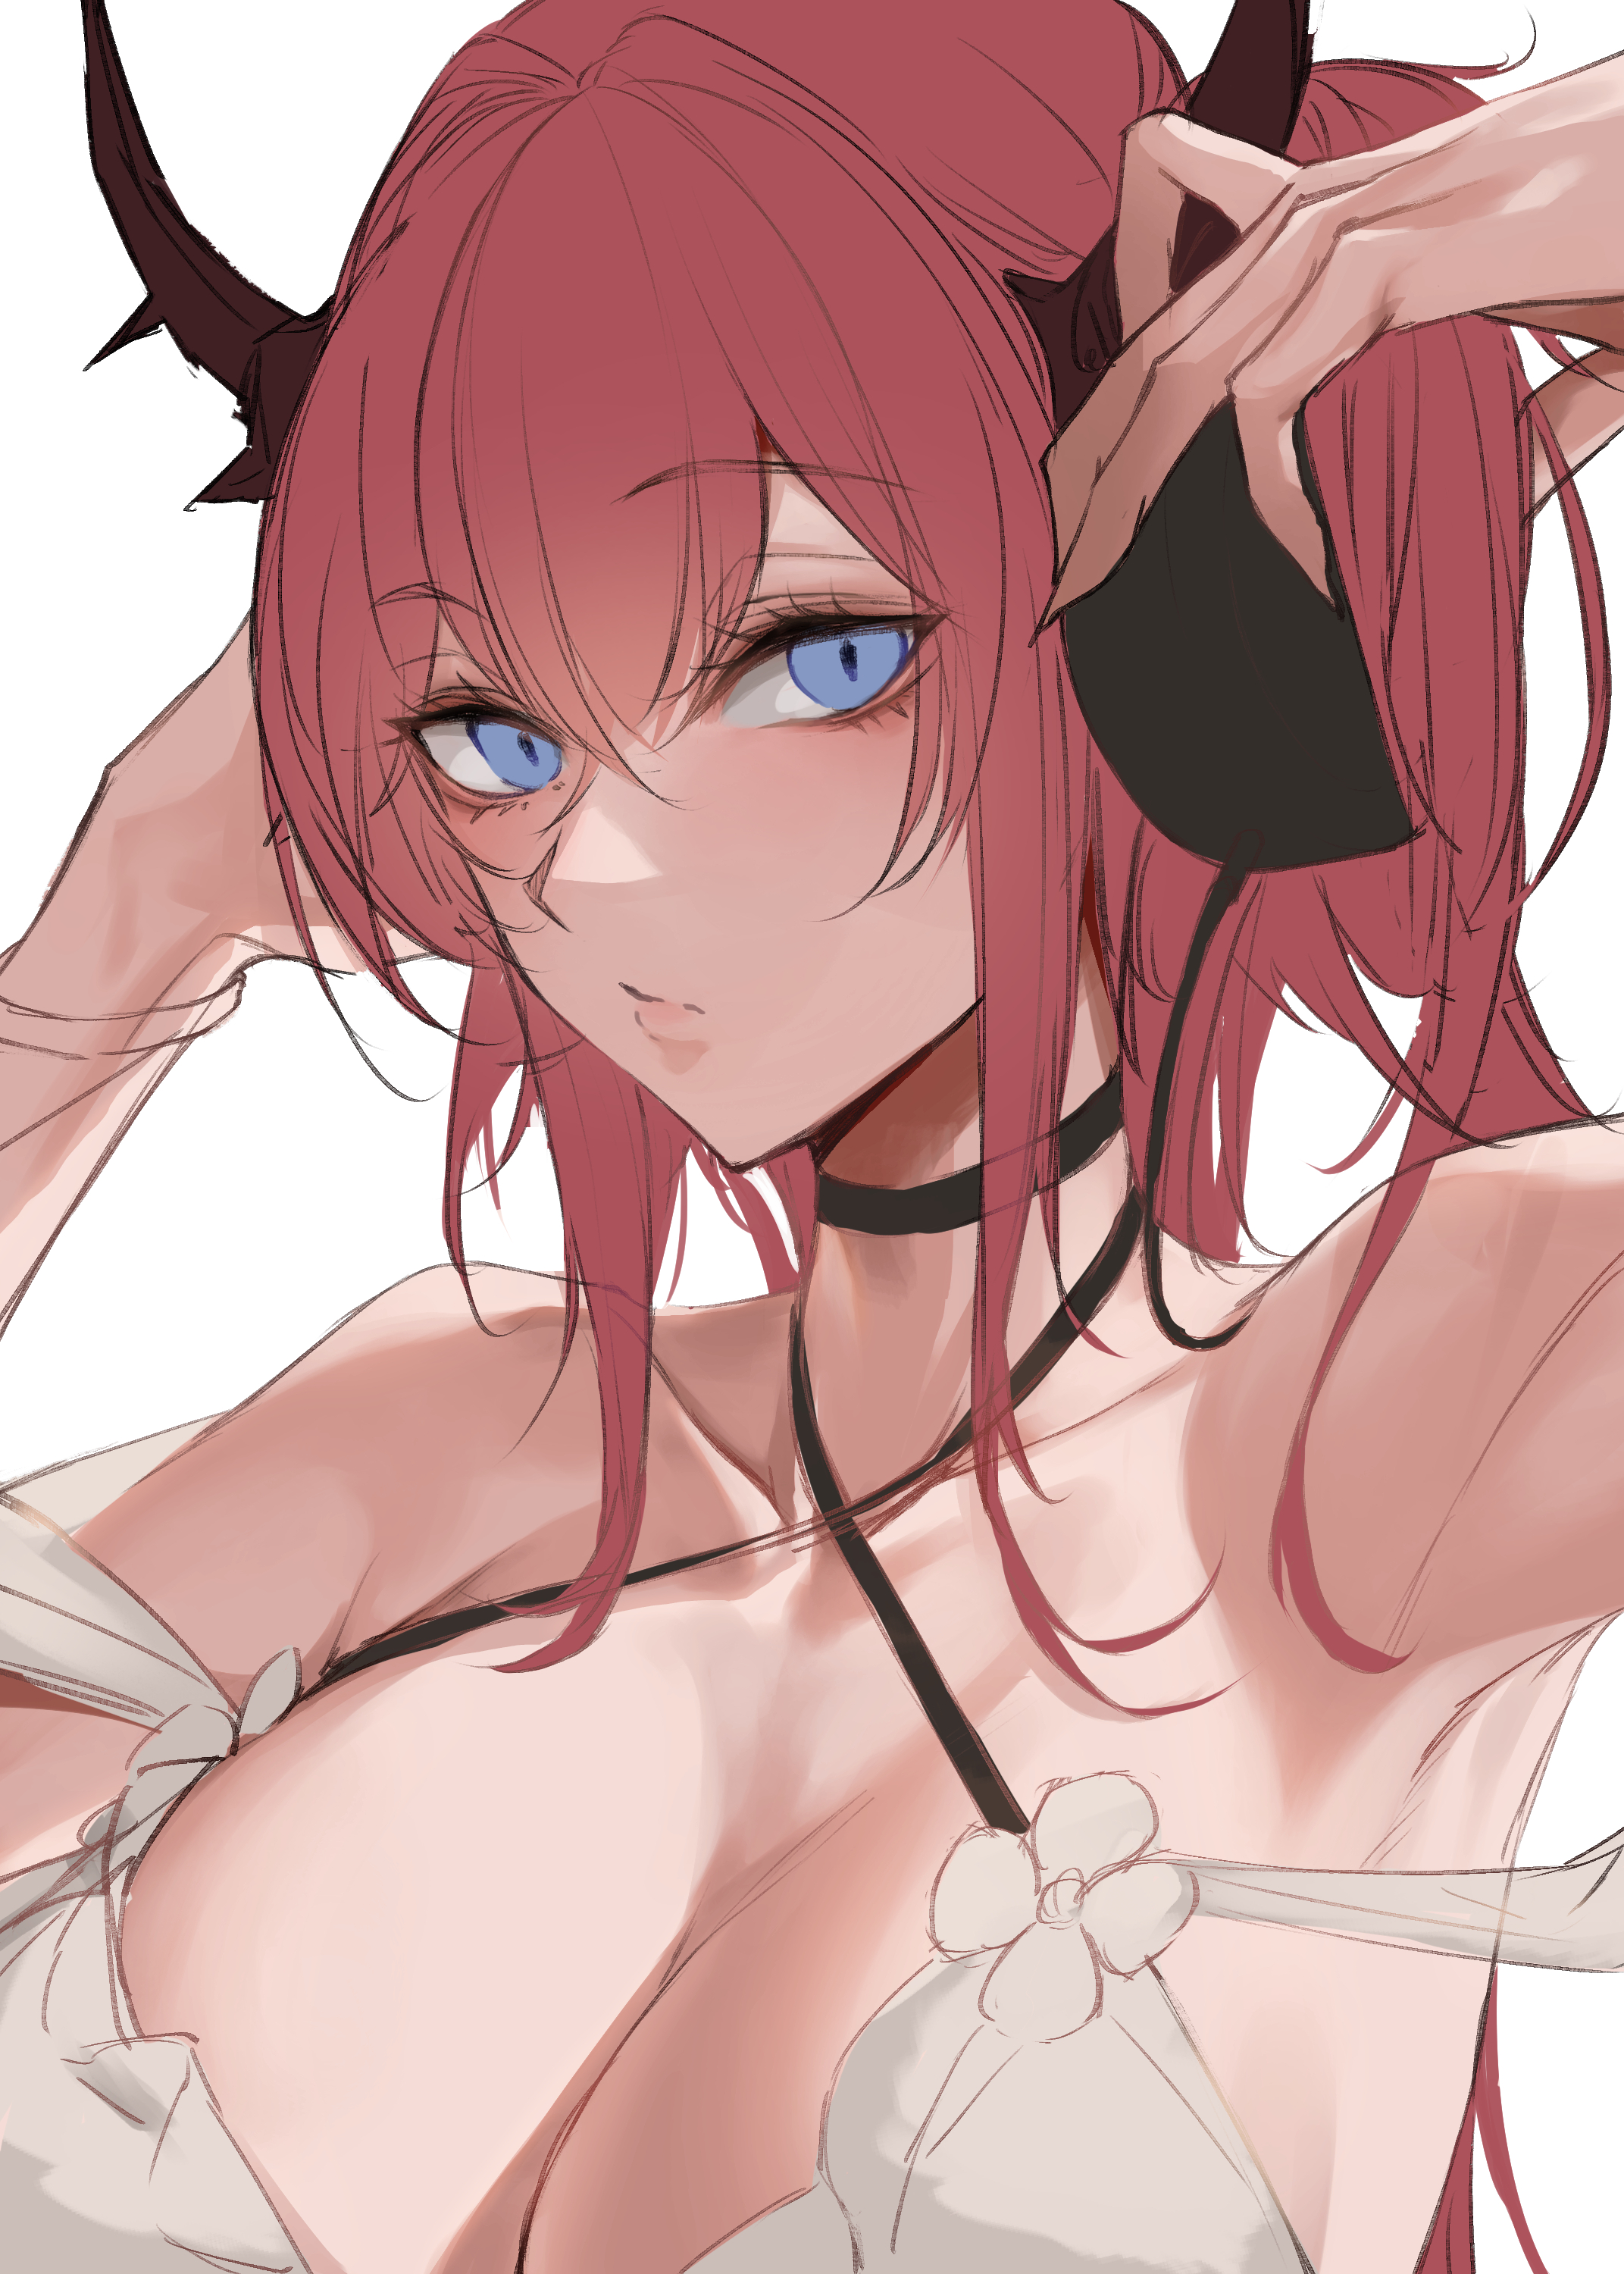
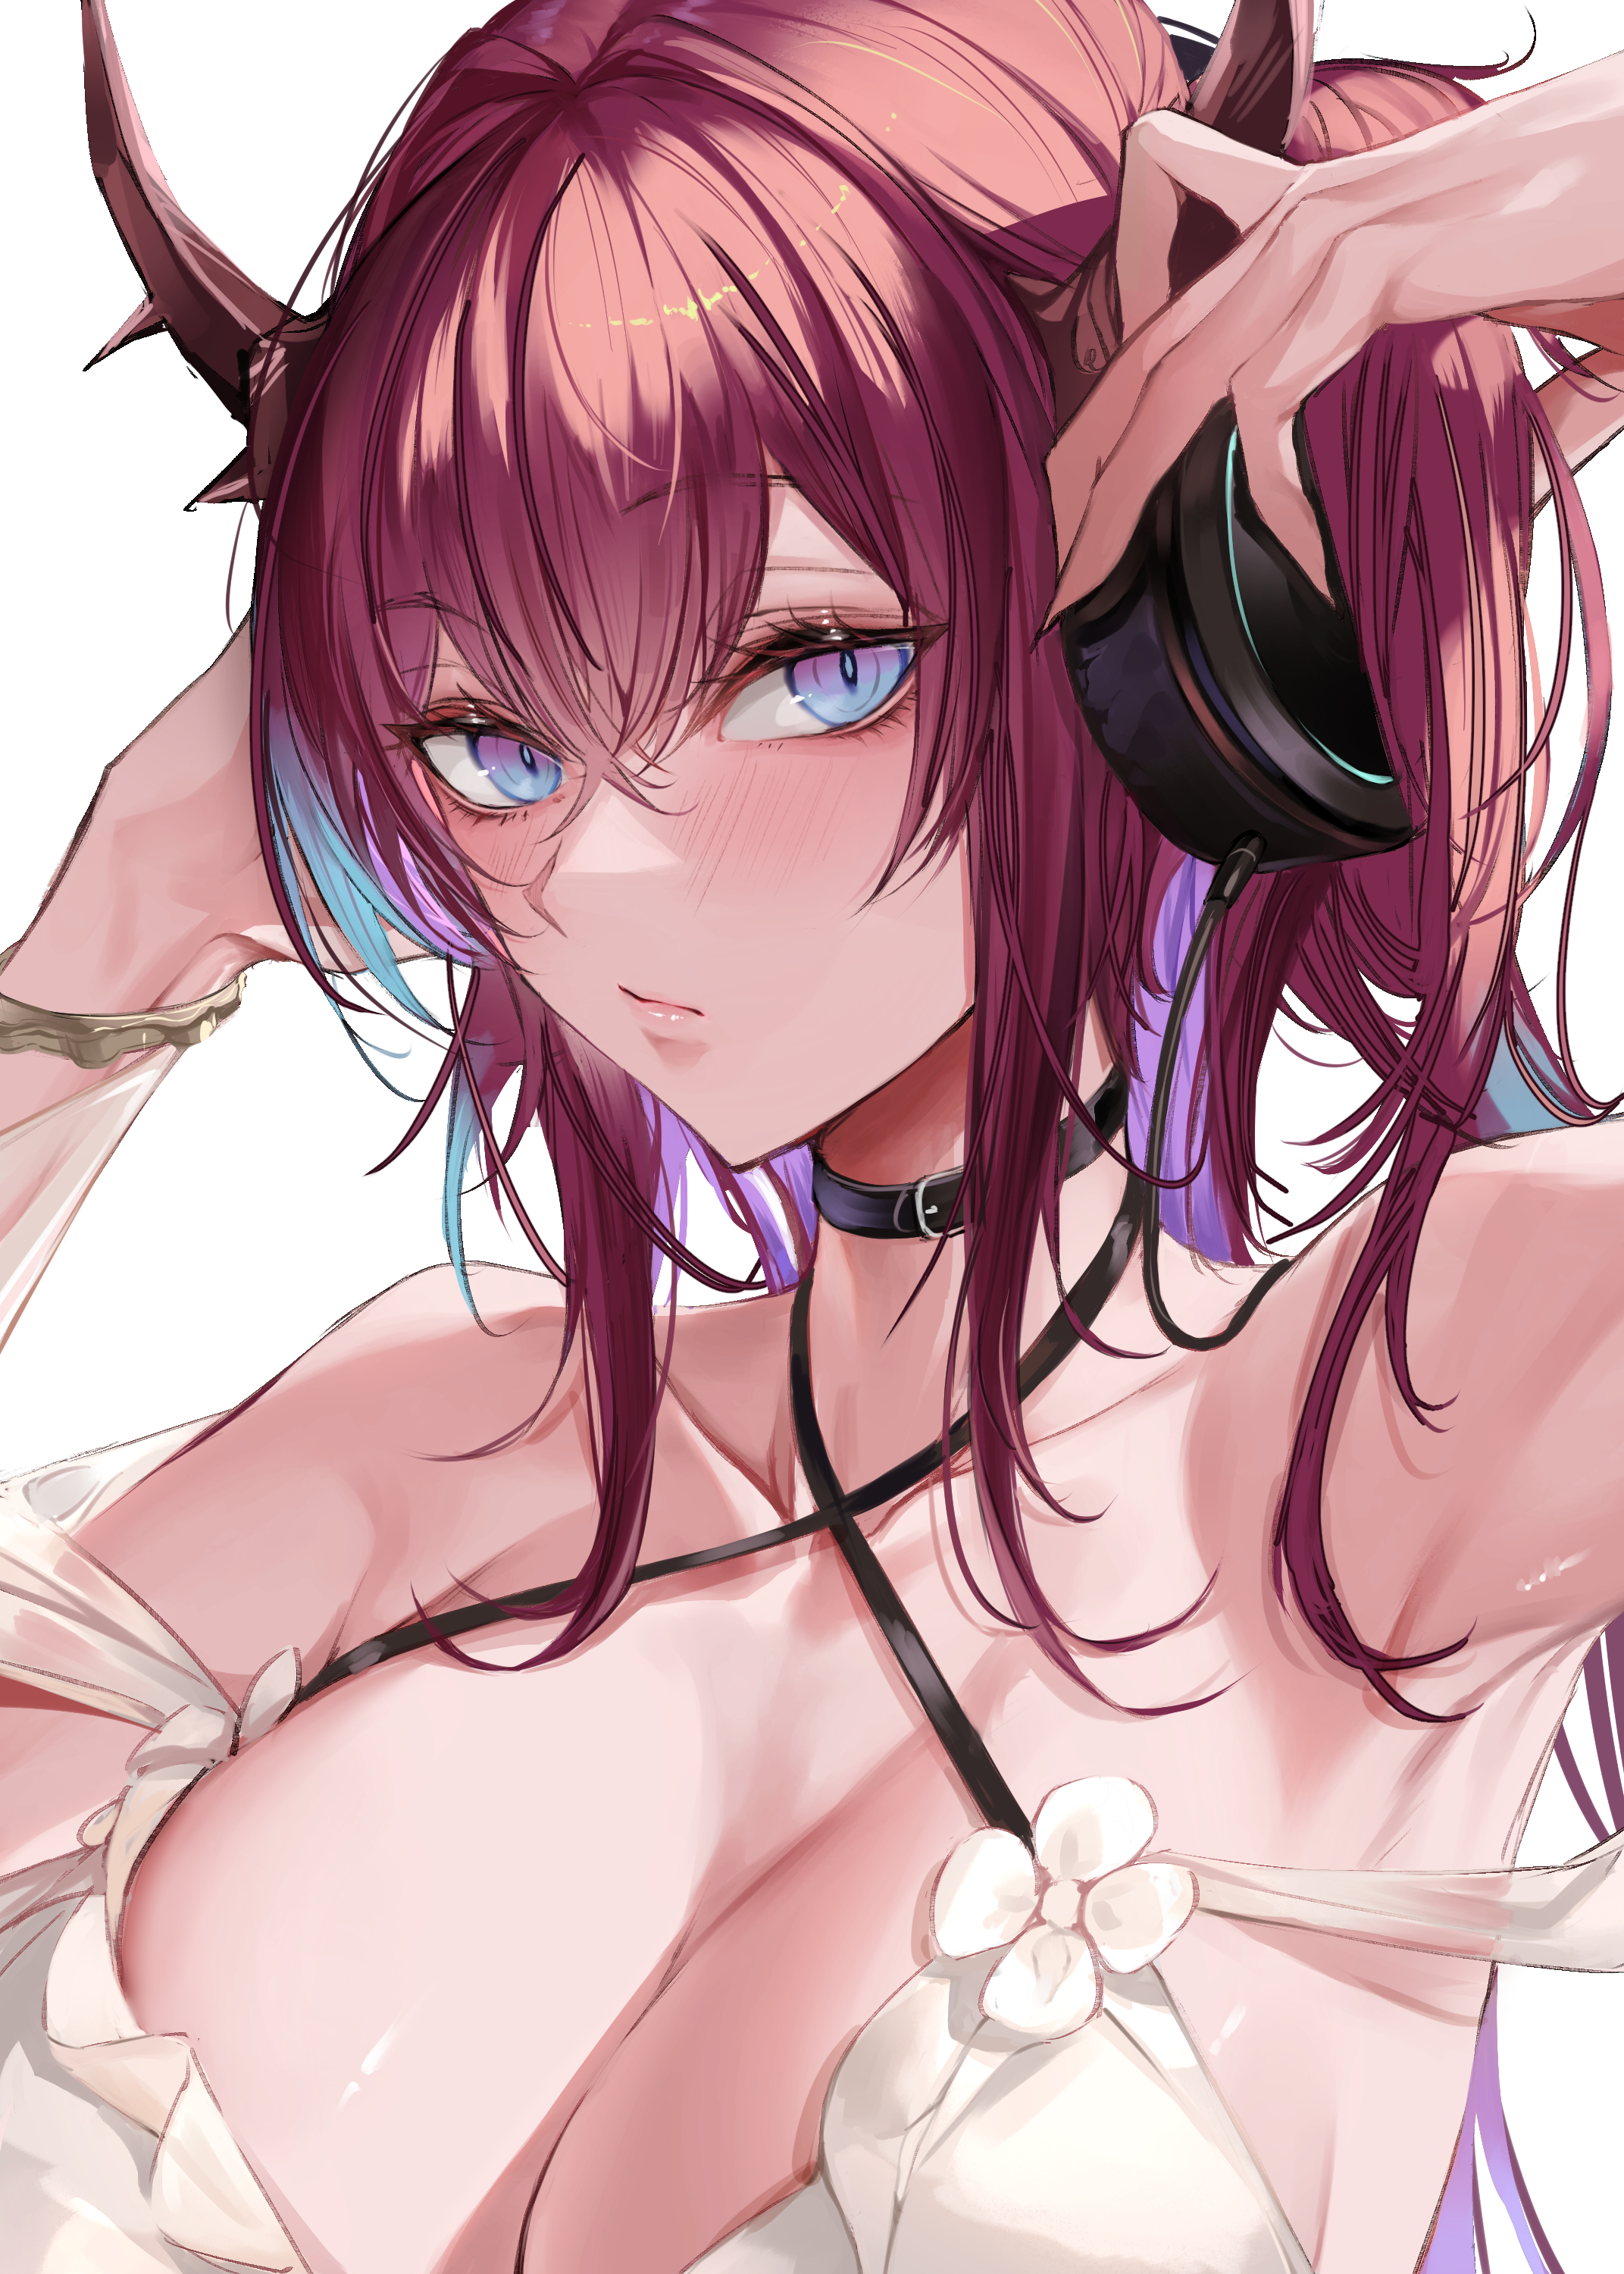
11,完成!(Completed!)
細かい修正やエフェクトを追加して完成しました。
目や髪の毛にカラフルな水玉を追加してポップ感を演出したつもりですがどうでしょうか?
少々ラフではありますが目標だった一日の内に描き切ることが出来ました。
(I made some minor modifications and added some effects to complete the image.
I added colorful polka dots to the eyes and hair to make them pop, but what do you think?
It is a little rough, but I was able to complete the drawing within a day, which was my goal.)
gif image
最近、自分の描く手に魅力が足りない気がします。
顔自体は綺麗に描けてると思いますが細かいパーツが描けるように練習していきたいですね。
また、構図も割りと似たような構図を使いがちなので意識してラフを切るなどまだまだ学ぶべきことが沢山です。
今後も引き続き頑張っていこうと思います。
(Recently, I feel that the hands I draw are not attractive enough.
I think I am drawing faces beautifully, but I would like to practice more so that I can draw detailed parts.
Also, I tend to use similar compositions, so I still have a lot to learn, such as consciously cutting rough sketches.
I will continue to do my best in the future.)
記事を読んでいただきありがとうございます。
よければまた読みに来てください。
それでは!
(Thank you for reading the article.
Please come back to read more if you like.
See you soon!)


