Tuning Pressure Advanced at 1200mm/s
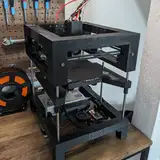
Added 2025-01-08 15:33:01 +0000 UTCToday I want to share with you one Step of my tuning process of my new T250 3D Printer.
One of the biggest headaches we all face: achieving consistent extrusion—or any extrusion at all—when pushing speeds over 300mm/s.
The reason why most printers struggle here is because the pressure of inside the hotend is too big causing oozing in both sides of the hotend, one side you see as oozing on the print but the other side that is more critical is that molten filament climbs up the melting zone through the heatbreak and finally cloggs the hotend.
And that’s where the pain truly begins. You’ve been there—having to drain the filament, disassemble the hotend, yank out that swollen blob of filament blocking the melting zone, and tighten everything back up. Boom, 30 minutes of your life gone. And for what? A strong chance it’ll happen again during the next test run. Rinse and repeat. Another 30 minutes down the drain.
For my PA tuning I use Dmitry Butyugin Advanced PA Tower model. It's part of THEOS, my 3D Printer Operating System and provides an easier and more powerful approach to the classic PA tower klippers mainline uses for tuning.
In the video attached to this post, you’ll see my first pass with the PA Tower. Here’s how it works: The extrudes at five different velocities to mimic real-world speed transitions during a print.
DWELL Point (0mm/s): The printhead pauses for a short amount of time, allowing filament to ooze out of the nozzle if theres too high pressure. This point acts as a resetting point for the pressure in the Hotend
SCV (18mm/s): The slowest movement speed in a print where oozing causes over-extrusion left side of the point and under-extrusion right next to it
Slow (360mm/s): Matches my outer-wall print speed for quality prints.
Medium (800mm/s): Reflects inner-wall speeds.
Fast (1200mm/s): Reflects infill speeds.
Before we start, let’s take a moment to review the speeds I used for this test. My printer is capable of moving the toolhead at speeds of up to 4000 mm/s with an acceleration of 280,000 mm/s². For this test, the Pressure Advance Tower uses a test distance of 12 mm.
To determine the optimal speeds for this short distance, I used the RepRap calculator to ensure the toolhead reaches at least 50% of the target distance at maximum speed. Here's how it breaks down:

As shown in the acceleration graph, the toolhead requires approximately 2.7 mm to accelerate to 1200 mm/s, followed by another 2.7 mm to decelerate back to 0 mm/s. This means the toolhead reaches maximum speed for at least 50% of the test distance, aligning perfectly with Klipper's recommended minimum cruise ratio.
First Pass
Lets have a look at the result of the first pass:

Here's the same result with the different velocities as overlay:
 The printhead moves at a speed of 1200 mm/s and decelerates down to 0 mm/s. At this zero-speed point, any overpressure inside the Hotend cause oozing, leading to over-extrusion. From there we immediately accelerates back to 1200 mm/s, then reduces its speed to 360 mm/s, and ramps up again to 1200 mm/s. This behavior simulates the transition between the outer wall and the infill.
In the next phase, the printhead decreases its speed to the Square Corner Velocity (SCV) to simulate a sharp 90° corner move, followed by another acceleration back to 1200 mm/s.
The pressure advance (PA) test starts with a PA value of 0.0, increasing incrementally by 0.005 per layer, and reaches a maximum of 0.06. For this test, a Smooth_Time value of 0.01 was applied
Based on the test results, the optimal PA value is estimated to be around 0.02.
Second Pass
So I printed another PA Tower:

This tower test began with a PA value of 0.015 and ended at 0.025. The results indicate that the optimal PA setting is slightly above 0.02. Based on this observation, I selected 0.021 as the final value.
Final Pass
So here is the final result of the PA tuning:
 Let me share a few of my observations:
The most critical aspect for me is the transition from 1200 mm/s to 360 mm/s. As you can see, there’s a slight jitter, which is perfectly normal. Even with a perfectly tuned printer, vibrations at such high speeds are inevitable. However, this jitter is nearly invisible in real-world prints and entirely acceptable at this transition point between the outer perimeter and infill.
The more visible lines on the left and right are fully closed, which is essential. These areas represent the connection between the infill and the inner wall, and it’s critical to avoid gaps here, as they would compromise the stiffness of the final part. Keep in mind that these transitions occur inside the printed object. For the outer perimeter, the transition would involve a speed change from 360 mm/s to 18 mm/s, and then back to 360 mm/s, resulting in a much smoother line.
The uneven, slightly bulging edges of the cube are not representative of the final print quality. Here, the toolhead is moving at 1200 mm/s around a 90° corner, which is an extreme condition. In real-world printing, the toolhead would slow down to the Square Corner Velocity, significantly improving the quality of these edges.
For further clarification, I’ve attached another side of the PA Tower, showing a 360 mm/s → 18 mm/s → 360 mm/s transition for comparison

Want to see the final Pressure Advance (PA) Tuning Tower in action? Check out the YouTube Short I made of it being printed!
If you're curious about tuning 3D printers to perform at these speeds, I’ve got you covered. On my Patreon, I’ll be sharing most of the steps I followed to get my printer up and running. For just $5, you’ll gain access to my development diary, which includes behind-the-scenes insights about my printers, my custom printer operating system, and the projects I’m working on—content you won’t find on Instagram or YouTube.
Comments
Incredible!
Alex B
2025-01-08 15:47:14 +0000 UTCI'm impressed 👍🏻😳😊
Flo
2025-01-08 15:40:08 +0000 UTC