SD Tutorial #2 | Basic for Generate images
Added 2023-11-17 15:11:48 +0000 UTCHi everone, This tutorial will be an introduction to generating images using stable diffusion webUI. I have to apologize if I make any errors.And Download full-resolution images in this tutorial below
| Contents |
- SD User Interface
- Checkpoint(AI Model)
- Generate Image
- Basic Prompt
First of all, i want to recommend website for download model or lora
Here : https://civitai.com/models
1) SD User Interface
Let's start with how to use it. First, I will introduce all parts of the SD-Wedui interface. As you can see below, this tutorial only includes text-to-image. I will make a tutorial for another one later.

Dsecription
1) Checkpoint(Model)
Checkpoint determines what type of image it will create, like anime style or realistic
2) Prompt
Prompt is divided into two sections: positive prompt and negative prompt.
Positive determines what you want to generate.
Negative determines what you don't want to generate, like bad quality or extra finger
3) Generation Settings
Settings Section includes
- Sampling method: Determines how AI generates
- Sampling Steps: Determines how many times AI draw
- Hires. Fix: It will have its own section below
- Refiner: I don't really use this so i don't know
- Width Height: Determines the size to generate
- Batch Count and Size: Determines how many images it will generate.(I do not recommend changing.)
- CFG Scale: Determined how AI generate follow your prompt
- Seed: Just random number for identifying images If you use the same setting, prompt, and seed, it will generate identical images
4) Generate Button
The orange box is the button to start generate images. And the basket below is for deleting both positive and negative prompts. Regtangel dropbox below is preset i will teach you later.
5) Images Section
In the middle are generated images. All box below is not necessary today.
2) Checkpoint(Model)
I have several models that I want to recommend to you.
- AbyssOrangeMix2 - NSFW | For generating 2.5D anime style images best for all NSFW
- AnyLoRA: For generating any images in anime style, kind of like a standard for making anime images.
- YesMixv3: For generating any flat 2D anime color, it is best to use anime in an accurate style.
How to Install Checkpoint
First, go to your stable diffusion webUI folder. Then locate the "models" folder. ↓Image↓

Then go into the "Stable-diffusion" folder. ↓Image↓

Then place the model you downloaded in "Stable-diffusion" folder. ↓Image↓

I recommend you restart stable diffusion after you install the model. Done installing the model!
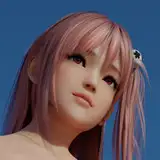
3) Generation and Basic Prompt
Here is quick setting I use | Full Setting Below
Size : 512 * 768
Sampling Method : Euler a
Sampling Steps : 20-28
CFG Scale : 7
Hires. Upscaler : R-ESRGAN 4x+ Anime6B
Denoising Strength : 0.45-0.5
Upscale By : 1.8-2
Here is the full setting I recommend for the best 2D images for me.
- Size
I want to recommend 512*768 for normal generation; it is perfect for generating all kinds of portrait images of characters. 512*512 i usally use this resolution for testing model and lora only or use with lora that requires this size to get perfect image.
- Sampling Method
I have 2 sampling methods I used for most of the images I generated.
1) Euler a | This one is for generating flat 2D anime color styles. i use it most often with AnyLora and YesMix
2) DPM++ 2M Karras | This one is to generate 2.5D styles. I use it with AbyssOrangeMix
- Sampling Steps
I recommend 20–28, not more than 30, because if you want an anime style, you don't want that much detail on the image. The higher the steps, the more detail in the image you generate. I usally use 20.
- CFG Scale
I usally do not change setting that much i usally use at 7 and not more than 12.
Hires. Fix (highly recommended to use)
- Hires Upscaler
For starters, i recommend you use "R-ESRGAN 4x+ Anime6B" this one is for upscale flat color anime image.
And "Latent (nearest-exact)" You can use this one on simple image like just sitting or standing pose because i can getting weird if you use one complex image.
- Denoising strength
"R-ESRGAN 4x+ Anime6B" I recommend you use 0.45-0.5 if you use more than that it can change the base image too much.
"Latent (nearest-exact)" I recommend you use 0.51-0.6 you can change up to you.
- Upscale By
This is determined how many time you want to upscale so i recommend 1.8 to 2 times.
Prompting
For starters, I want you to use some negative embedding so you don't have to write long and boring negative prompts. I recommend EasyNegative here and following the instructions, or you can search for tutorials on how to use it. I'll make a tutorial for this later.
And I have a website for looking for prompts if you can't think of one here. This website has all kinds of prompts you can use to generate anime images.
First, prompts have an order of priority. The first prompt has more priority than the last prompt, but it doesn't have that much difference. I recommend putting a quality prompt at the start every time.
Quality prompts are prompts to get the best image possible. For example, I recommend you use masterpiece, best quality at the start every time.
For the negative prompt, you just use easynegative i told you earlier. It'll do all the work for you.
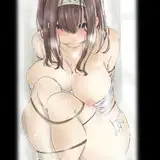
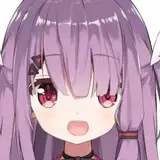
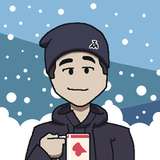
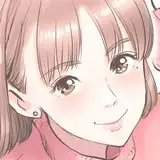
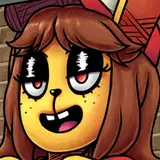
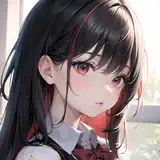
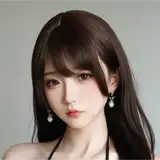
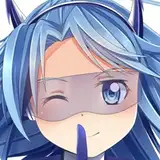
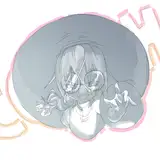
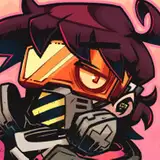
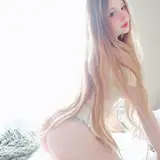
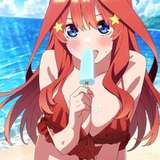
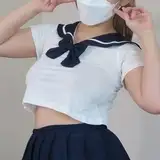
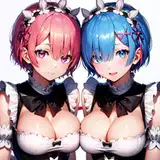
Here is example prompt and setting for you

Done!!, Congrats🥳🥳 Now you can create your own AI images by yourself. I'll make more tutorials for Lora and Extension later.
Download full-resolution images in this tutorial below