Hi Moika Students! Sorry for the long wait on my tutorials/step by step posts. I promise you all that more content is coming your way!
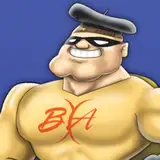
For today, I'll compile and explain the process of how I made my Bea animation. In this Step-By-Step explanation, I will put special care on the use of references and how important they are. Enjoy!
Format: 1080x1080 px (1:1)
FPS: 12 fps
Total frames: 16 frames.
Time it took: Around 3 days of work.
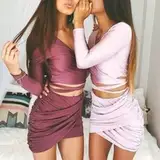
Step 1: REFERENCE

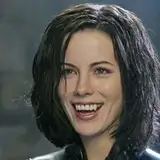
Remember this girl from 2012? She became a sensation back then thanks to her cute dance before running. Her name is Michelle Jenneke.
When I start an animation it it rarely comes from nothing or just pure imagination. I always try to think or look for inspiration. This one showed up while searching "sexy+woman+fighter+sport outfit" on google, or something like that. I loved it and decided to do a homage to it, because back then it was super popular.
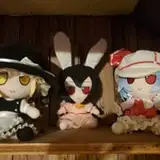
My use of reference doesn't stop there. I also compile a lot of pictures from the character that I will draw + anatomy references for parts of the body I am not an expert on.

For this, I use an amazing software called PUREREF (It's free, I think...)
It's super useful! Especially if you use a secondary monitor with it.
Step 2: STUDY/ANALIZE THE REFERENCE

I don't normally do this but since I wanted to make an "homage" to Michelle Jenneke's dance, I studied her moves by tracing a quick drawing on top of her "Main Poses". I focused on the position/angle of her hips and shoulders.
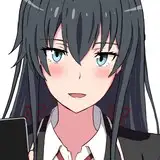
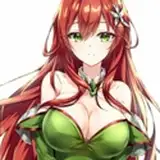
Then I made a drawing of Bea with Clip Studio. Trying to pose her and see the anatomy I was going to use.

Step 3: FIRST | MAIN POSES

This is the rough animation of the main poses. Mostly focusing on her anatomy and movement.
Step 4: BREAKDOWNS | FIRST INBETWEENS

I later added the breakdowns and main inbetweens to make the whole thing look smoother.
With this animation, and very similar to my Hex loop ( Check the step by Step here) I re-used/mirrored the first transition from one pose to the other. So the return it's the same animation as the beginning. I am mirroring it to save time.
Using this mirror technique is useful, but you'll still have to animate things that are not affected by the mirror, like her bunny ears or the design of her clothes. If those where just mirrored and not-redrawn it would look very weird. The animation of her boobs is also not mirrored.
Everything that is affected by the main body, everything that needs overlapping animation, has to be animated entirely and it cannot be mirrored.
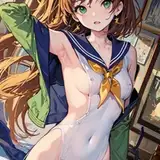
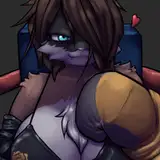
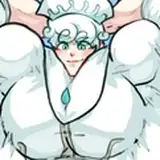
Step 5: TIDDIES! TIEDOWN AND FINAL INBETWEENS

The next step was to clean up her body. This is either a clean-up or a tiedown (More clear versions of the sketch).
Then I added the missing inbetweens to make the movement feel smoother. Enhancing slow-ins and slow-outs for the main poses and the pose here she is higher in her jump.
And then boobs! I ended up using a bit of mirroring. But I still had to animate them entirely to make the loop work.
When doing loops it's important to make everything fit and work together. It's important not to break the illusion that this is repeating forever and ever.
Step 7: CLOTHING


Clothes are so important! Even tho everyone wants to see the girls naked. Clothes are part of what makes them so attractive. Psss... don't tell anyone, but I prefer all of my loops when the have clothes instead of the naked versions...
It's just that clothes are complex and they give so much personality to who they are.
If you are an NSFW animator it's super important to work from the most naked version towards the clothes. And work in layers!
When you release your final loop you can play with your followers with stuff like: "Hey, if we hit 1000 likes I will remove her shorts!"
It's a fun game for everyone, and it helps you as a creator in a lot of ways:
I am not telling you that you should always do this, because they can easily get tired of this game. But I've done it in the past and it has been fun. And many other NSFW artists do it as well so it's a common practice.
But always set a limit for your Patreons or money supporters. So they can have the super extra exclusive nude to the bones version!
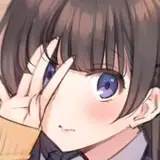
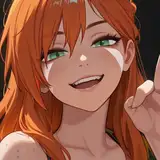
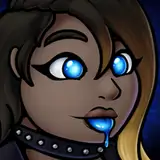
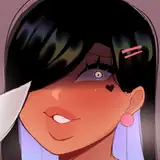
Step 8: FACE

So after everything is done I always work on her face. It's the most important part along with her boobs and ass. Everyone just stares at them, it's in our genes. So it's important to focus on them and put extra time to make them shine. Especially with the eyes!
But it's also important to:
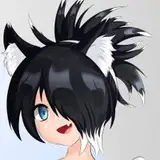
Step 9: ADD VARIATION!

I always add a BLINK, a change of expression or just a change on where she is looking at.
You've been working for many hours in your loop, what is an extra 1 or 2 hours to make it stand out from the rest?
That's what simple variations like these do for you. They bring more life to your characters. It's simple but super effective.
And that's it! I hope you liked my explanation on how I animated Bea.
I am actually very proud of this one, so if you read it this far, please drop me a comment or questions, or even suggestions for future tutorials. I would appreciate it!
Bye!
Jacob Wiese
2025-06-27 19:02:02 +0000 UTC