In this post I want to show the process of making a texture that I used in some of my work. This texture can be called dry grass. It can be done in any color scheme, but keep in mind that the higher the tonal contrast between the grass and the ground, the more expressive the texture will be.
The process consists of three stages.
1. Base. Applying the grass itself with light paint on a dark background. The paint must be sufficiently liquid and opaque. To make the paint more liquid, I add a medium. I use brushes with very long hair.
2. Glazing. After the first step dries, I apply a layer of glazing with transparent paint. It is better to apply the paint with a dry brush so that there is no excess of medium.
3. Volume. In the third step, you need to apply the same color that was in the first step. It is important to apply this on a still raw second layer. That is, the glazing should be not dried. In this case, the second and first layers are mixed and form a volume.
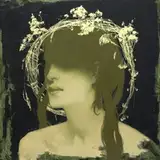
That's all it takes to create this texture. You also need to take into account the composition itself, the specificity of the lines, the alternation of the thickness of the lines and the direction of the lines. But it comes with the experience of observing nature and practical skills. I first used this method in painting “sleeping flower”, but in order to create such a texture, I had many paintings in which I tried to create the effect of dry grass, but they were not successful enough. It should be noted one feature that this texture becomes voluminous with the use of glazing, that is, in three stages, as in the video. Before I used one layer and of course I was always not satisfied. Perhaps this method will seem too easy, but believe me, I understood this method only on the sixth painting with such a texture. I hope you enjoy this video and find the information in it useful.
Thank you.