Here it is !! My first step by step drawing article. What is it ? Well, this article and images below will speak for themselves :)
*Here is a downloadable pack where you can find this same step by step to read it on your computer and find High Rez screen captures and notes.*
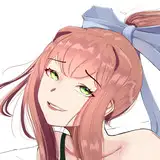
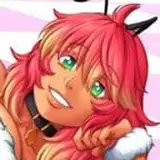
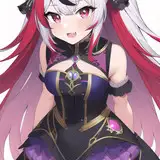
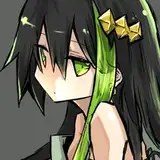
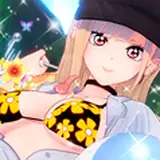
(this drawing is called Reylo, contraction of *Rey and*Kylo)
------------------------------------------------------------------------------------------------------------
How did I draw this ? :

Well...
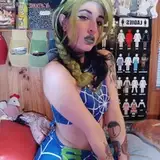
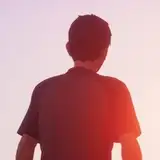
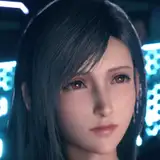
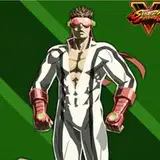
For a start, I look over the internet to find a picture that will give me inspiration.

Bingo ! when I saw it, I knew it was the one :). It had the feeling I wanted to transmit !
----------------------------------------------
Then, I collect a ton of reference pictures which will help me to get the atmosphere and characters spot on.

-----------------------------------------------
I watch carefully the first picture and draw what I see. This time, I draw directly on Photoshop , it's faster that way. When I draw on a piece of paper, I have to scan the drawing and get it clean before coloring.

I did a "without clothing" version but it wasn't what I had in mind. Then, with the eraser tool, I clean the lineart.


So far, I only use the brush tool. Be sure to have the "pen pressure" option activated on "size Jitter" in "shapes dynamics". I also use "pen pressure" on the "transfer" option when I want to give a sketchy vibe to the lineart. But later , when I get it clean, I only activate "size Jitter"

----------------------------------------------------------
When the lineart is ready, I need it to be on a transparent layer. Only the lineart will show. This will allow me to put the colors under it. I get all my drawings colored that way.
(download the pack for a full view) :

I name this new layer "lineart" and set it aside for now.
----------------------------------------------------------------
On my first layer ( the one with black and white) I select the characters and copy and paste them on a new layer. I name this layer "base" Then I delete the first one. I get this :

I select the pixels of this "base "layer and erase all colors with white :

The "base" layer will be the one where to start the coloring process !
----------------------------------------------------------------------
COLORING
First I add a layer which I name " color". I will only put my basic colors on it. When I create it, I select "use previous layer to create clipping mask". This option is VERY important.

I put the "color" layer in multiply mode.
----------------------------------------------------------------------------------------------------
Then, I add another "multiply" mode layer, named " shadows". I'll only put my shadows.
And then, another layer named "light" in "overlay" or "soft light" mode (depends what your are aiming for), where.....I'll put the lights :)
*You can create as much lights and shadows layers as you want.
----------------------------------------------------------------------------------------------------
The "lineart" layer will always stay above all the others, I put my colors on the layers under it.
Then I use the Eyedropper tool on a reference picture to have a reference color for the atmosphere and I start applying them on my "color" , "lights" and "shadows"layers.

-------------------------------------------------------------------------
Now this will not be about Photoshop tips. There is rules to apply lightning and shadows but this will be for another time. Now I let my creativity express itself. I Draw more details on faces with the help of reference pictures , I add shadows and lights layers etc...
I also add a background under the "base" layer. I find a free to use forest picture on google and apply a ton of filters on it to make it look like it was hand painted. ( this layer is not my priority)

--------------------------------------------------------------------------------------------------
Time for texturing :
Here is a *rar of the textures I used
Look at the different textures on the right panel.

--------------------------------------------------------------------------------------------------------FINISHING
Then I adjust the contrasts, colors and lightning settings on the overall picture:

ET VOILA !!
In the future, I'll also make drawing time lapse videos . If you have Photoshop questions you would like me to answer, feel free to ask. This could be the subject of my next article.
A bientôt !