My Corrective Shapekey Workflow
Added 2021-01-23 03:27:51 +0000 UTC In working on this latest project, I've really honed in on my corrective shapekey workflow. A corrective shapekey is frequently used when you have a pose you like, but said pose distorts the model in some unappealing ways (this is going to be pretty common when doing bondage stuff or when you want to push your expressions to extremes, so having a good workflow for corrective shapekeys is important).
I'd like to share this workflow with you; let me know if you have any questions!
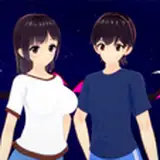
First off, we get the pose/expression that we want. For this example, we're going to be giving Tracer a nice, "default" laughter expression.
Watch the sped-up posing video.
With all the relevant bones selected, let's make a pose library and add this pose into it, so that we can use it whenever we like.

Remember to click the "Shield" icon so that Blender doesn't randomly decide to throw your library out! 😰
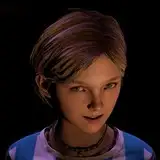
While this is a quality rig, every rig is going to have some limits/issues. As we can tell here, the eyelashes intersect with the face, the mouth corners don't close properly, and overall there's lots of little things we can touch up.
Before we jump in, we're going to make a new shapekey labeled "Laugh.Fix." Make sure all modifications are done under this shapekey! Very important. Also make sure the "Shape Key Edit Mode" button is selected, so that we can see our changes as we edit the mesh.

With this shapekey selected, I'll work in both sculpt and edit mode to make the necessary changes (bringing out the eyelashes, closing the mouth corners, etc.).
Watch the sped-up sculpting video.
As you can tell, the difference is night and day! We fixed the eyelashes and lips, curved up the eyebrows a bit, and overall made the expression smoother.

You can actually call it here, adding keyframes to the shapekey as needed, but of course this is going to be a rather tiresome process as you go about your animation (especially on a bigger project), so we're going to spend a little time and make it a lot easier (trust me, I've found out that while it's a bit of a hassle to "pretty up the process", "future you" will really appreciate it when you're in the dog-days on a big project and don't have to worry about these little things. The more you can automate, the better).
We're going to make a new bone that is going to control our corrective shapekey; I like to duplicate a bone from the face, move it to the left or right, and then parent it to the head bone (so that wherever the face goes, the bone goes).


In pose mode, we're going to add a "Limit Location" constraint to this newly created bone. Make sure "local space" and "Affect Transform" are both selected. You're going to leave everything at 0 save for the Y Location, which I've found works best at 0.2 (this is a matter of preference).

In the Drivers panel, we're going to sync up our shapekey with our newly created bone. The result we want is moving the new bone from it's Y-Location position of 0 up to 0.2 will interpolate through the new corrective shapekey (basically, an on/off slider).
These are the basic settings you want for your driver:

Using the picker tool, we're going to select our Tracer Rig, and then using the search tool, we'll search for whatever we named our new bone ("Laugh.Fix.Corrective" in my case). Remember to click "Update Dependencies" as well.

At this point you may be excited to try out your new shapekey, and become flummoxed as to why it appears to have no affect!

The distance the bone is traveling (.2 on the Y axis) is not enough to affect change in the shapekey, so we're going to add a "Generator" modifier in order to "fudge the numbers."

You may have to experiment with the values you put into the Generator modifier, but I've found that 80 on the X value is a good starting point.

It works! 🙌
This is, again, a point where you could call it, but there is ONE final step we can do to make our animation process easier.
Remember when we made our initial "Laugh" pose in the pose-library? Now, we're going to ADD this new bone to that pose, so that whenever we engage it, our lovely new corrective bone is added to the mix (again, make sure all the bones are selected).

By the end of a project, it's not uncommon for me to have dozens of poses in the pose library. These serve as great "starting points" in animation, and to use them effectively, you have to have an understanding of corrective shapekeys. I hope this breakdown has helped!
I'll be back soon with a new Exclusive preview of D.Va's Tickle Arcade as we get closer to release.
'Til then!