Hi Folks,
This month's video is all about weathering!

Let´s talk about how this video came about.
I had just finished my weathering class at the past Adepticon in Milwaukee. And my long-time Patreon supporter and friend Chris Schmidt walks up to me, we chat a bit .. and he sees the base in my hand.
And he goes, "Wow, that's just what I need for my current project!" Too bad the class was sold out, but I am sure I will find this video on Patreon!
And to my shame, the answer was: NO!
Weathering is such an essential part of our miniature hobby,
But I have realized that I have never done a video just dedicated to
weathering.
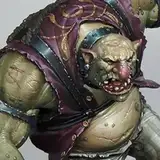
There are a lot of bits and pieces about weathering throughout the videos, like the rather exotic tea-stain weathering on the Nurgle bust or the weathering of Hank - the anti-robot squat sergeant.


So here we are!
Let´s talk about weathering:
In this episode of Straight from the Desk, we will focus on essential weathering with an all-acrylic set-up.
There is a whole industry around weathering products. There is so much stuff that it is almost overwhelming.
Oil-brusher, dry pigments, weathering pencils, enamel washes, real rust and oxidation products... and much much more files the shelves
And I think it is great to see that we can get a long way with our regular acrylic paint ...and not only because I am an occasional brushlicker ;)
So it´s good to keep your workflow solvent-free.
This essential guide covers those simple, yet convincing, acrylic weathering techniques focussed on damage and rust.
We are showing a whole degree of weathering and rust on our showbase.
The base is so open and large that it allows us to demonstrate more things and a model would do, or at least we can see it more easily.
All those techniques can be also used to weather any miniature model of your choice.
I have built the base like I do for my weathering classes.
Usually, my wonderful wife Kristin helps me with the mass production of the Cons!

It´s a simple and effective way to build a nice-looking show base that helps to give your model a bit of scenic context.
I have built this simple L-shaped backdrop base using a simple 3x3 cm woodblock and plastic wall elements from Mantic Games, some sand and superglue.
Most plastic products are super smooth and slick.

It can be advisable to add a bit of physical damage and additional texture detail to the surface, especially when you want to go for a heavily weathered scenario.
So this is also the first step that we are taking.
We are using a scalpel or exacto knife to add a few smaller scratches to the surface where we think they would occur.*
*Weathering is always showing something like a "timeline of usage". It is a super small form of storytelling, as it shows the level of usage of each element in the scene. For example:
How rusted are the hinges of a door can indicate if it´s opened regularly,
How well has the armor been taken care of, how dented is the hobbit's frying pan, it's the spaceship corridor still in use or is it a post-apocalyptic environment that has been rusting in the desert for a couple of hundred years... it's all up to the degree of weathering.
So think about that when you decide on your weathering!
 We are not only adding small scratches but we are also creating bigger damage, I am using the knife to not only cut in the surface but also create a jagged edge that I am bending up a bit to simulate peeling paint.
In the super heavily corroded area, we are applying a mixture of super fine graveled sand and super glue.
Those physical changes will help us to get a seamless blend between actual and painted-on surface damages, and lead to a more believable result.

In the next step, we are adding color to our scenery.
As you can imagine it would be hard to see orange rust on an orange armor or wall.
This means your weathering should always also react to the colors of the element you are weathering.
We are working with a cool base tone, this allows us to see all the impact of the warm rust tones the strongest.
We are starting with our base color and highlighting the more horizontal elements as I am going for a zenithal light scenario.
As chipped-of paint and also the scratches are supposed to look three-dimensional, so they also receive highlights, and the deeper ones even shadows. The direction of light needs to be the same as in the rest of the project.
We are continuing by adding chipped-off areas and deeper scratches with a dark red-brown.
The dark red-brown areas are the deepest layer of the underlying material.
We are using it to get smaller scratches done but also to expand the physical damage a bit.
In the next step, we are adding the highlights! The highlights are key to making the damage work.
It really determines whether the eye can be fooled or not. Try to make these highlights as thin as possible, always fitting the dimension and depth of the scratch.
In the next step, we are adding orange rust.
The orange rust is fantastic to show age, it's the typical rust that builds up where humidity/water can gather, in crevices, indentations, on horizontal surfaces ,and for sure it would also gather in the chipped areas.
I always like to imagine how water would run over the surface and where it would gather and spills over the edge.
This leads to beautiful leaking rust.
The leaking rust is a super neat element, it not only helps to connect whole areas , it also shows a certain direction of usage.
It reveals how the object has been standing most of the time.
If you imagine the direction of the leaking rust would be very different on the wing of a plane. The wind would it the wing mostly from the front so the rust would flow to the back of the wing instead of building up only horizontally around the bolts and rivets.
Keep that in mind especially when you paint models (or all moving objects like planes, vehicles etc). For example, if the rust runs down your raised space marine arm it will make him look like a statue rather than a moving something that is alive.
On the lower part of the base, we are painting super heavy rust.
As we want to create a surface that is so rusty that only a few bits of paints have remained, and it would make no sense to start to paint everything in the base color first.
We will paint the whole surface by over-diluting the orange paint on purpose. We are thinning it to a poit where the bond between medium and pigment breaks. This will lead to a super chalky finish.
Something that we want to usually avoid.
We can create a very natural look, as the pigments settle in the recesses similar to rust particles would do.
We are playing around with the intensity of the orange and even adding a bit of yellow/ ocher to create even heavier rust.
Once we are almost happy with the intensity, we add a few remains of the paint.
We are adding a final pass of the light orange rust, this time a bit more controlled to bind in the paint chips.
The last step is spicing up the weathering even a bit more by adding additional real-life gloss contrast with some glossy oil stains and metallic scratches.
We now have color contrast, value contrast, texture contrast, gloss contrast...
You can see how these different levels of contrast help to create something complex that is yet simple to achieve!

Alright, that was a rather long sum up :D
Now enjoy the Video!!
And as always thanks for your support!!
Silvio Martins
2025-04-29 13:07:32 +0000 UTC