download the attached .zip below to get access to the process pack of this piece (12 pngs + 1 gif).
funny thing about this 'painting' is that there wasn't actually a whole lot of _painting_ going on. i drew the lineart and painted on the finishing touches in much the same way as usual, but when i coloured it i primarily used the lasso tool and the gradient tool (and sometimes a big airbrush-type brush). it makes for a pretty neat, clean, and crisp effect - i hope you can get an idea of how i went about it by looking at the step-by-step process pics.
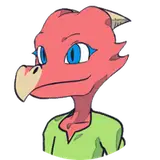
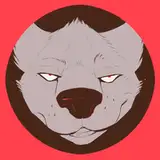
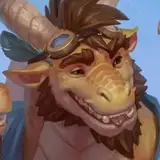
i start with the basic flat colours, on a separate layer for each character, and lock the transparency of those layers. i then use the lasso tool to select a specific area, and then use the gradient tool or a big airbrush to colour in the area or add a soft gradient. at step 4, for example, i selected luca's (the werewolf's) entire arm - but i only added the dark gradient to the lower parts of it, allowing it to seamlessly merge into the lighter colour of his body. using the same method, i also made his back and shoulders somewhat lighter than the base colour of step 3. on the other hand i also selected the lower half of his tail and coloured it in with a darker hue - and here i left a clear 'edge' between the dark and light fur, rather than a gradient. the same goes for the darker fur along his spine and on his face. whether you leave a soft gradient or a clear edge partly depends on the character design, of course, but also gives a different texture to the area in question; smooth and even vs scruffy and layered, long fur vs short fur, and so on.
so far, then, i've added luca's basic colours and the "main" big gradients (dark grey base colour, black legs/belly, lighter grey back/shoulders, etc). moving on to steps 5 and 6, i still use the method of selecting an area with the lasso tool and using an airbrush or the gradient tool to 'colour it in,' but as you can see the selected areas are getting smaller. in step 5 i added lighter hues to his back and arms to emphasize the musculature, leaving either a sharp edge or a soft gradient as i saw fit, and step 6 is all about adding the darkest shadows.
from then on it's "simply" a matter of adding more and more details, still using the same method, selecting smaller and smaller areas and adding either highlights or shadows to create texture and form. it's only at step 10 and 11 that i switched to a 'normal' brush and painted on some finishing details.
it's quite fun to use this method! it's different from "normal" painting - and it's fairly quick once you've got the hang of it.
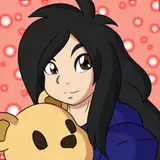
// art + stubs/luca © me; rin © kubi.