With the intense drawing load in June, it has been a while that I posted some Progress artwork. Please forgive me! This Artwork was done as Part of a Big Bang. It's a Pacific Rim AU, that you can [Read here]!
Let's go! As always, please feel free to ask any questions or suggest if you want a more deeper insight into anything. I can try to make a tutorial or video then!
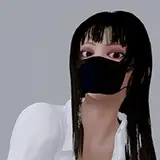
Step1 - Pose:
Because I was struggling with the Pose and the framing, I jumped into Magic Poser first. It is an awesome 3D posing app (works on my android and my ipad both) where you can pose several characters very realistically, and even can play with the direction of the light! It is beginner friendly, but I recommend playing around a bit to get comfortable. They even have basic shapes and certain props you can include (As I did with the gun and sword) I can not recommend it enough!
I got added two new characters to the scene and posed them till I was satisfied, then I rotated the Camera around to get the angle I wanted.
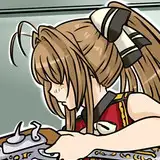
Step2 - Sketch:
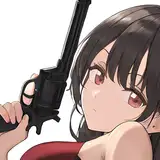
Based on the 3D pose and several References of their Faces, I did a sketch of the scene. As you can see, I went further in then the original pose, to make it more intense. Also, as always, I never sketch in black. A dark red/brown works best for me. And I know others that use blue or violet. It usually feels less restricting and less like I have to make a clear and final line.
Step3 - Lineart:
Using my favorite rectangular textured brush, I lined the whole piece, adding folds, details and the Background. What you don't see here is, that I usually do my whole linework in the same red/brown, and only when I am done do I color correct it to black.
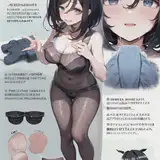
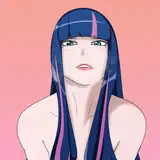
Step4 - Base Colors:
After using a clipping mask over the Lineart to color the lines of the skin in a reddish tone I block in all the colors. I try to have at least an idea already what Lighting I want to go for, because that helps to have an appealing color scheme in the end. Generally, I try not to get to colorful. This artwork has a lot of earth tones (browns and greens) and get's a bit of contrast from the blue
Step5 - Textures:
I added several textures. Some of them are pretty bold (like the back wall) and others are very soft ( like the skin). I use a mix of Textured brushes and png textures and fiddle around a lot with color and layer modes (may are set on multiply)
To make the textures of fabric look more realistic, I use the liquefy tool to follow the folds. Procreate has a feature where you can set the tool to "Borders", and that makes for a pretty nice sharp edged tool.
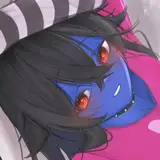
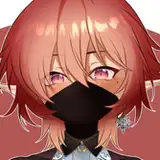
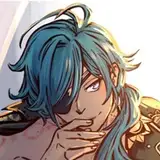
Step6 - Shading:
With a hardheaded rectangular brush that's set on 80% opacity, I give the features and cloths some depth. It always helps to look at references, especially when you want to capture a persons likeness. This kind of shading is key to sculpt the face. But don't go to dark! There will be real shadow added in the next step.
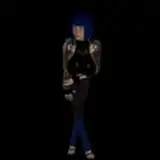
Step7 - Shadows:
I used several shadow layers on multiply.
One with a soft dark edge, so give the picture a vignetted look and draw attention to the faces. In this artwork it pretty much covers everything lightly, to give a gloomy vibe
The second layer has the harder shadows that that are actually are cast by the light, like under the chin and on the part of the body away from the light. I used a mix of de-saturated blues and greens for the shadows to contrast the skin tones and the violet of the plasma gun
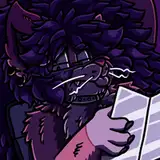
Step8 - Light:
The last part (and my favorite) is the lighting layer! On a top layer sat to overlay I paint the light over everything. I try to go a bit messy with it, because in my opinion that looks better then clean, defined lines. The color of the light dictates a lot of the mood in an artwork, so don't be afraid to try different options. My first intention was to go with blue light, but it made the scene to clinical, so I settled on orange in the end.
Also, in this case there is a secondary light source (the gun) so I had to paint in that light as well.
Aaaaand it is done! That pic took a bot more then 8 hours and I had a lot of fun with it! Hope the explanation was enjoyable and helpful! See you all soon! 💙
Klayr de Gall
2022-07-07 13:44:21 +0000 UTCBrookie
2022-07-07 08:22:11 +0000 UTCKlayr de Gall
2022-07-07 05:58:57 +0000 UTCchowbot
2022-07-07 04:12:34 +0000 UTC