Lesson for Illusion Artists and anyone interested
Needed Material GIMP 2.10.34 or above
Image legend - Post title/first image = IMG_0, next IMG_1, etc. (so you can check images in full size from post header, since patreon shrinks them unreadable in post)
🎨The Lesson - creating a individual phone chat display
As i mentioned in some previous post, i wanted to make a picture with a phone chat display in it, but all i could google was mostly stock pay trash or rather useless. So i went and created my very own template for that matter, a whole setup ready for simple usage. And You can do too. Yay!
The template was made in GIMP, so using it is mandatory in this lesson. The respective file is attached to the post. About copyright issues, just don't sell the source-file and we're fine. Use the template in commercial projects, no problemo.
The following tutorial is somewhat a GIMP introduction for dummies, if you know GIMP or similar applications, feel free to skip the tutorial and just load up the file, you should know your way around. Also the tutorial overall is more helping suggestion than imperative to follow. However, if there are some questions and uncertainties regarding my instructions, please let me know in the comment section, so i can adjust the tutorial accordingly. Suggestions are welcome too. It's somewhat text heavy, i hope that's not an issue for you, same as bad grammar or typos.
Enjoy your lesson ╭(~﹃~)~zZ
🔘 GIMP Overview [IMG_1]
With GIMP installed, open FoolBoyPhoneTemplate_v1.0.1. On the lower right you can see the Layers tab, which contains all the single elements/templates that form the whole picture of my phone and chat display, showed in the main tab in front of you. Those elements are named appropriately to help you with orientation and quick navigating. You can select and manipulate or rename any of them, but the lesson will mainly focus on the chat ones. An example outside this lesson would be selecting the phone_case layer and changing the color to your liking (top options menu Colors->Colorize). Important to note is that you handle the sorting of the layers with care, since it represents the order in which the single elements are displayed in front of you. So if one element seams to be missing on display, it might just be covered by a layer above it. By the way, those eye symbols in the layers tab represent the visibility of the individual layer, you can click it on/off.
🔘 Making Chat Avatar [IMG_1]
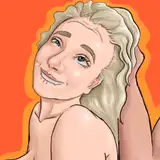
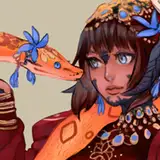
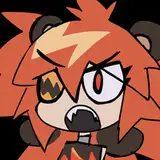
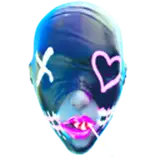
Copy your selected picture/cutout which you intend to use as a avatar for the chat app. In GIMP select Edit in top menu ->Paste as ->New Layer. Move this new layer above the avatar_template layer you wish to place your avatar in and reduce the Opacity (option in Layers tab), so you can see the avatar_template layer. From the toolbox in the upper left corner select Scale Tool and rescale your picture so that it fits the avatar_template sphere to your liking. Then select the avatar_template layer and the Fuzzy Select Tool from the toolbox. Click on the colored sphere and the tool should mark the whole one colored sphere as selected. Now select your resized picture and adjust its position over the selection (Move Tool in toolbox). After that go to top options menu, Select->Invert and press del on your keyboard. This should remove parts of your picture that are not meant for the avatar spot/sphere template. Next on top menu Select->None and fill the Opacity of your picture layer back to 100. Should your choosen picture contain some transparent sections, take avatar_template_01 and tina_avatar as examples. I left the avatar_template visible with reduced opacity as a basic background to fill tina_avatar transparent sections.
🔘 Making Chat Message Box [IMG_1/IMG_2]
Use existing chatbox layers as samples. Create a new layer, first option from the lower bar in Layers tab, default size will be of the whole picture, leave it as is, only important is that the last option Fill with is on Transparency, confirm OK. Select the newly created layer. From the toolbox select Rectangle Select Tool, with the same Tool Options (below toolbox) as in [IMG_2]. Now click and drag a selection-box into a shape to your liking/need in width and height, use the provided chatbox layers as samples. Now we have a empty selection-box on our new layer. Select Gradient Tool from toolbox, with the same Tool Options as in [IMG_2]. With this tool we will fill our chatbox with the foreground color changing into the background color. Those colors are defined at the bottom of the toolbox, you can select and change them. In my case i used the following color codes (optional for you);
owner chatbox: foreground f770b9 background fde4ef
member chatbox: foreground 6caf72 background dfeadf
Of course feel free to use your own colors. With your colors set and the Gradient Tool selected, we go to your previously created empty box-selection, click-hold on the left side just beyond the border, push-hold strg/ctrl button on keyboard to lock a horizontal angle and drag the mouse to the right side of the selection, just beyond the border and release the mouse. Your chatbox should be filled with color now. Optional but recommended, to make your box stand out more add some shadow. For that we go over the top menu Filters->Light and Shadow->Drop Shadow, Tool Options as shown in [IMG_2], or your own if you care. And that is it, chatbox ready.
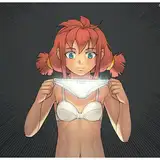
For a picture message use the same method as in Avatar Making, select and cut-out, but with the settings and instructions for the Rectangle Select Tool described above, without the coloring part and with the optional shadow drop.
🔘 Writing Chat Message Text [IMG_1]
Easiest part. Select Text Tool from toolbox and write your text a layer above your chatboxes, click and type, this creates a new text layer above your currently selected layer, Tool Options just take settings from my sample text layers. Or select my member_chat layers, select Text Tool and click on the respective member_chat layer text on display, then change it. Above your text also appears a options box, that is for locally selected text, mark specific passages in your text and change their appearance. I did that in lookalikelink_sample layer. Same procedure with timestamp layers or display_clock. Move and adjust the positioning of your chat text via Move Tool. The following fonts where used (optional for you);
chat text, timestamp, type a message box: Leelawadee UI Bold
display_clock: Fixedsys
chat_app, phone_OS: Ethnocentric Italic
To include emojis open Windows Editor App, in text field push WIN and . buttons on your keyboard to open the emoji tab. Select emojis you want in your text, then mark and copy them from the text field to your text in GIMP.
🔘 Finish It!
If you are done with the steps above, have all layers visible you want to appear in one final picture. Right-click on the top layer and select New from Visible. This will create a new layer with the visible sum of all layers below. With this final layer selected, go to File->Export As... and save the final picture in a format of your liking, preferably with transparency support. From there include it into your works as you wish. Or directly from GIMP strg/ctrl + C copy the final picture and paste it as a new layer into other pictures you have open in GIMP. Check the post gallery for examples of usage (will add more later).
Seeya next lesson. Bye (. ❛ ᴗ ❛.)