Hello Patreon members!
At least once a month, I plan to upload Blender-related breakdowns and tutorials here. The next post will likely be an introduction to the ARIADNE project.
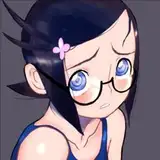
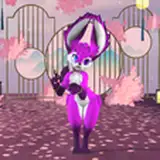
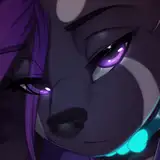
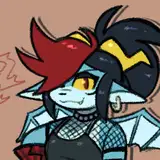
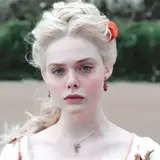
This time, I’ll be sharing a breakdown of Aria’s hair system.
This is the blend file.
Over the past few years, I’ve been exploring ways to create semi-realistic hair directly within Blender. Aria’s hairstyle is something like a long bob (or is it considered a short cut? Ladies—please tell me what the proper term is!), and getting it to move naturally has been quite a technical challenge. I really didn’t want to use the old particle hair system anymore—I’ve had enough of its instability. So I started exploring alternative solutions.
The method I’ve arrived at uses a proxy mesh with cloth simulation, and transfers its deformations to the main hair mesh using the Surface Deform modifier. Here’s a rough breakdown of the process:
1. Create the hair cards.
2. Convert the hair cards to a mesh (Object A), and assign vertex groups to the deformable areas.
3. Duplicate the assigned vertex group in place and separate it to create a new mesh object (Object B).
4. On Object B, reset the vertex group, then create a new group and assign weights for pinned areas.
5. Apply a Cloth modifier to Object B, assigning the pinned group as needed.
6. On Object A, add a Surface Deform modifier, targeting Object B and the corresponding vertex group.
Please refer to the breakdown video and the .blend file for more details.
Thanks so much!
※ To my international friends: I’m sorry that I still only speak Japanese! To make up for that, I’ve included a .blend file so you can follow along visually.
P.S.
I will explain Patreon and ARIADNE in detail in the next post. Also, this blend file is for viewing only, but in the future I plan to distribute freely available assets. Stay tuned!
-JPN-
Patreonメンバーのみなさんこんにちは!
最低でも月に一本はblenderの解説動画とチュートリアルが投稿される予定です。次の投稿はおそらくARIADNEのプロジェクトに関する紹介になると思います。
今回はアリアのヘアシステムについて解説です。
これがblendファイルです
ここ数年blender内でのセミリアルな髪の作り方について模索してきました。
特にアリアの髪型は長めのボブのようなもの(ショートカット?女性の皆さん それをなんと呼んだらいいか教えてください)で、自然に動かすとなるとすごく手間がかかり難しかったです。既存のパーティクルヘアーによるヘアシステムは使いたくなかった、もうあの不安定なシステムは懲り懲りでした。だから別なシステムを採用するとしたら何がいいだろうと模索していました。
今たどり着いている手法は、クロスシミュレーションされたプロキシの変形データをサーフェス変形でメインの髪の毛に移すという手法です。簡単な手順は以下の通りです。
1. ヘアーカードを作成
2. ヘアーカードをメッシュ化し(オブジェクトA)、変形する部分に頂点グループを割り当て。
3. 割り当てた頂点グループをそのままの位置に複製して分離し、別オブジェクト化(オブジェクトB)。
4. オブジェクトBの頂点グループをリセットし、新たに固定グループ用の頂点グループとウェイトを作成。
5. その後オブジェクトBにクロスモディファイアーを設定し、固定グループを指定。
6. オブジェクトAにサーフェス変形モディファイアーを追加し、オブジェクトBと頂点グループを指定。
詳しくは解説動画とblendファイルを参照してください!
ありがとう!!
※Patreonの紹介やARIADNEに関しては次の投稿で詳しく解説します。また今回のblendファイルは閲覧用ですが今後は自由に利用可能なアセットなども配布予定です。お楽しみに!