


日本語版はこちら: https://tsumayoji.fanbox.cc/posts/3803247
Japanese version is here : https://tsumayoji.fanbox.cc/posts/3803247
-------------------------------------------------------------------------
Let's create an original scene with our heroine and her enemies! 😆
It's quite long, so be prepared 😱.
One usable heroine and usable enemies are stone men and stone women.
Mmmm 🤔
...
Let's make it a scene where she is lying on her back and gets stomped on her stomach 🥰.
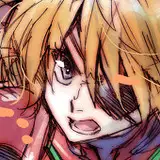
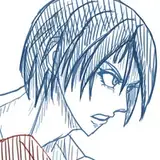
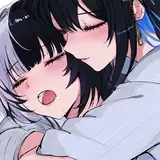
I like to make the heroine's expression look like she is in pain and glaring at the enemy 💖.
If you have a scene you want to make, you can read and reread it as you see fit ✨.
Here's what it looks like when I show the finished product first.
Let's make it then😊.
The first step is to load the items to be used.
You load the ground and the mountains.
Then load the heroine (use your favorite heroine ✨)
First, let's reset the heroine's pose.
With [Ultra Wendy] selected, double-click [0_Zero] under [My library -> tsumayoji -> FreeHeroin -> Poses -> FullBody].
By the way, [flying], [laying], [sitting], and [standing] under [FullBody] are part of the pose sets I have distributed in the past. If you have a pose that is close to your image, I recommend applying it and fine-tuning it, as it is much faster than creating one from scratch.
In this article, I will create the poses from scratch to explain how to apply them.
Now, let's put together a pose for the heroine.
The key points to make the pose are as follows
・First, adjust the angle of the [Hip] and [Pelvis].
・Next, adjust the part of the body in contact with the ground.
When posing, when standing
1. [Hip] and [Pelvis]
2. Legs
3. Torso (Abdomen, Chest)
4. Arms, Hands, Head
The order of the poses is recommended.
When lying down
1. Hip, Pelvis
2. Torso (Abdomen, Chest)
3. Legs, Arms, Hands, Head
This order is recommended.
The reason for moving the "hips and pelvis" first is that moving them will move both the "torso" and "legs" into position.
Of course, it is never decided at the beginning, so it will be adjusted later, but it will be easier to create a rough pose once it is decided.
Now let's adjust "1. Hips and Pelvis".
Since the target pose is lying down, set [X Rotate] of [Ultra Wendy -> Hip] to [-110.00].
The image is a bit like a "bend back" when the belly is stepped on, so the tilt is deeper than [-90.00] right next to the belly 😉.
Let's lower it so that the hips touch the ground.
In the same way, set [Y Translate] of [Ultra Wendy -> Hip] to [-96.66], which is just enough to make the hips dip a little into the ground.
The torso is stuck in the ground, so we need to raise it up 🤣.
Select [Ultra Wendy -> Hip -> Pelvis] and adjust [Waist Bend] under [Pose Controls -> Torso] in the [Parameters] tab at the bottom right to raise the body.
I set it to [42.3%] so that the waist line is somewhat straight.
I kind of straightened the waist line and the upper body floated, so I adjusted the [X Rotate] and [Y Translate] of [Hip] again so that it touches the ground.
Result
[X Rotate] = [-115.12]
[Y Translate] = [-98.16]
Next, the feet!
Select the [Universal Tool] at the top of the screen and pull (drag) the heel of the foot with the mouse.
Pose the feet to some extent while rotating the camera.
Turn the camera and move her feet, repeat.
Let's turn her inward a bit.
This is difficult to do with the mouse alone, so we will use a dial to adjust.
Select the right thigh and move [Side-Side] a little in the positive direction and [Twist] also a little in the positive direction.
I also adjusted [Side-Side] and [Twist] on her left thigh, as well as her right thigh, and moved it around with the mouse to get a nice inner thigh 😉.
In addition, let's bend her ankle 🥰.
Select the heel of the left foot and move [Bend] in the positive direction.
Her ankle is now bent✨.
Her right ankle heel is also slightly bent, and the current situation looks like this.
Next, let's make a face.
The facial expressions will give you a lot of motivation 🤤.
We'll use the expressions that have been prepared in advance.
Select [Ultra Wendy] and apply your favorite expression from [My Library -> tsumayoji -> FreeHeroine -> Poses -> Face].
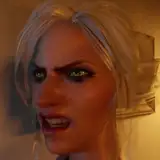
I applied [5_Pain3].
Tilt the face slightly.
Click on her face to select it, then adjust [Neck-Head Bend], [Neck-Head Side-Side], and [Neck-Head Twist] in [Pose Controls -> Neck] to pose her as if she is in good pain.
※You can also tweak the facial expressions in the [Pose Controls -> Head] section of the face. Let's give it a try if you are a seeker 😉.
Now, we want the heroine's hand to touch the enemy's trampling foot, so we move once to the enemy's pose here.
Press [Ctrl + S] to save the scene.
If the pose you have created is lost, you will cry.
First, load the stone man that will be the enemy.
Double-click [Stone_Man] in [My Library -> tsumayoji -> FreeHeroine -> Enemies].
Move the stone man to a position where it would be easier to trample the heroine.
Select [Stone Man] and make the following changes.
[XTranslate] = [-16.47].
[Z Translate] = [9.63]
[Y Rotate] = [131.67]
I think we can leave "1. hips and pelvis" as it is this time.
Let's make a pose for "2. legs.
Start with the left foot on the ground.
Place the left foot in a position where it will not lose its balance and fall.
Move the heel with the mouse as you did with the heroine.
Check from the side.
The heel is not level with the ground, so select the left heel and adjust it with [Bend].
If the feet do not touch the ground, use [Stone Man] or [Stone Man -> Hip] and [Y Translate] to adjust.
Once his left foot is firmly on the ground, now place the right foot on the heroine's belly 😊.
Move it with the mouse, select the heel and adjust it with [Bend],...
From the back, he is somewhat unbalanced.
Select the thigh and adjust the angle, etc.
Now his toes were digging into her belly, so he adjusts the angle 😥.
He step on her.😐
Create the pose of the upper body.
First, the torso. Make it look as if it is looking down at the heroine without expression.
Select [Pelvis] in [Stone Man] and adjust [Waist Bend], [Waist Side-Side], and [Waist Twist] from [Pose Controls -> Torso].
Next, move his head so that he is looking at the heroine.
Click on the head to select it, and adjust [Neck-Head Bend], [Neck-Head Side-Side], and [Neck-Head Twist] in [Pose Controls -> Neck] to make it face toward the heroine.
Make a pose for the arms.
Leave them hanging down lazily as they have no particular role to play😊.
There are a few more steps to making arm poses.
First, click on the shoulder and click on the pin symbol.
Then click on [Pin Translation].
In this way, the hands can be moved with the mouse in the same way as the feet.
Pin the right shoulder in the same way and move the arm.
His hand is straight out, so let's make it a relaxed hand pose.
Select [Stone Man] and double-click [1_Relax_L] and [1_Relax_R] in [My Library -> tsumayoji -> FreeHeroine -> Poses -> Hand].
These hand poses were created for heroine, but can be applied to almost any figure 😉.
The pose on the enemy side is now complete.
Finally, the pins should be removed. If you move the body with the shoulders pinned, the pose will collapse.
Select the appropriate part of the enemy stone man, click on the pin, and select [Unpin All] to remove all pins.
Now, it's been a long time coming, but with the heroine's hand, it's going to be done!
Let's save the scene by pressing [Ctrl + S] to overwrite the scene.
It will make you cry if all the work up to this point comes to nothing!
※[Ctrl + Shift + S] to save as another name. This is also often used.
The method of moving the heroine's hands is the same as before.
Click on the shoulder, pin it, and move the arm.
I pinned her left and right shoulders and moved her hands to the vicinity of the enemy's feet.
We have prepared a pose of a hand grasping a thick object, so let's apply it.
With [Ultra Wendy] selected, apply [6_Grab_Flat_L] and [6_Grab_Flat_R] in [My Library -> tsumayoji -> FreeHeroine -> Poses -> Hand].
From here it's all about spirit 😭.
Move the heroine's hand along the enemy's leg.
Use the mouse to move the hand, [Twist] on the forearm, [Bend] [Side-Side] [Twist] on the hand, etc. to move it to a good position.
In these situations, it is useful to select "Hands" and press the "Frame / Aim" button in the upper right corner, which will cause the camera to rotate around the selected object.
Once the palm of the hand is in a good position, it is time to fine-tune the fingers.
There are two ways to move the fingers.
One is to use [Pose Controls] on the hand. The other is to fine-tune each joint of the fingers.
The former will usually do the trick, but if you want to be more particular, you will need to do the latter as well.
In a spirited effort, she laced her fingers along her enemy's leg 😭.
I managed to get her hands along her enemy's legs.
In the case of this kind of tedious work, it is also possible to just position them appropriately if they are not in places that will not appear in the final image.
Even in the image I created, there are places where the feet are dug into the ground that are not in the picture, or there are punches that look like they hit from an angle but actually did not.
It's a struggle for the creator 🤣.
Don't forget to save the scene with [Ctrl + S] to overwrite it after all your hard work!
The work done so far has completed the rough pose.
I will fix the areas of concern.
First of all, I will fix the position of the heroine's eyes because she is not looking at the enemy.
And we also fixed her facial expression 🤣.
Select the heroine's face and choose [Pose Controls -> Head -> Eyes].
Then modify the parameters as follows.
[Eyelids Lower Up-Down] (the top one) = [100.0%].
[Eyes Closed Left] = [46.5%].
[Eyes Closed Right] = [23.3%]
[Eyes Side-Side] = [100.0%] (I changed it to 80.0% later.)
The other thing is that it's been a little while since she was trampled, so it's odd that her feet are floating forever.
So, we put her feet down on the ground.
Their pose is complete!
Let's raise our blessing and at the same time [Ctrl + S] to overwrite and save the scene!
Now it's time to finish the scene.
Let's make the heroine pretty by adjusting the way the light hits her and so on.
First, apply the recommended rendering settings.
Double-click [Normal] in [My Library -> tsumayoji -> FreeHeroine -> RenderSettings].
Then press [Ctrl + S] to overwrite and preview the iray.
Save the scene before you start, especially since DAZ Studio may crash during iray preview!
Once you have an iray preview, go to [FreeHeroine -> HDRI] and select the light condition ✨.
I recommend [00_Default], [02_Sunny1], [06_Smooth1], and [07_Sunset7].
This time, I chose [02_Sunny1] because it was daytime.
But,,, oops, the enemy's shadow covered the heroine.
Move the position of the sun to find a position where the heroine's face can be seen clearly.
In the [RenderSettings] tab, go to [Environment] and change [Dome Rotation] to find a good position. The result is [20.00].
This completes one scene.
Congratulations! First, let's save the scene by pressing [Ctrl + S] to overwrite it!
Move the camera around, find a good viewpoint, and set up the camera!
If it's your favorite scene, you can put the camera there as much as you want 😆.
Once you have placed many cameras, press [Ctrl + S] to overwrite and save!
And then render!
Oh,,,wonderful🥰
Mmmm... I'm starting to want to play some more...!
Let's turn the color timer to red!
Ultra Wendy is not weak enough to be defeated by one stone man! Let's get some more enemies!
She's in a pinch and she needs to be stomped and look like she's in pain!
So I'll save the scene as an alias and make a difference.
I did it in Step 2 how to change the color of the color timer!
To add more enemies, just load new enemies and pose them.
I have also prepared a pained expression, so just apply it.
So, this is what I ended up with.
No wonder she can't win in 1vs5 🥰.
What is her fate, and...
-----------------------------------------------------------------------------------------------
So this is how I usually make my images.
How was it😮?
I hope this tutorial will be of some help.
If you have any questions, please ask 😊.
Have a good DAZ Studio life and a "pinch of heroine" life.
Thanks for completing this long tutorial! 😆✨
g-s-t
2022-05-19 11:06:09 +0000 UTCg-s-t
2022-05-18 16:31:30 +0000 UTCWinstone
2022-05-08 14:11:38 +0000 UTC


