Hello loves! (ノ´ヮ´)ノ*:・゚✧
I hope your day is going well so far~ Can you believe it's already been a full year since the first Mermay we traversed together? o_o I barely can, but I'm happy to share that I'm participating in Mermay full force this year as well and am dedicated to finishing the challenge and presenting you with another 31 mermaids! >:D
I wanted to share some tutorials with you regarding my traditional work since my process has changed a bit since last year. Before we move forward, here are a couple of copic tutorials I've posted in the past to give you an idea of my general process:
How I plan out traditional artwork!
I still stand by these methods so I encourage you check them out if you're interested! ^^
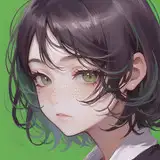
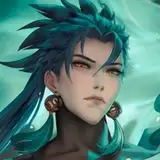
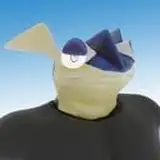
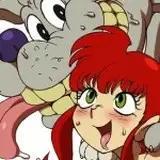
Let's start with the first Mermay I did this year. Mindset-wise, this one was the closest to how I previously approached traditional work so I think it'll be a good transition.
1. Sketch

I always always always start with a pencil sketch when working traditionally. I'm the type of person who really likes to plan things so it's no surprise. I make sure the sketch is relatively tight, as in 95% of the drawing is set and I have a good idea of how the finished product will look. I leave 5% wiggle room for happy surprises. :)
2. Lineart

This is the step that I've started to change. I used to ink every line I sketched and create a very bold and heavy look. But this year I've been more interested in a softer vibe and have been more selective with what I choose to ink. I started off by inking the parts that I know for sure I want to stand out (usually the face and tail) and kept the rest untouched so I could adjust as needed.
3. Color

Another step that I've changed is the way I color pieces. I used to exclusively use copic makers and call it a day, but lately I've liked the different textures that new mediums can bring to the table. Using a combination of markers and color pencils I add color to the piece and purposely avoid uniformity in order to make the piece more visually interesting. Marker tends to create a heavier look as well, so I applied color pencil to create gradients and blurs.
4. Details

This is always my favorite part, adding the finishing touches onto any piece. Whether it's drawing in scales with white gel pen or adding a background, small details can really help tie a piece together and make it look complete.
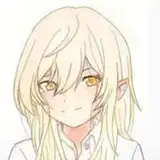
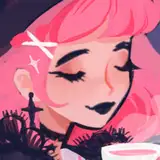
I also took some process photo's for Day 2's piece! :D The process and approach is the same as Day 1 unless otherwise noted~


Note how the areas not lined in black tend to look softer and more faded than the areas that are lined. Use this effect to your advantage.

One of my favorite additions to this year's material repertoire is my gold calligraphy pen! I use the one made by Pen-Touch Sakura and I highly recommend it! Since it's a calligraphy pen, it has a square nib rather than a brush nib so it can be tricky to get defined tips. However, the pigmentation is amazing, the pen is so easy to use and it's really affordable! I like using it to add in details at the very end (you can't really draw over it) to add a special bit of shine and sparkle to the piece. ^^
I hope that was useful! Let me know if you have any questions down below and I'll be happy to answer them. >:3
For those interested, I'll have postcard prints, originals, and (fingers crossed!) a zine of this year's Mermay available in my store next month mid-June! :D Thank you so much for your support so far, I've really enjoyed sharing this month's creations with you and it's wild to think that it's already halfway over! You can follow my journey this month on either Twitter or Instagram. I'm deeply humbled that I have the opportunity to participate in this challenge with you and look forward to how we'll continue to grow as a result of this time.
I love you lots and hope you have a great day! (ノ。≧◇≦)ノ
Vicki
Vicki Tsai
2018-05-22 17:43:01 +0000 UTCVicki Tsai
2018-05-22 17:42:33 +0000 UTCKatyenka S.S.
2018-05-18 17:57:30 +0000 UTCFelicia Marie Herrera
2018-05-17 23:07:23 +0000 UTC