Well you've all been asking for it, so here it is. The long overdue guide on bringing your screenshots and overall experience to the next level. If you can follow this guide correctly you should be able to make your screenshots and characters look like mine.
STEP 1: Get ReShade and subscribe to MartyMcfly's Patreon
https://www.patreon.com/c/mcflypg/home
Pay the $5 to become a RayTracer Member, and download his iMMerse pro shaders.
STEP 2: Get Stopper's Light Plugin
https://hub.virtamate.com/resources/light-options.37554/
This will allow you to crank up the shadow crispness for better lighting. For maxing out crispness I set resolution to 14, bias to 0.00060 and near plane to 0.16 - this will give you maximum clarity. DO not set resolution any higher, or your game will slow to 3 fps. For animated scenes I will lower resolution to 13 for a slight performance boost.
STEP 3: Use a high quality photo with a high FOV for your background.
I recommend using your phone to take a nice photo of an area in your home for maximum realism, and import it into VaM via an ImagePanelEmmissive. Keep it simple, with only 2-3 light sources maximum. Alternatively find a nice picture from google image search. The attached image was found with "interior design bathroom" and advanced search "Larger than 4MP" as the only criteria. It would make a fantastic backdrop for your character.
In your image panel emissive settings, turn up specular and turn down gloss to make the image as bright/dark as you want.
STEP 4: Add your character to the scene
Now Place your Character in front of the photo. Play around with the scale of the image panel and the proximity of your character from the image. Adjust the in game Field of View slider as necessary, I find that wide angle pictures look best when using a higher FoV in game between 50-70.
STEP 5: Creating realistic lighting to match your photo
Look at your background photo. Where are the light sources? What is your character's relation/orientation/distance to the light sources? In my example screenshot, there are 3 invisible lights. One point light representing the sunlight from the window flooding the room with high intensity and medium shadow definition. Another point light near the cabinet representing the reflected ambient light from the wall, with low intensity and low shadow definition.
The third light is a spot light placed very close to the window, with low range and high shadow crispness. This is necessary because VaM's lighting model doesn't draw shadows realistically, where they are crisper the shorter they are, and more diffuse the father they are from the object. So we can work around this by layering two lights together and making one long range and diffused shadow, the other short range with crisp shadow.
(Don't worry, VaM2 will have a correct shadow/lighting model)
STEP 6: Understanding ReShade Shaders
Now it's time for our shaders to start doing the work. If you don't know how to use/install reshade you need to read this first.
https://hub.virtamate.com/resources/vam-desktop-reshade-rtgi-guide-2024-presets.45882/
Now that you have Reshade working properly and have downloaded/installed the correct shaders, I will explain what each shader does to add to the image:
Immerse Launchpad: Part of Marty's shader package, necessary to make his shaders work properly
UiMask: allows you to mask off the game's Gui for easier usage
Monocular Cues: Adds definition and contrast to the image. Dramatically affects the visuals depending on placement in the load order
iMMERSE RTGI: Adds Global illumination lighting and Ambient Occlusion. The AO is more for environments than characters so keep it very low (1-2.0) but the GI is very powerful so set it between 1-3.0 for subtle but effective lighting
iMMERSE Clarity: Allows you to play with sharpness/contrast, can dramatically change the look of the scene
iMMERSE Solaris: Subtle Bloom effect. Keep the Bloom to a minimum for maximum realism
iMMERSE MXAO: Powerful Ambient Occlusion that works great on Characters. Set it very low for subtle, sharp shading.
MXAO MK2: Older version of MXAO that is still useful when layered with iMMERSE MXAO to create broader, less defined shading
Bilateral CS: Texture Smoothing/Sharpening that can take the rough edges off your textures when used correctly
PPFX SSDO: Even broader, more ambient shadows that will continue to layer with the other AO shaders for realistic lighting in recessed areas of the model. Very powerful, keep the settings low
Glamarye Fast Effects with Fake GI: Another Global illumination shader that adds warmth to the lighting of the Scene. Combined with RTGI it is critical to making skin tones look alive and not cold/dead
MultiLUT: LUT shaders to saturate/desaturate the colors depending on what you're going for
Border: Adds black bars either horizontally or vertically to your game. It is important for screenshots because it helps keep your image file size down by removing unnecessary screen space.
Depending on how you arrange the shaders on top of eachother can have a strong effect on the final image. Experiment!
Step 7: Strive for realism and know your shortcuts
If you're looking at your character and you see things that look weird/unnatural, just keep working on it. Your brain is programmed to appreciate beauty by default and you will very quickly enter the Uncanny Valley if you're following this guide correcty.
https://en.wikipedia.org/wiki/Uncanny_valley
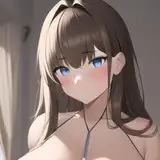
To cross the valley you may need to take shortcuts. This can be as simple as keeping the character's face out of frame. The face is by FAR the hardest part to make realistic. So if you don't like the way your character's face looks, just keep it out of the image!
https://hub.virtamate.com/resources/mask.49821/
Another shortcut is to simply morph your character to look good from the desired angle. This will open up a whole new way for you to sculpt. If your goal is to create a fully realized 3D Character that can be viewed from any angle and look realistic, you are up for a serious challenge.
If you move the goalposts/finish line to just creating a beautiful screenshot, you will find that to be much easier to achieve and just as satisfying. So don't get caught in the trap of making every single area of your characters' sculpt look perfect. Just make a good screenshot.
Conclusion
I hope this has been helpful and enjoyable. If you can follow this process closely, you too can create the characters of your dreams and bring your imagination to life. It took me many, many years of Vamming to get to this level of understanding and I hope this puts you on the fast track to having what you want.
Let me know if you have any questions! Thanks for reading! I look forward to seeing what you do with this information!!!