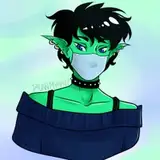
![Some Notes on Colors [Felicia Pinup / Process Breakdown]](https://img5.xaiju.com/storage/1/oa/un/d38796-019e8595-5311-7b2c-8d0c-11be89b65b79.png)

When I did my last attempt at explaining my working process, it was on a piece with fairly simple colors, so I thought it would probably be worth going through the colors in a little more detail on something more complex.

Here, I’ve got my clean (ish) lineart and filled a layer underneath it with 30% grey as a base. If your lines are clean enough, you should be able to select the area(s) you want with the wand tool, but if you like a textured line, you’ll probably need to do this manually with the lasso or just by painting it in by hand - whatever you feel most comfortable with. I’ve also spotted the darkest parts of the picture by filling them with the lineart color on a new layer, then reducing that layer’s opacity to around 85%. You can use full black for lineart and spot areas if you want, but I find that using dark greys will make it easier to tint these parts with color later on.

Shadows! If you like to work dark into light, you can just draw your shadows straight onto the layer above the base, but I prefer to set a clipping layer above the base filled with my shadow tone (about 50% grey) and then mask out my highlights with the lasso. Note that because the spot layer from the last step has that little bit of transparency, I can add shadows to it on this one, which was useful on the bottom of her breasts.

If you’re suitably confident when choosing colors, you probably won’t need to go through all the greyscale steps, but if you’re like me and can’t choose good colors to save yourself, this method tends to be more forgiving. Here, I’ve set a new layer above the lineart and made a new selection using both the base layer and the lineart. Fill your new layer with a skin color (preferably not too saturated), lock the transparent pixels and set that to ‘linear light’. You’ll probably need to play around with adjusting that color for a little while to get close to what you want, but I find this is the quickest way to get a good base color without breaking the lighting setup you’ve established in the grey layers. The linear light blending mode will also create a little hue variation in how it affects the different values underneath it, just gives your picture that extra visual interest.
Once you’ve got your skin tone, select any areas you want to be a different color (the hair, for example) and repeat the process on the same linear light layer.

If your colors are already working, you can skip this, but I find that setting a gradient map above the linear light layer will work wonders for color harmony. I’m just using this red/gold preset because I’m a basic bitch, but experiment with your own combinations. Broadly speaking, the color you set on the left will affect the shadows, the color you set on the right will affect the highlights, and everything in between will affect the mid tones. At 100% opacity, the gradient map will turn everything into the colors you set it for, but if your knock it back to around 50% or less, it should mix nicely with the colors you chose in the last step.

If you like the tint you’re getting from the gradient, but something still feels off or you want to change something, you can always fine tune the colors on the linear layer. Just pick what you want to adjust with the wand and use the hue/saturation sliders.

Now the fun part! I always think it’s the bright highlights that really make a picture feel alive. Again, I’m avoiding pure white here, picking a color that’s just slightly below it.

And we’re pretty much there! The colors were still a little drab, so I’ve added an adjustment layer to raise the saturation. Playing around with the background, I’ve also settled on a pink fill layer underneath everything else for that old-school Dirty Pair vibe, along with some rim lights on the edges of her abs, to help attract viewers’ attention.
So yeah, if you made it to the end of this wall of text, hopefully that was helpful? If there’s anything you guys want me to ramble about in future, please just drop a comment below.
Solid Pawn
2025-07-02 01:16:13 +0000 UTC