


This section describes the rendering method.
The file “Shiranui_v1_250308” is used for the explanation.
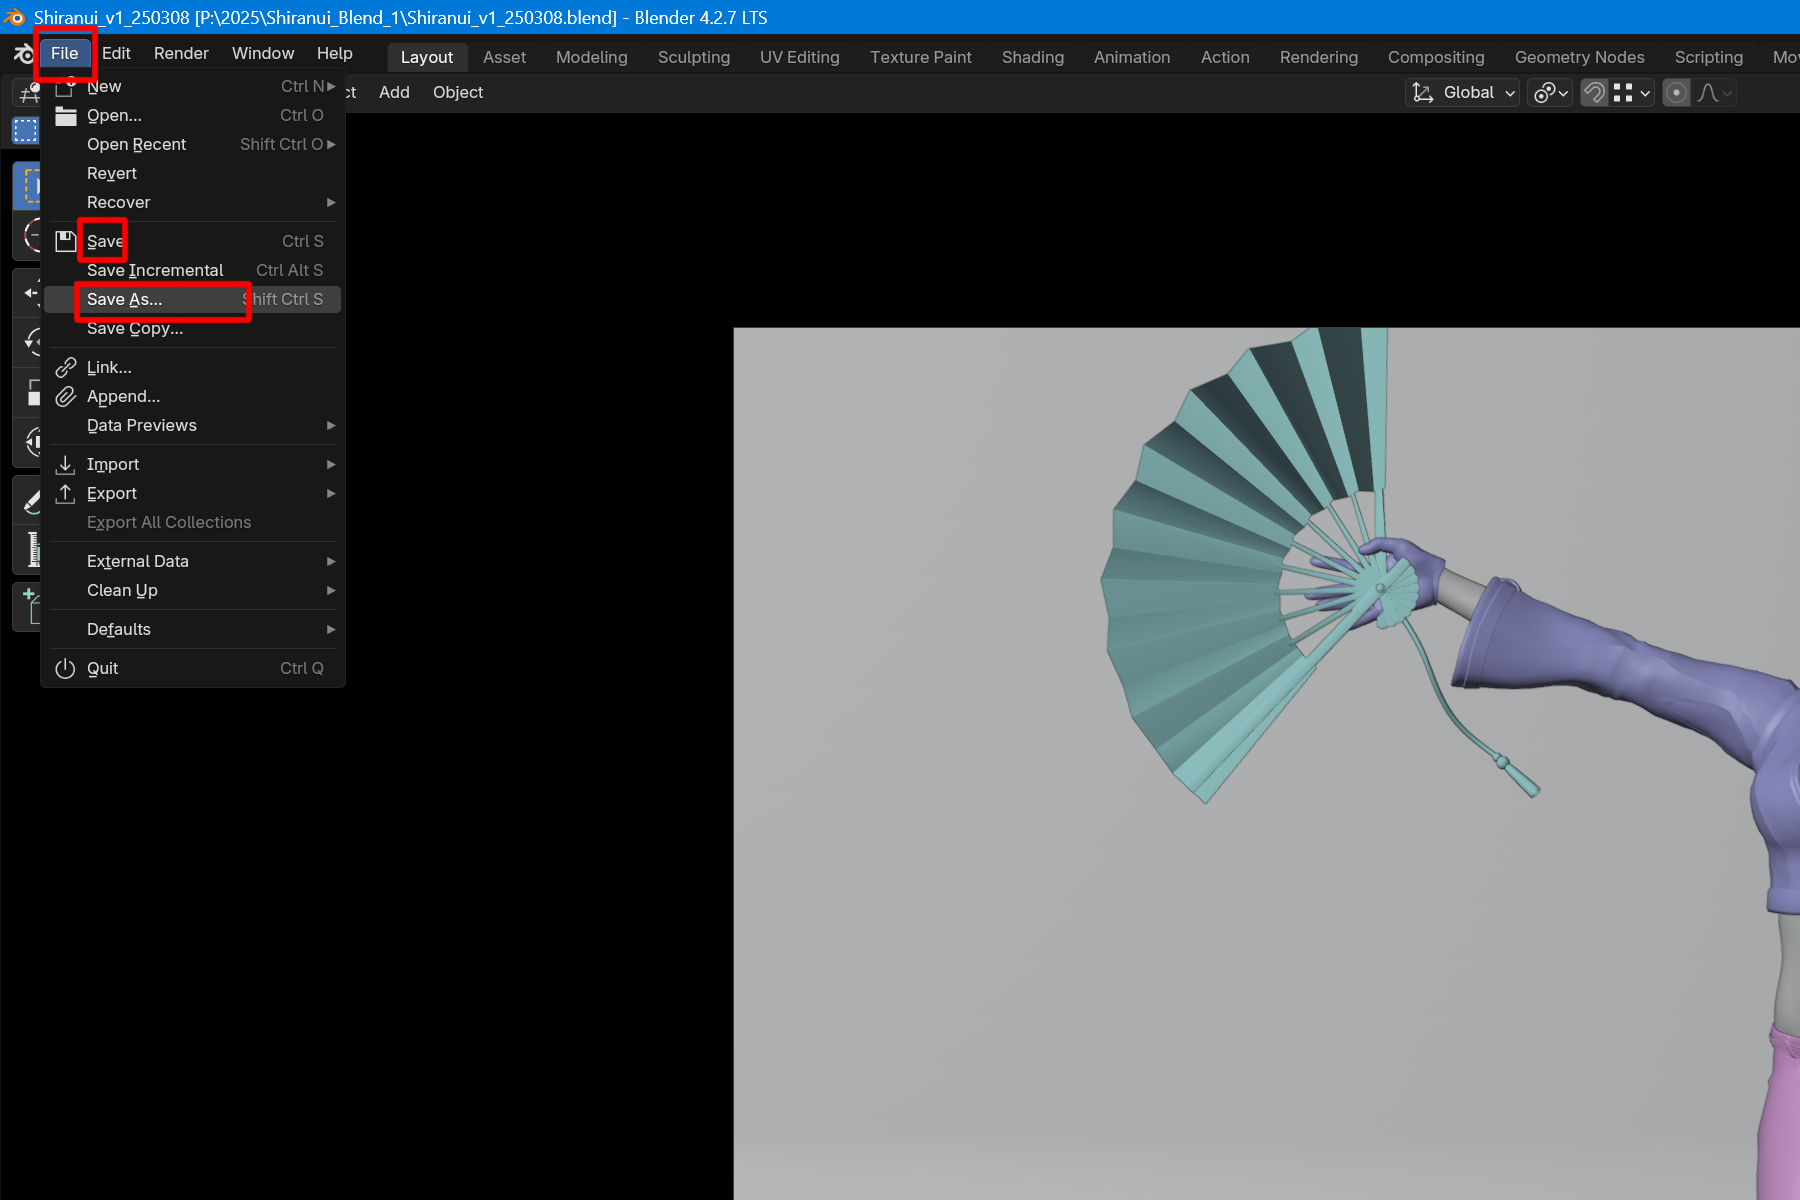
Save the file before starting rendering.
Rendering is very demanding on your computer and may cause errors or Blender to crash.
Click File on the top bar and choose Save or Save As.
Save the file to any location.
File > Save or Save As
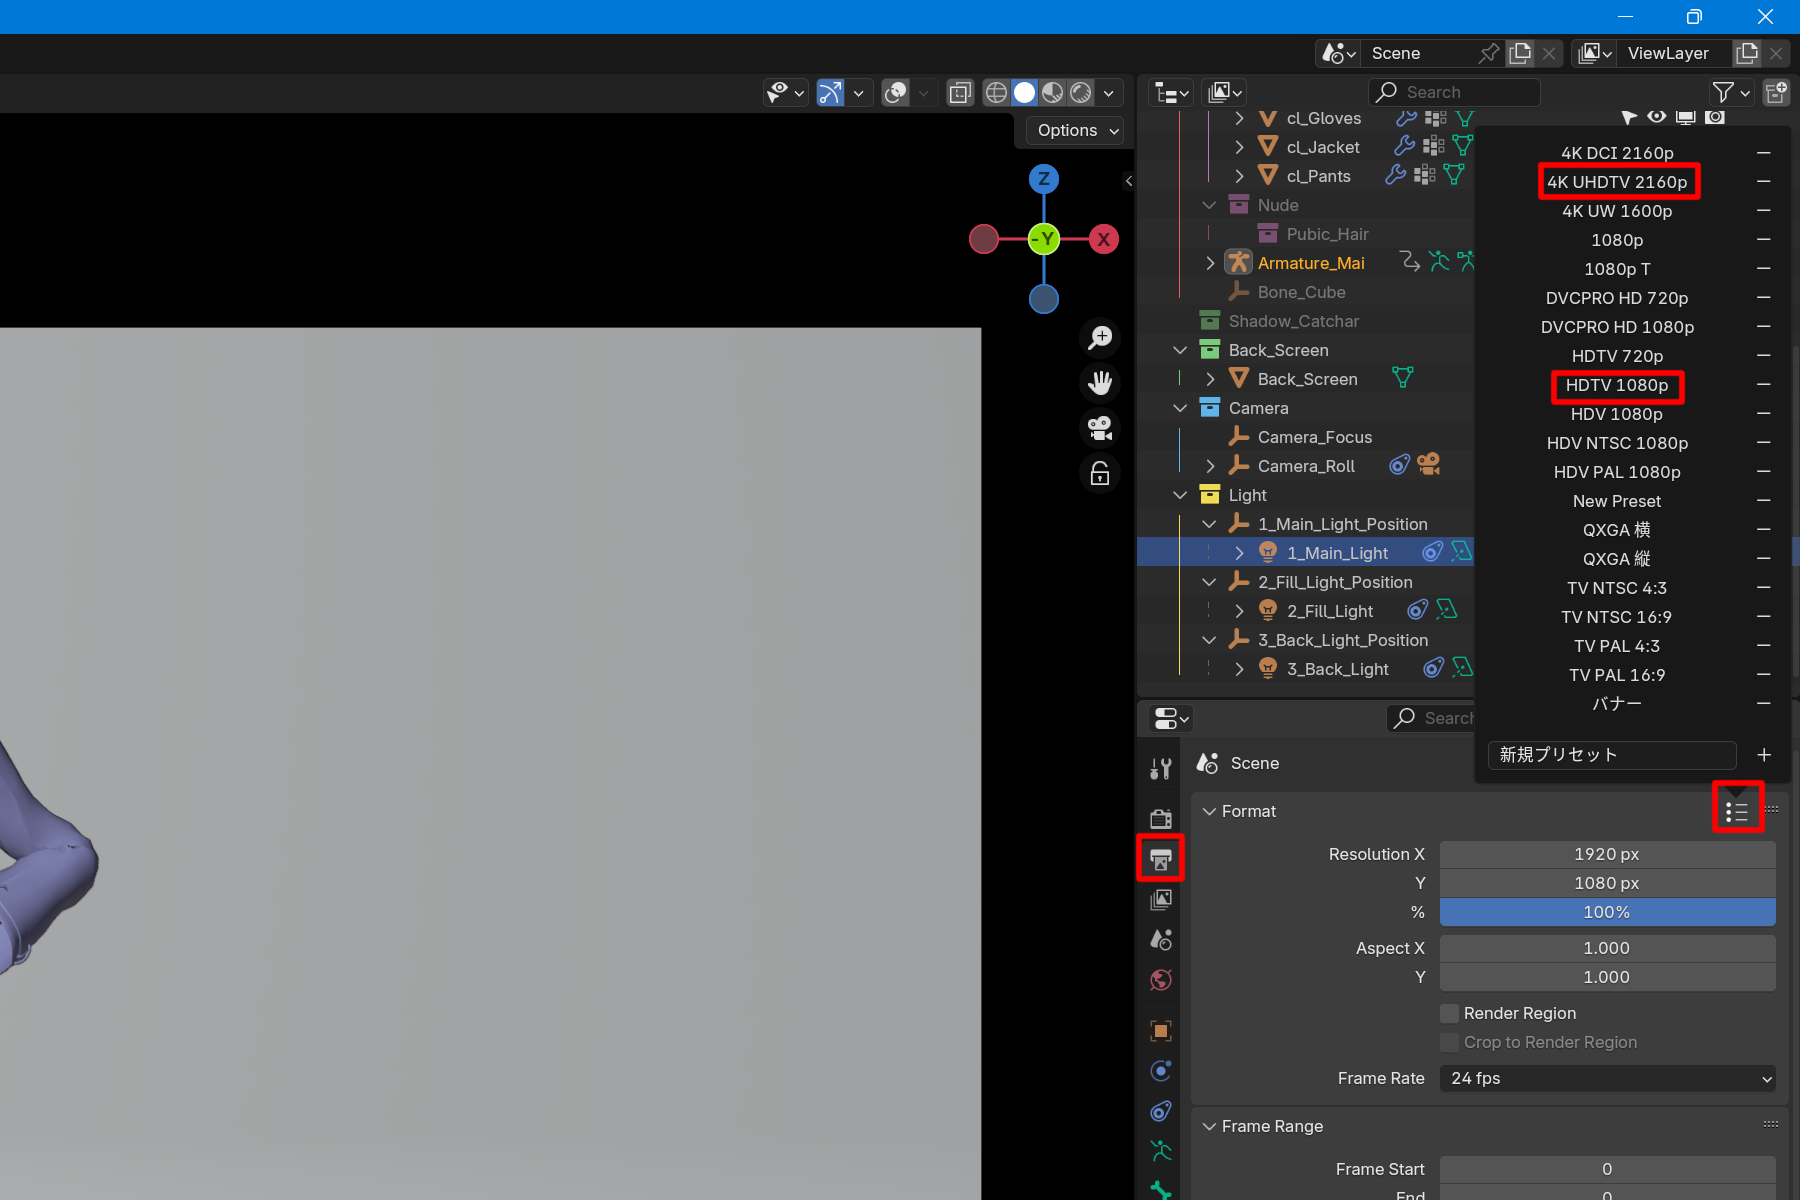
The first step is to set the resolution to be rendered.
The setting is made from the Output Properties in the Properties window.
Click on the Printer symbol in the Properties window.
Enter any numerical value in the Resolution XY field of the Format item.
Or, choose from the presets prepared in advance.
Click the mark on the right to display the presets.
For 16:9 4K output, select “4K UHDTV 2160p”; for Full HD, select “HDTV 1080p”.
Printer symbol > Format > Resolution XY or Right mark.
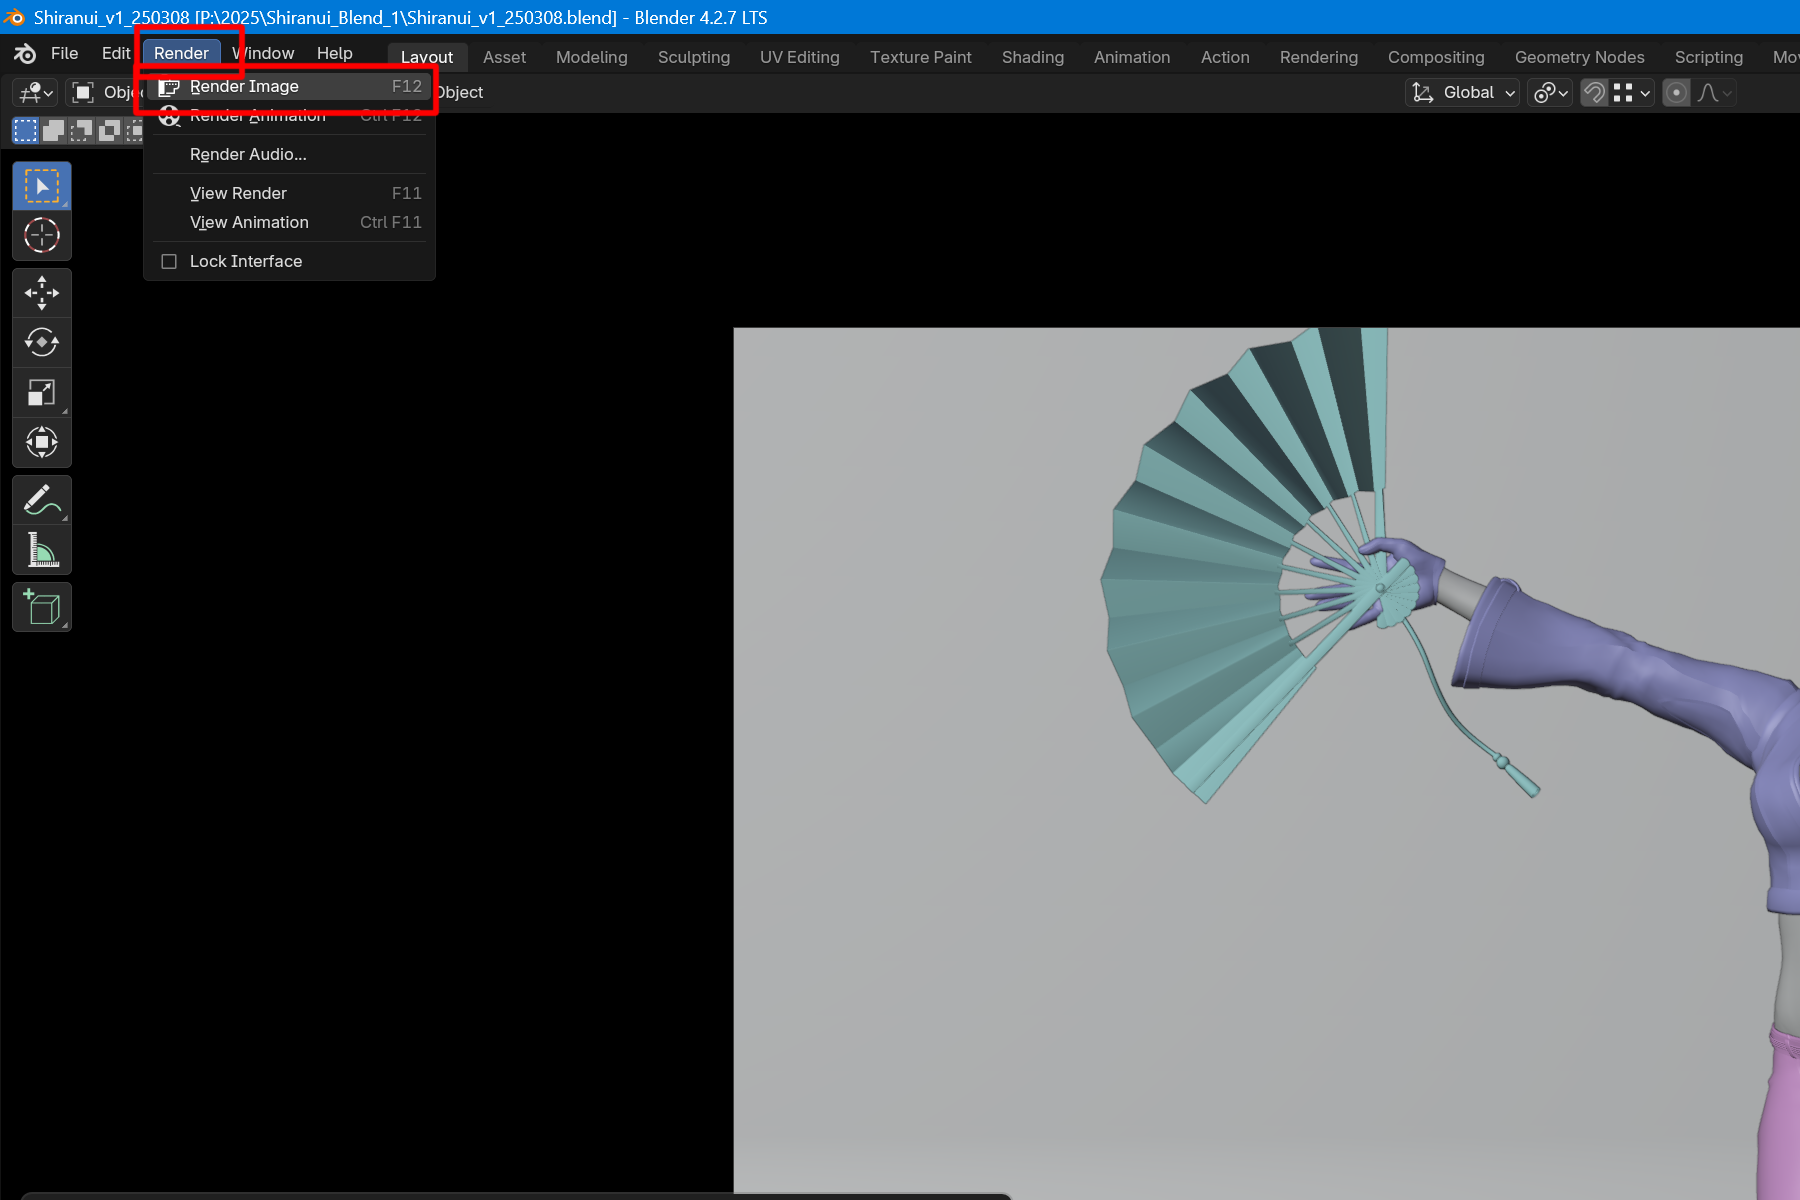
To start rendering, press the “F12” key.
Alternatively, click on Render in the top bar.
Click on “Render Image” to start rendering.
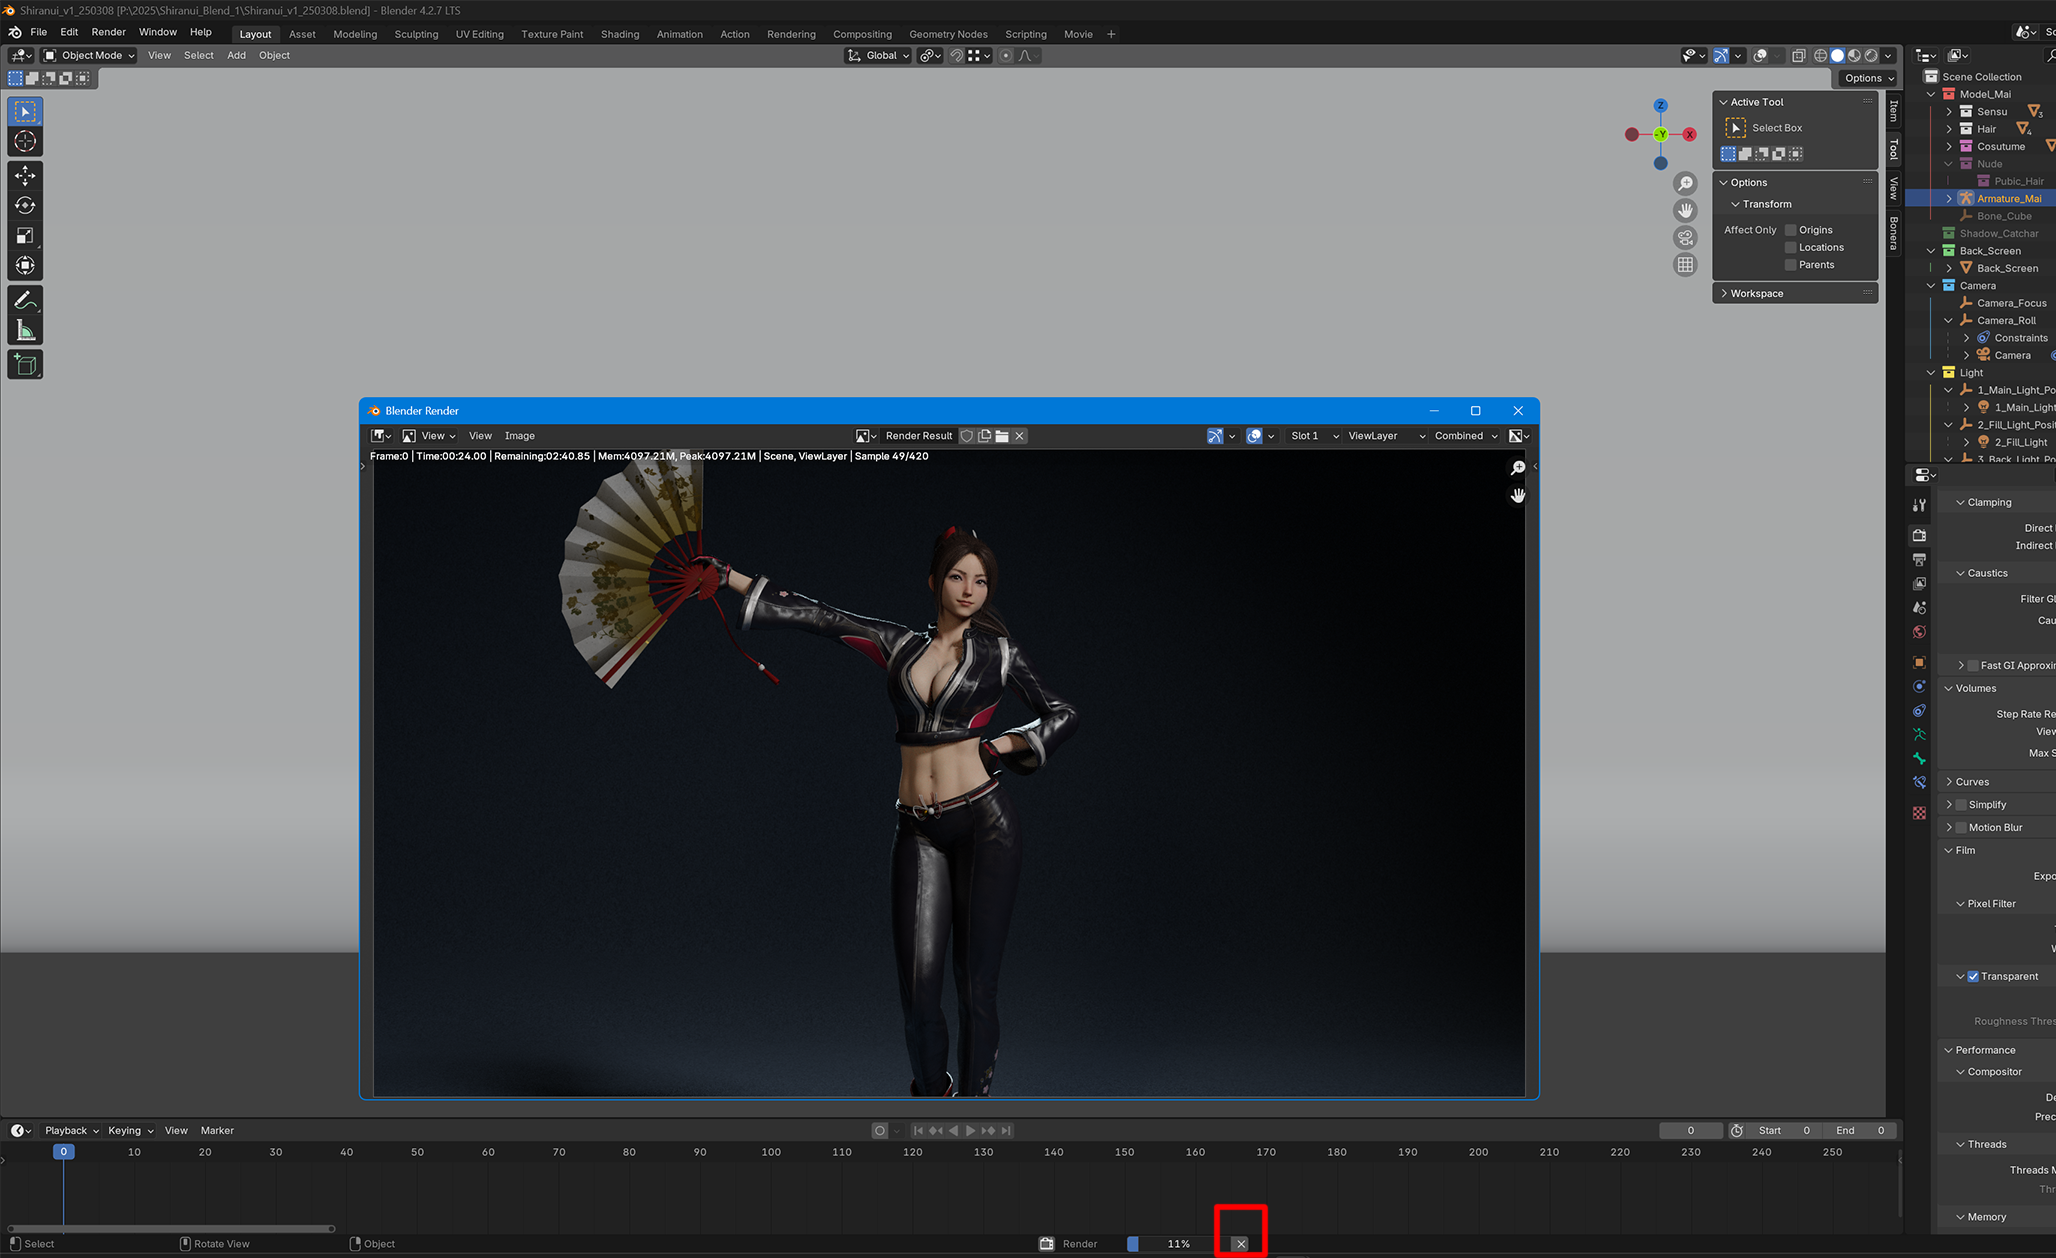
The Render window will open and rendering will begin.
F12
Render > Render Image
The progress is displayed in the bar at the bottom of the screen.
To stop rendering, click the “X” next to it.
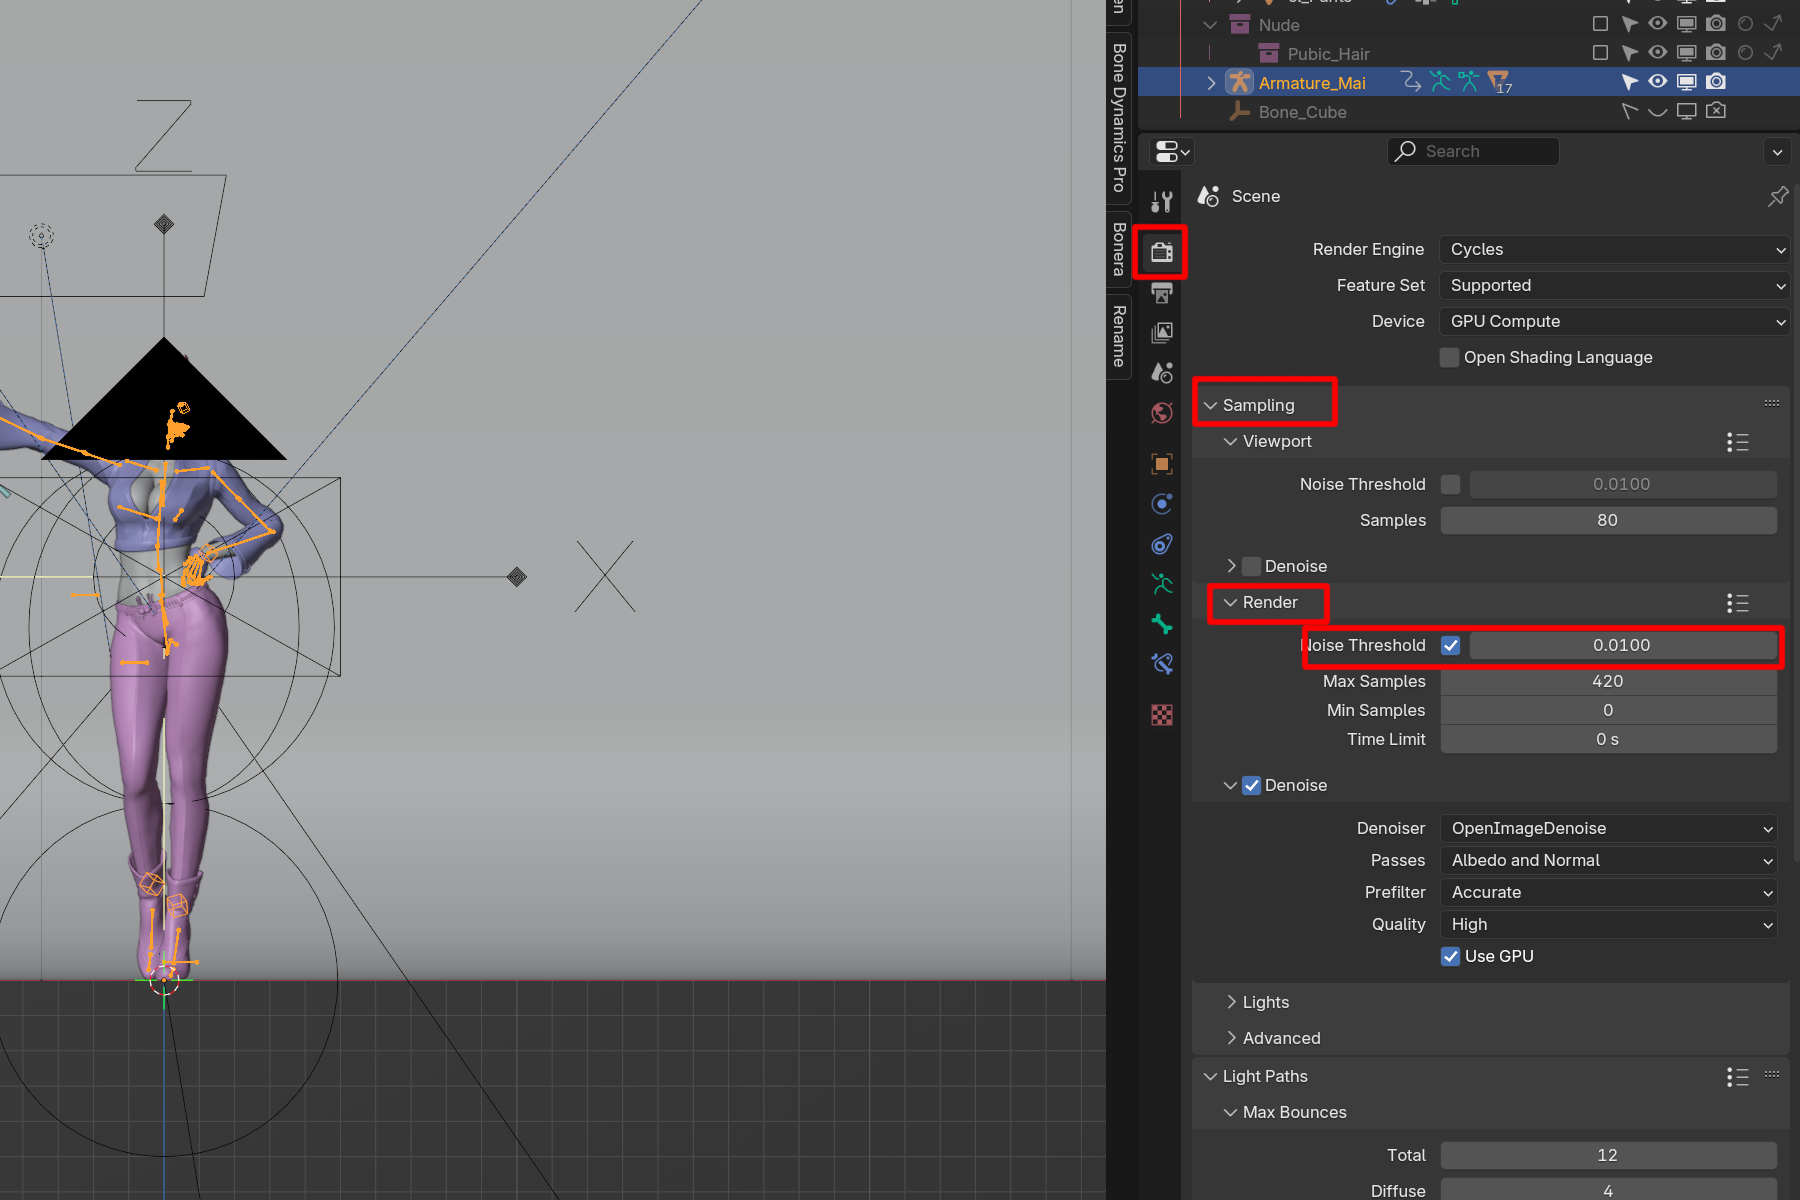
There are several ways to increase the rendering speed. Here we will explain how to change the noise tolerance and speed up the rendering speed.
Click on the camera symbol in the Properties window.
Under “Render” in the “Sampling” section, change the value of “Noise Threshold” to 0.001 or 0.01.
Increasing the value will speed up the rendering speed, but will result in a coarser image, so adjust the value appropriately.
Camera Mark > Sampling > Render > Noise Threshold > 0.001 or 0.01
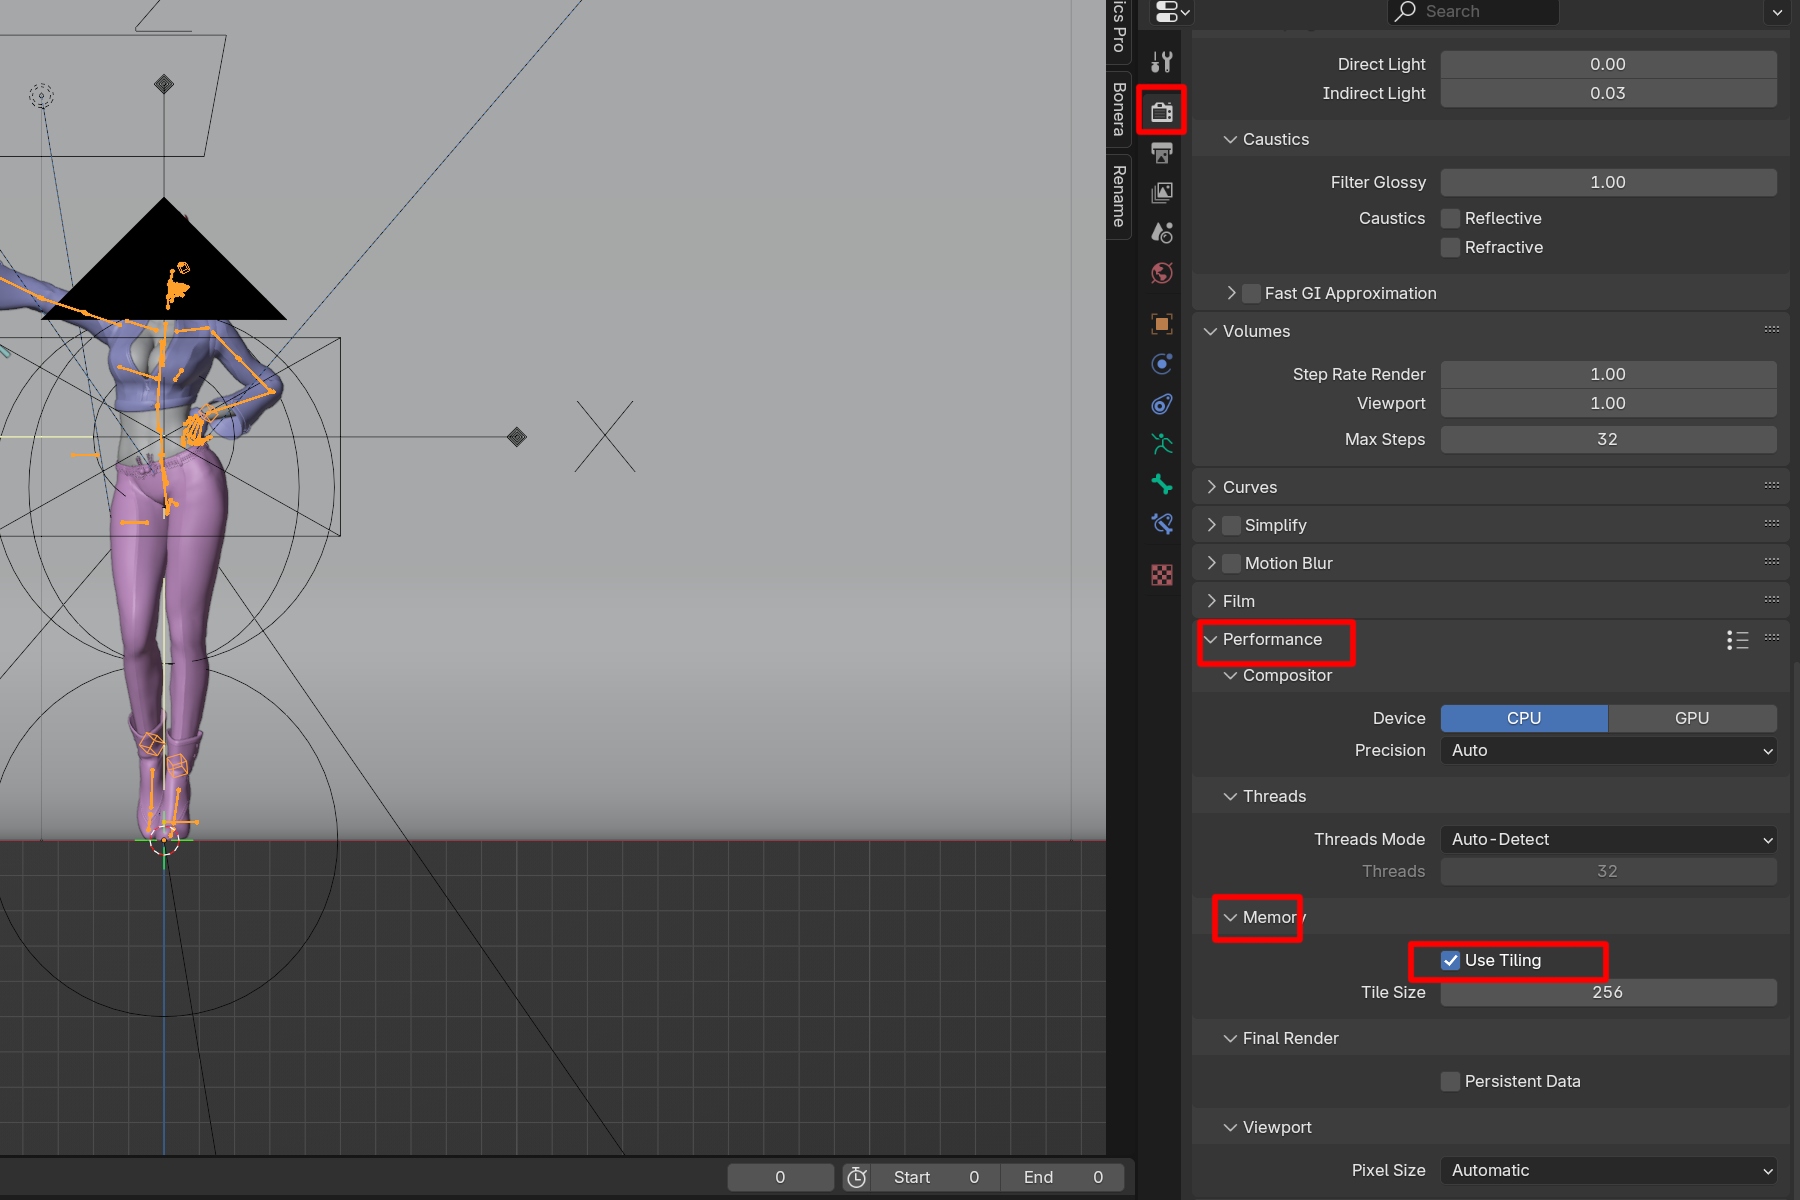
If rendering does not work well due to insufficient memory, use the function to split the process into several renderings.
Click on the camera symbol in the Properties window.
At the bottom, under “Memory” in the Performance section, check the “Use Tiling” checkbox.
Camera Mark > Performance > Memory > Use Tiling


