


This section describes the operation of the camera.
The file “Shiranui_v1_250308” is used for the explanation.
First, press “0” or the camera symbol in the 3D view to switch to the camera viewpoint
3D View > 0 key
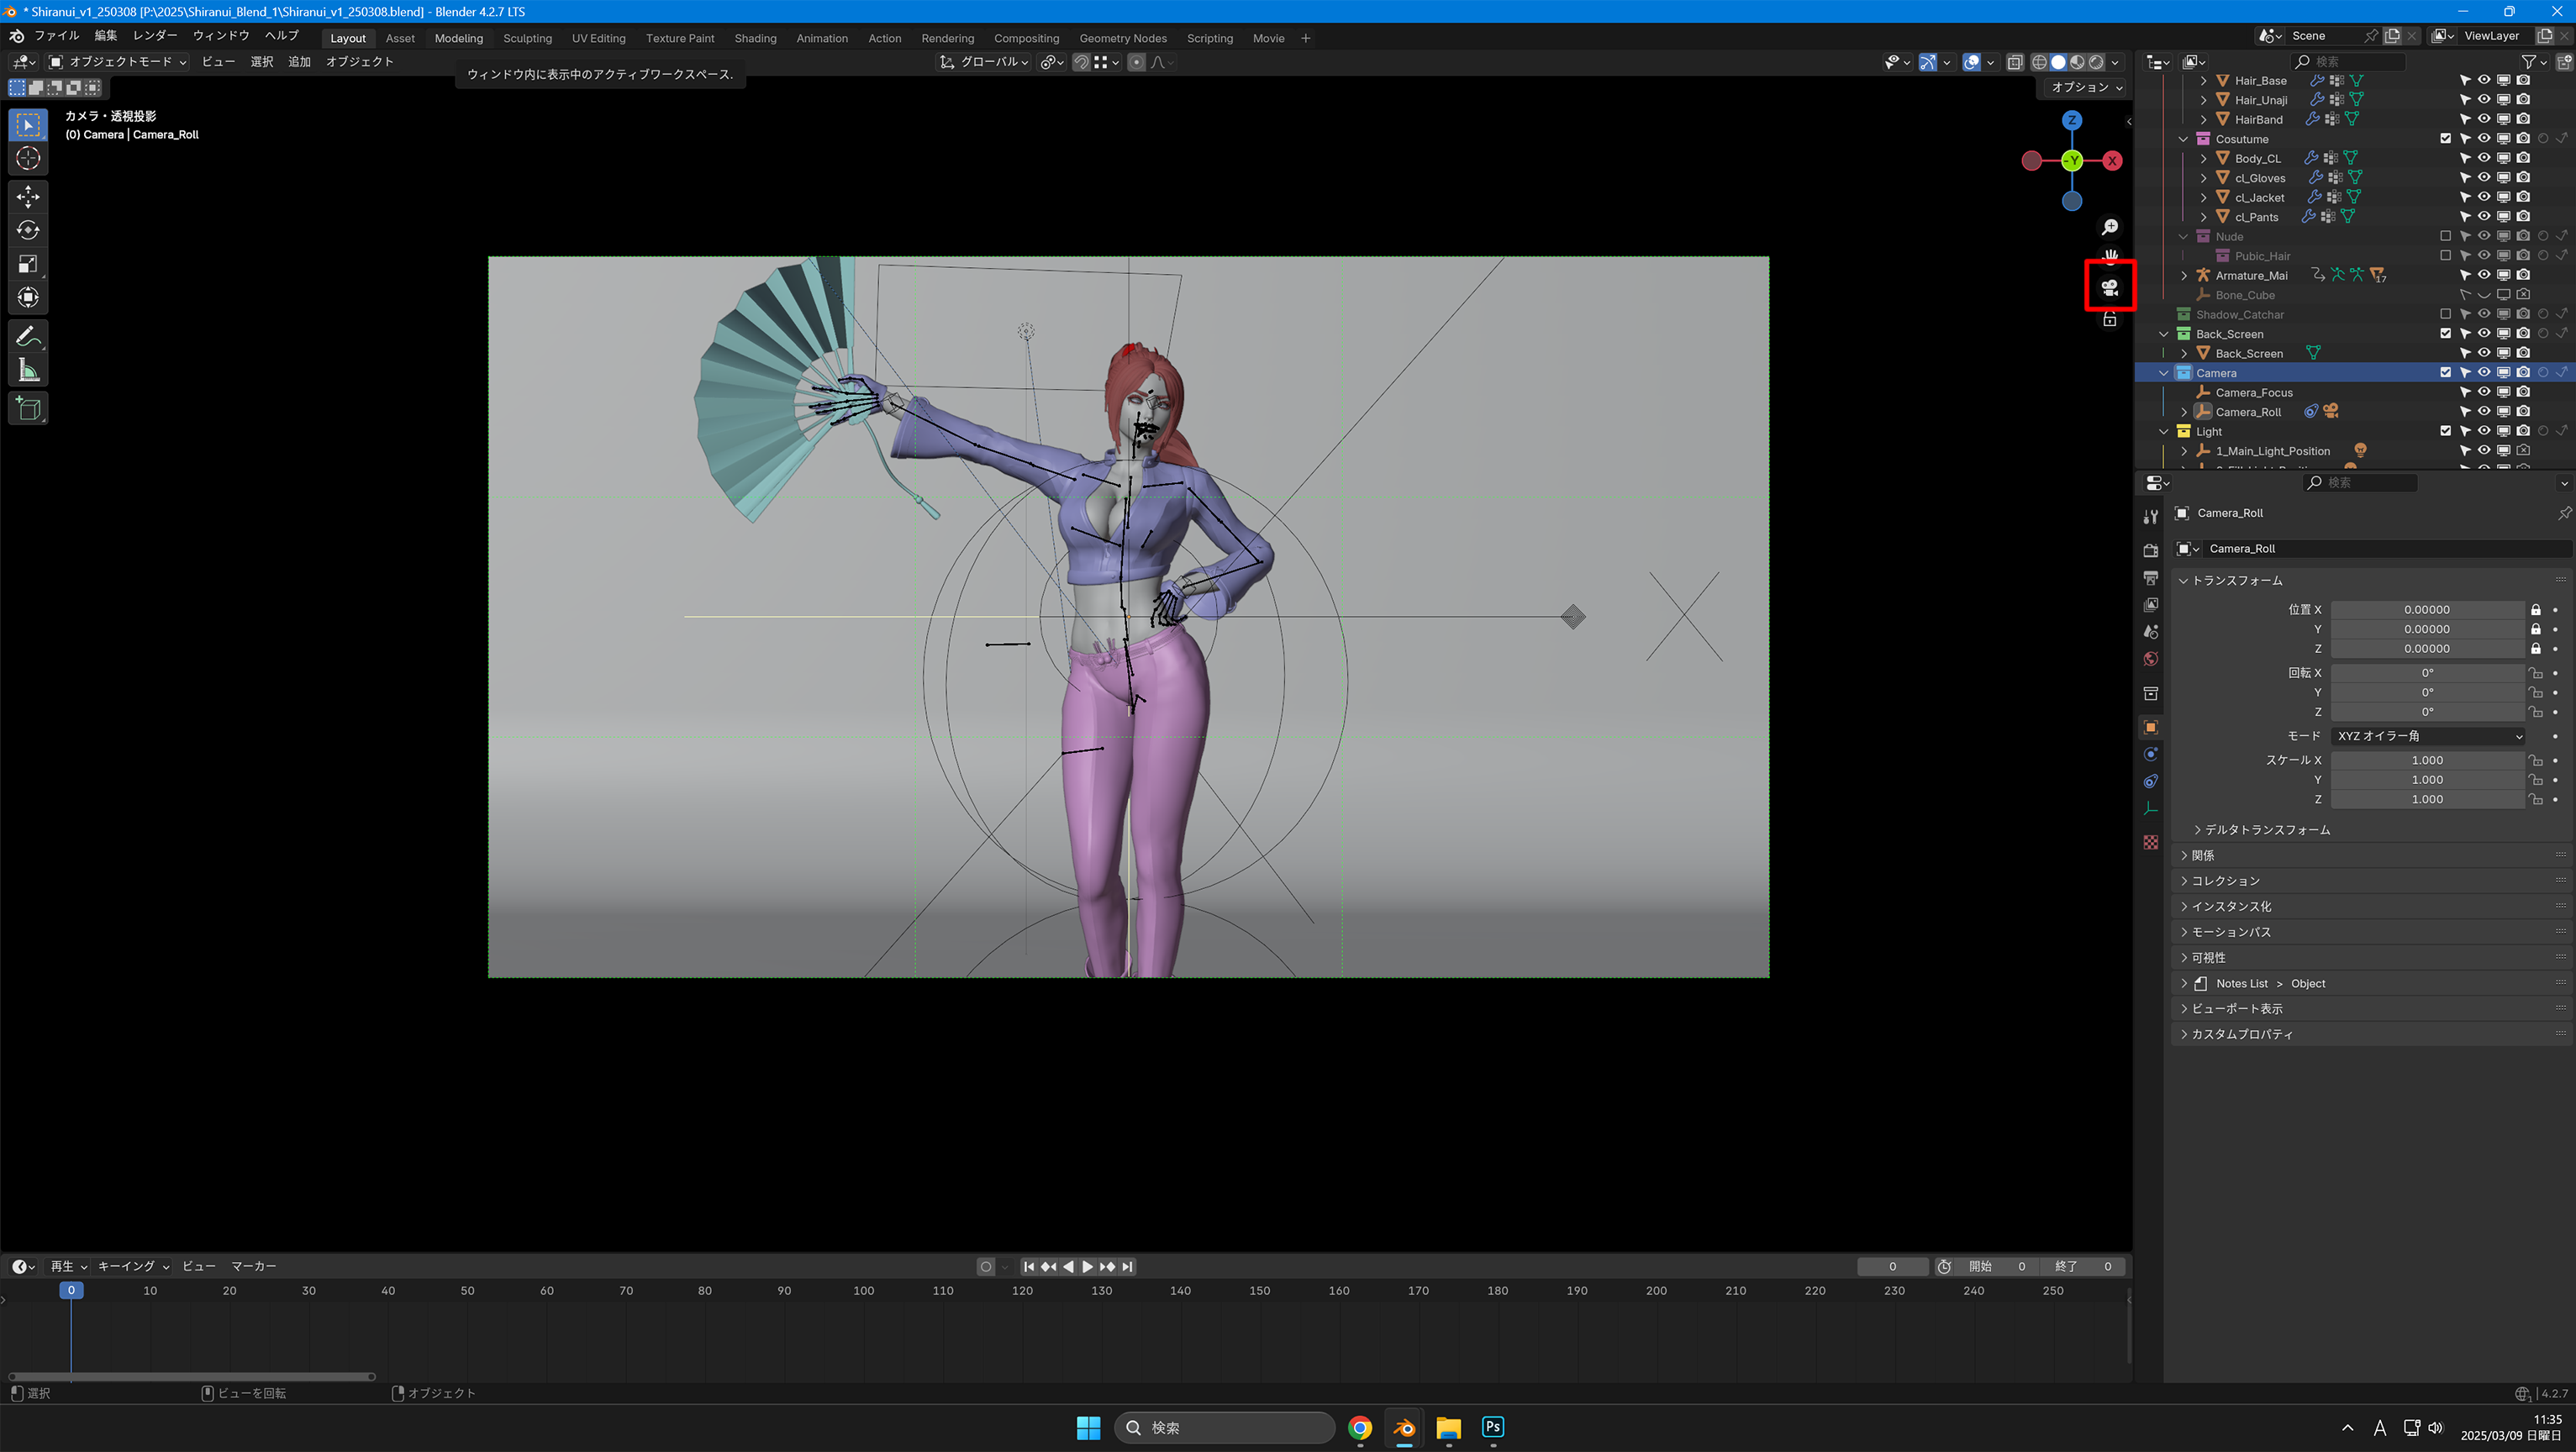
Select “Camera_Roll” from the Outliner.
Click on the square box in the Properties window.
Enter a numerical value in the Transform Rotation box or press the mouse left or right to change the value to rotate the camera.
To undo the change, press the BackSpace key on the changed value or right-click and select Restore All Default Values.
Select Camera_Roll > Yellow Box for Properties > Transform > Rotate
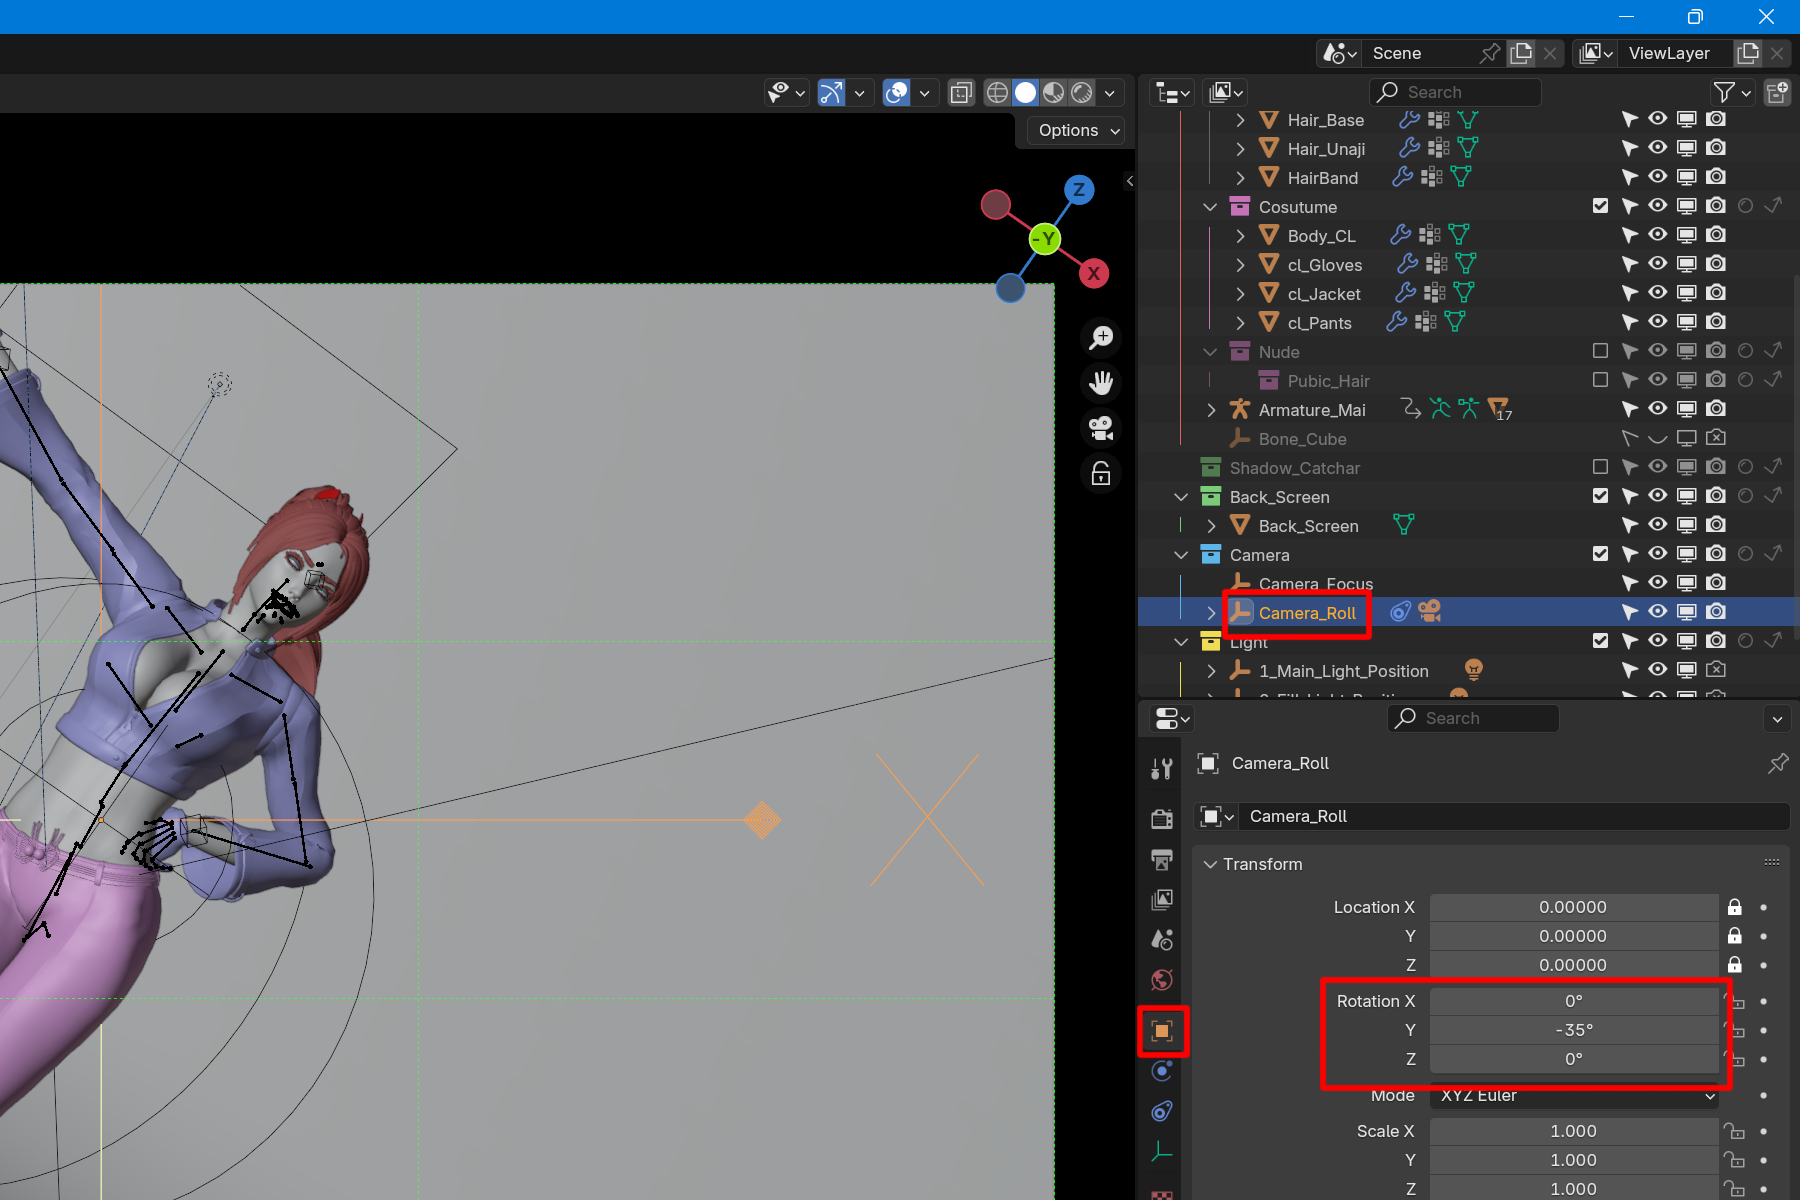
In the outliner, click on the “>” to the left of “Camera_Roll” to bring up “Camera”.
Select “Camera” and click on the Square box in the Properties window as before. Change the value of the Transform Location Y to zoom in (default is -4.0).
(It is initially set to -4.00).
Click “>” on the left of Camera_Roll > Select Camera > Square box in the Properties > Transform > Location Y
Change the focus position of the camera.
In the 3D view, click on the “0” or camera symbol to change from the camera viewpoint to the normal viewpoint.
Click on the two circles in the upper bar to display the Overlay.
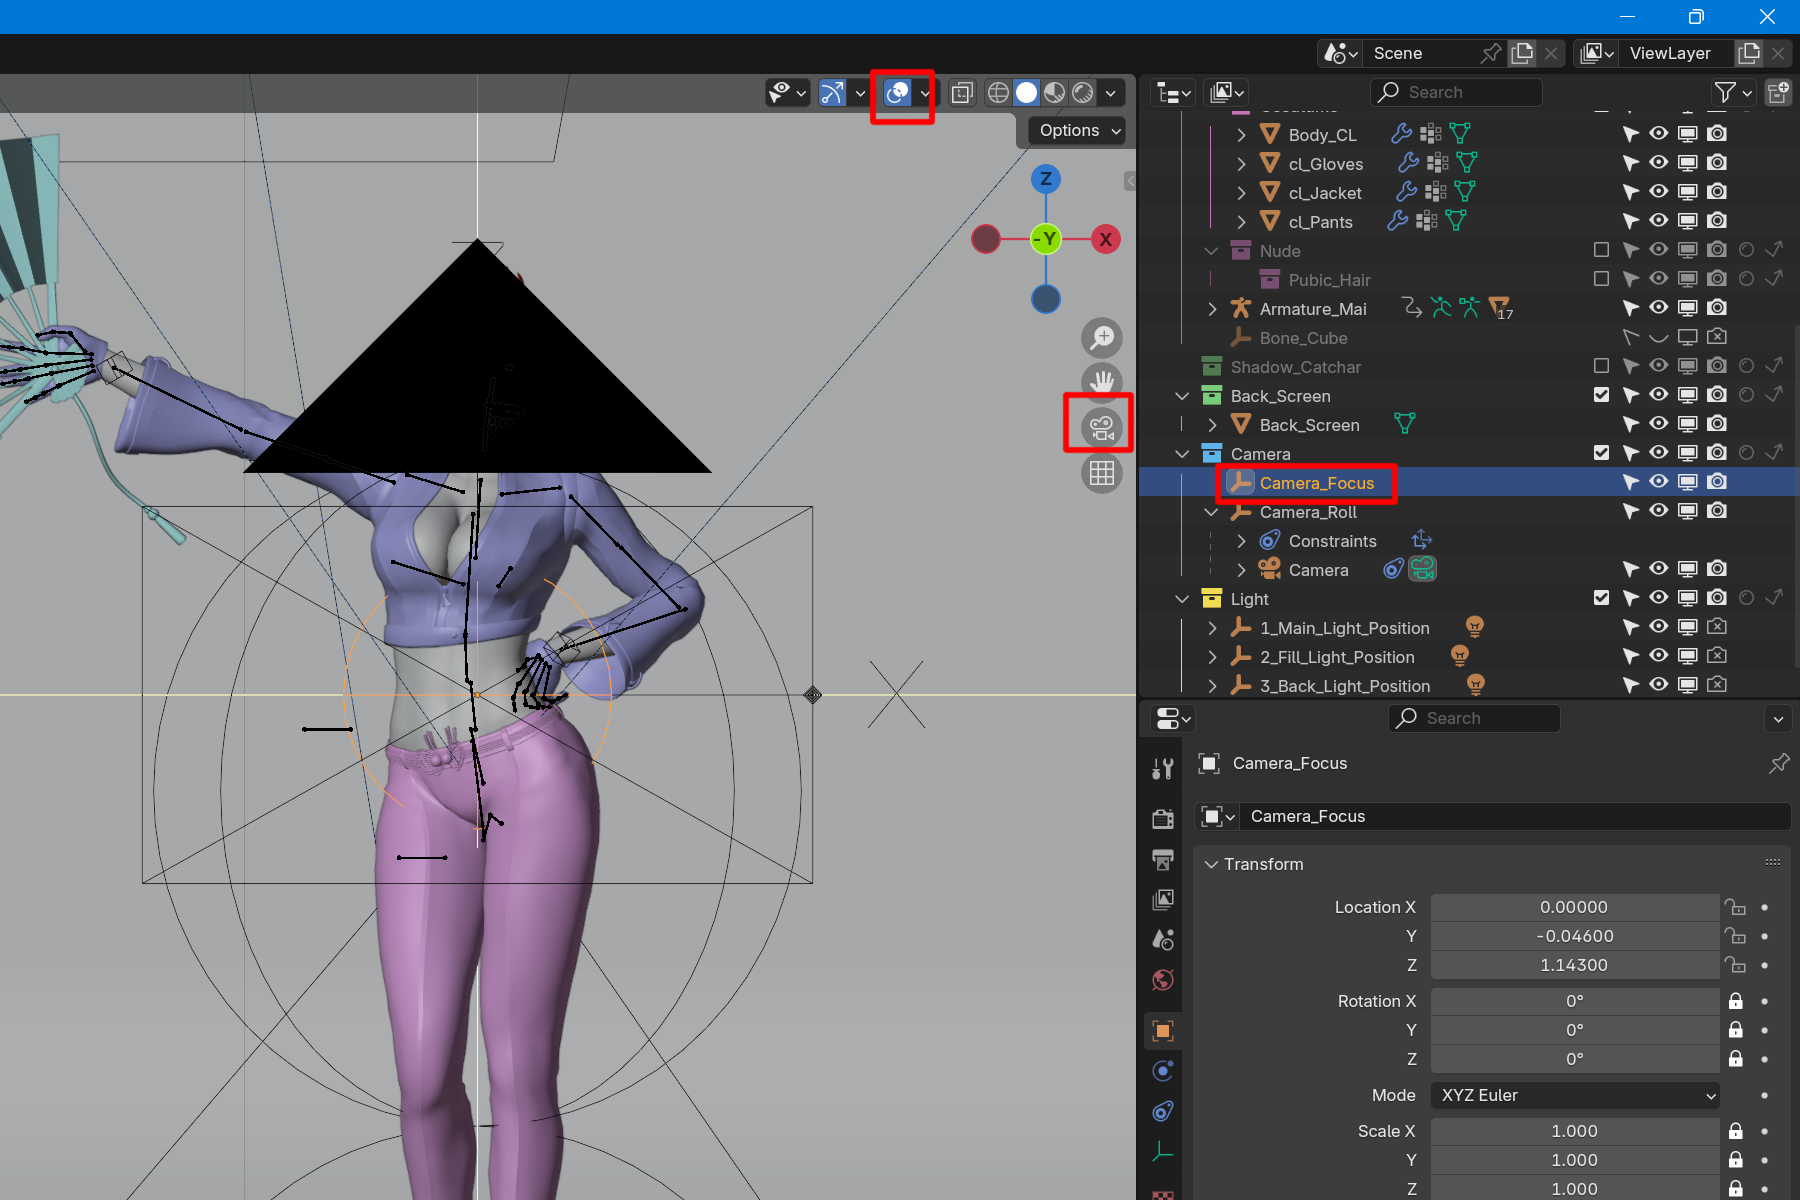
Select “Camera_Focus” from the Outliner.
The circle line in the 3D view will turn orange.
The center of the circle is where the camera is in focus.
(The initial position is set around the waist of the model.)
Press the 0 key to switch viewpoints > Overlay View > Select “Camera_Focus”.
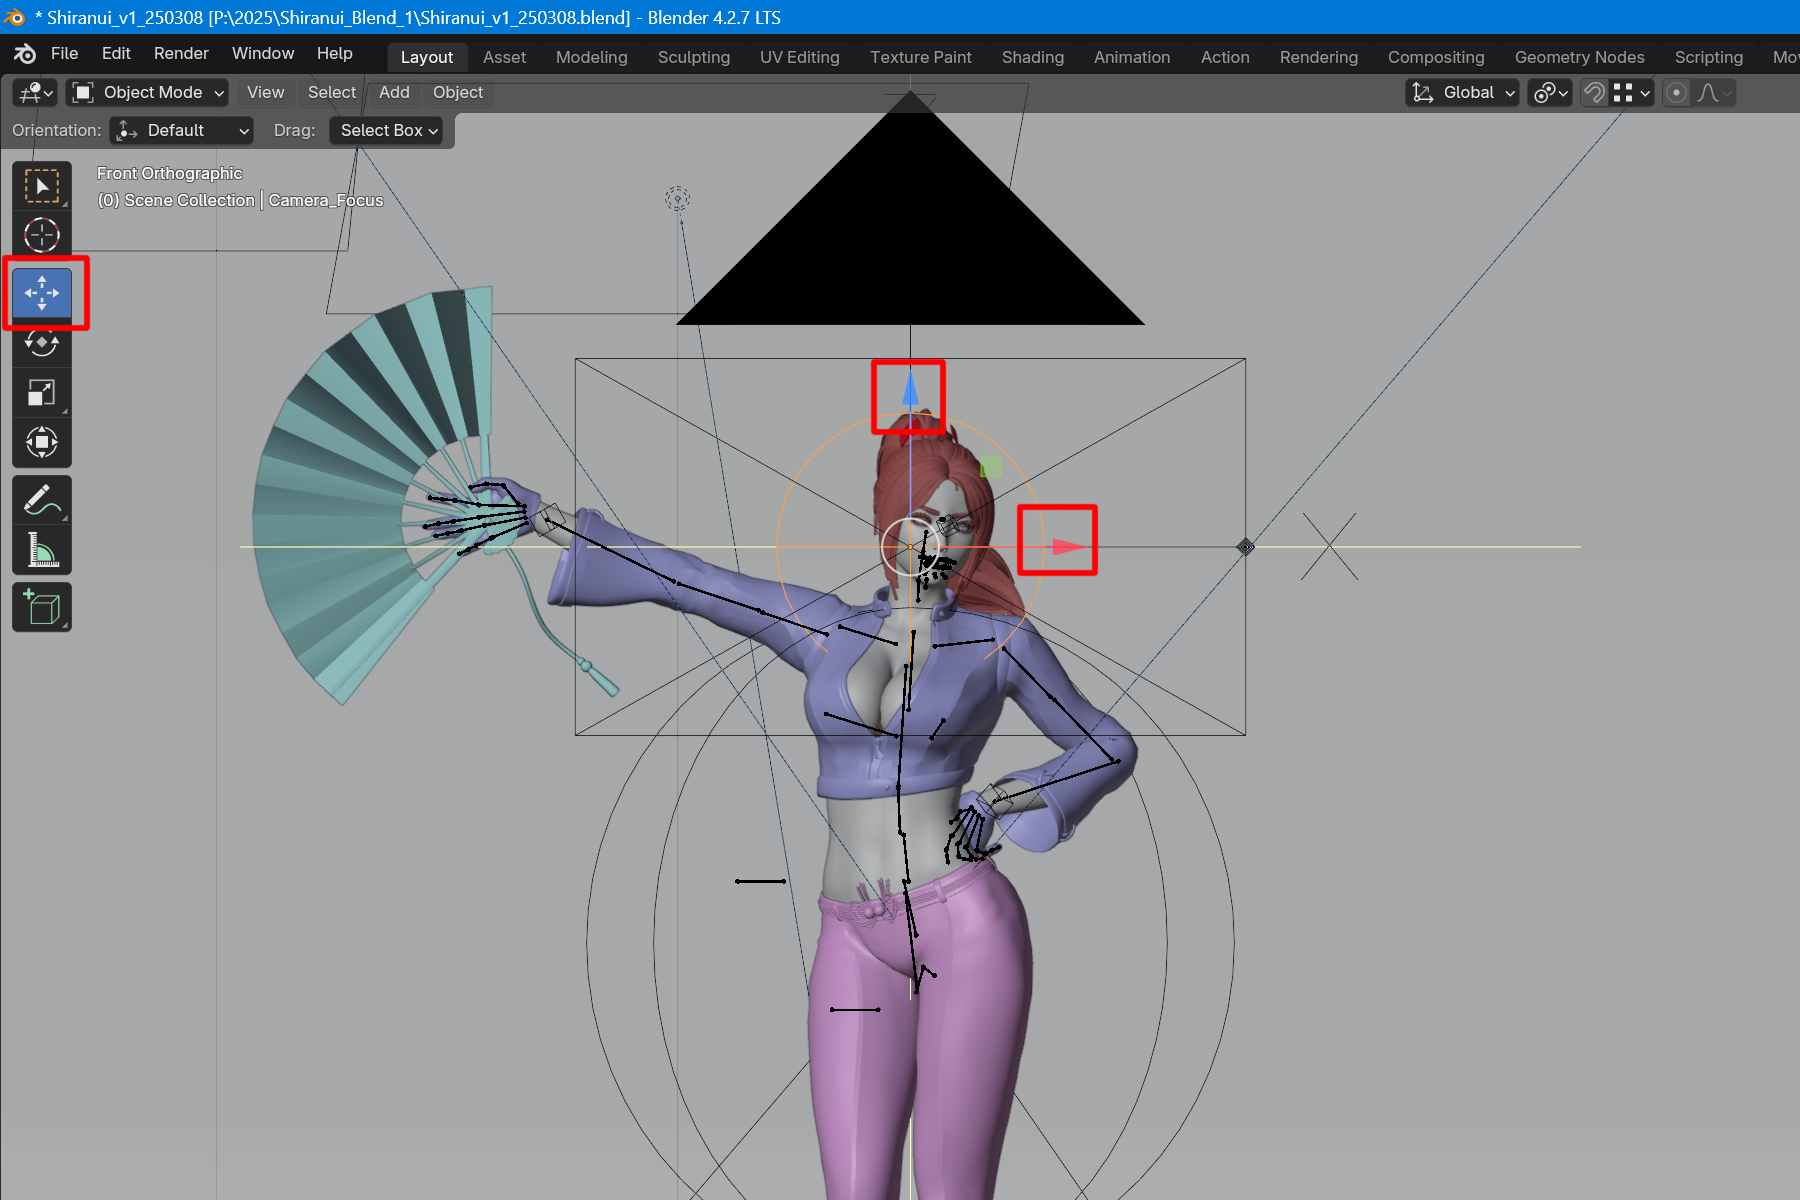
Click on the arrow cross on the left side of the 3D View.
If it does not appear, try pressing “T” in the 3D view.
Manipulator will appear (three colored arrows).
The direction of the arrows represents the XYZ axis.
Pressing the tip of the arrow and moving the mouse will move the focus position.
A similar operation can be performed by changing the Transform Location values in the Properties window.
Click on the arrow cross > Manipulator > Pressing the tip of the arrow
Properties > Square Box > Transform > Location
Camera Angle of View and Blur
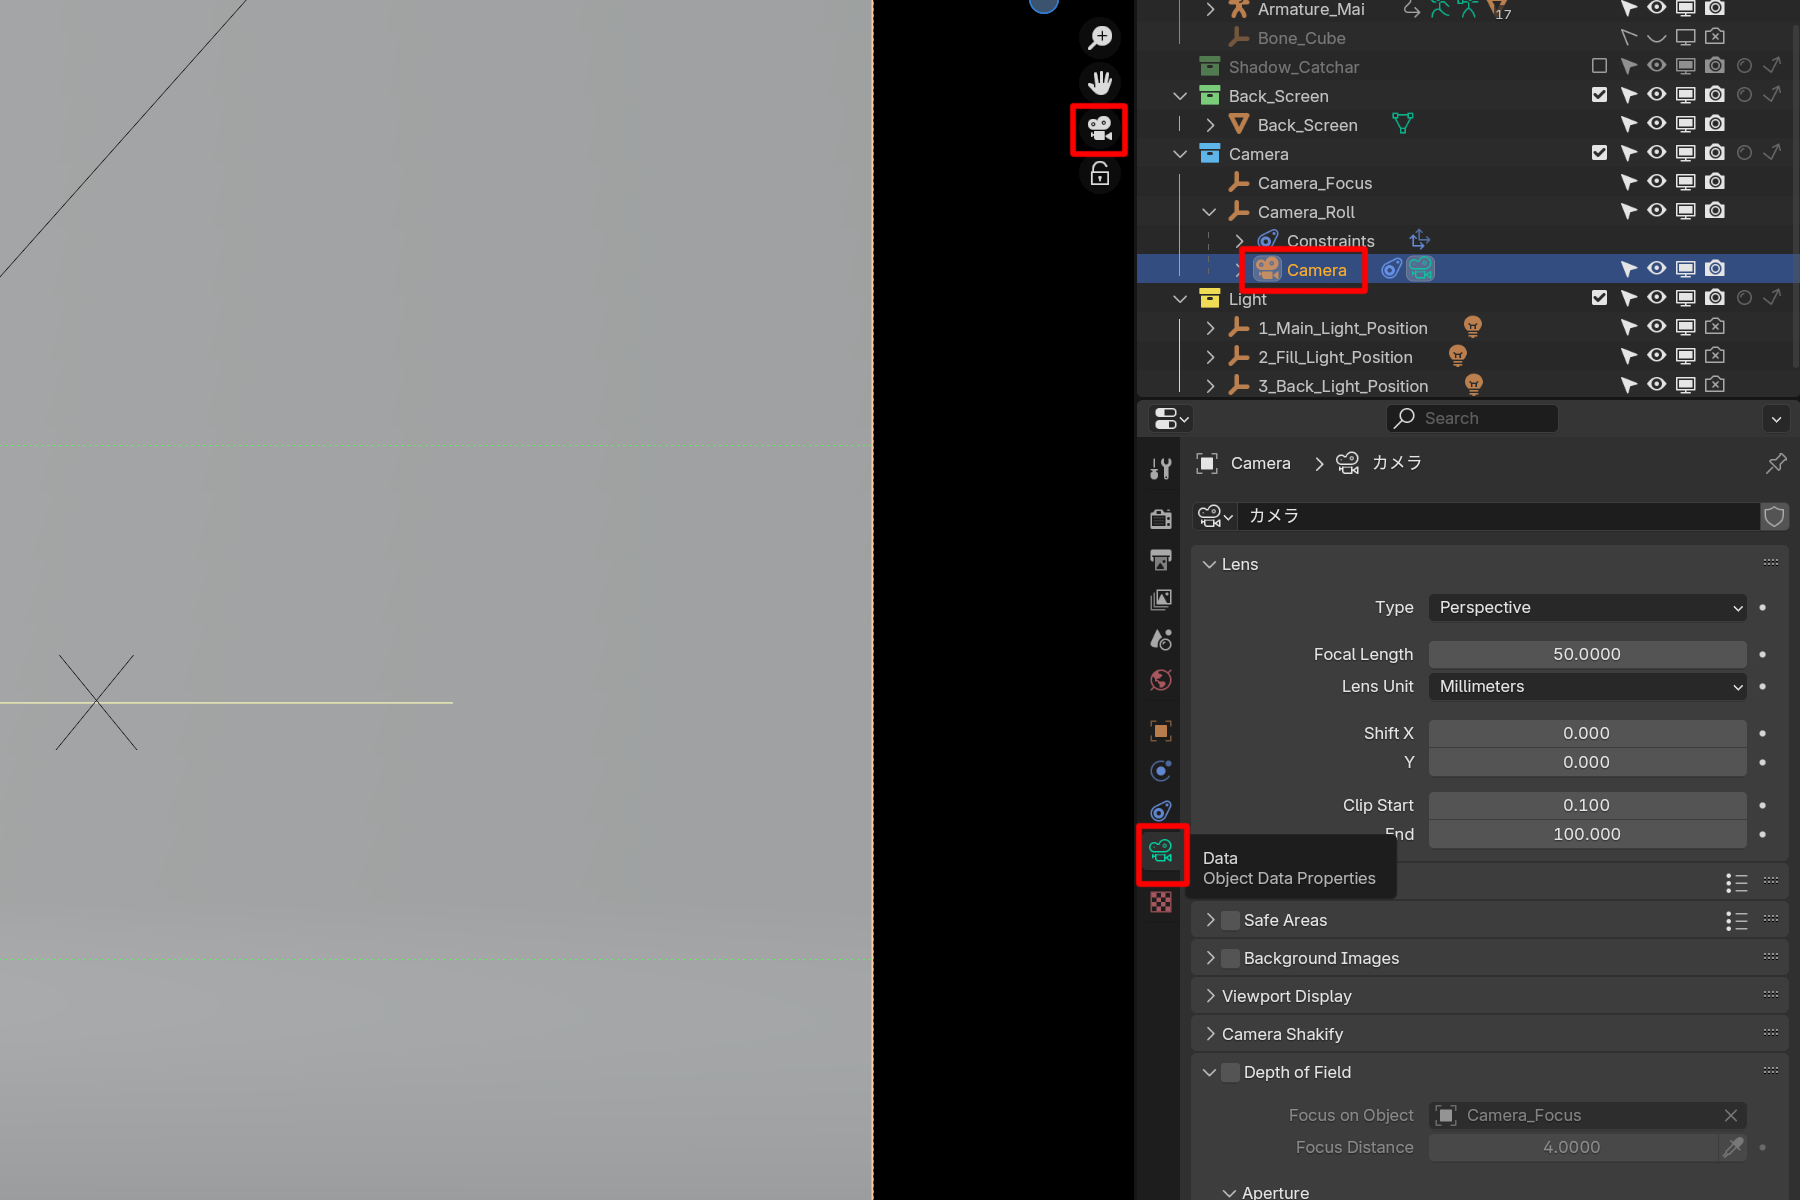
To easily check the operation, press the “0” key in the 3D view to switch to the camera viewpoint.
Select “Camera” from the Outliner.
Click on the camera symbol in the Properties to display the camera's data properties.
Press the “0” key to switch to the camera viewpoint > Select “Camera” > Click on the camera symbol
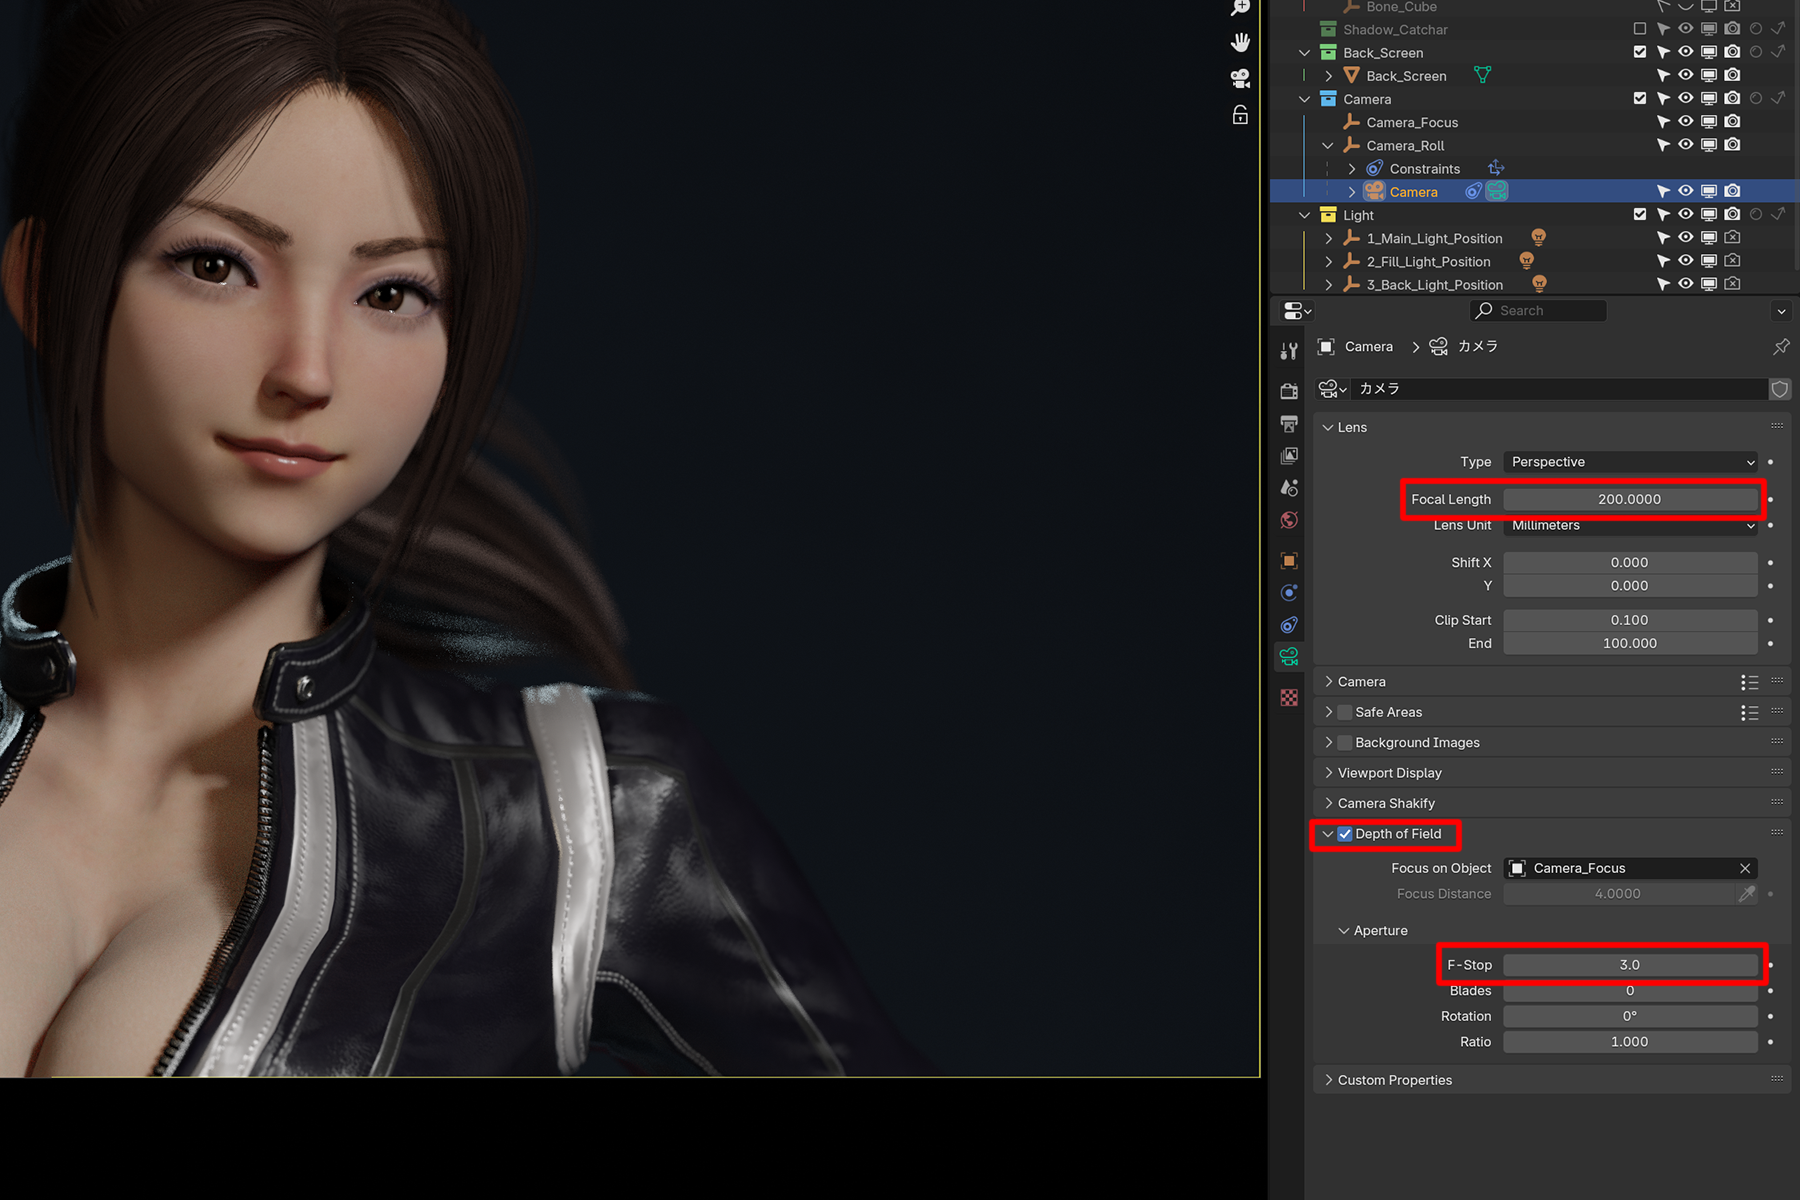
You can change the angle of view of the camera by changing the Focal Length value of the Lens.
(The initial value is 50. Normal range is about 30~200)
You can also check the Depth of Field below it to use the focus blur effect.
To make it easier to check, try switching the 3D View shooter to Render.
(In the 3D view, press the “Z” key)
You can adjust the blur intensity by changing the Focus Distance value the Aperture section.
(The normal range is about 2.8~11)
If you want a stronger background blur, such as in a close-up, increase the Focal Length value and decrease Focus Distance value.
Lens > Focal Length
Depth of Field on > Aperture > Focus Distance
Next, the blender light operation is explained.
This section describes the operation of the lights. The file “Shiranui_v1_250308” is used for the explanation. 3-point lighting The initial setup uses a three-point light that shines light from three directions. The roles and operations of these three lights will be explained in this article. Mai...


