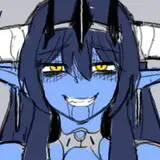
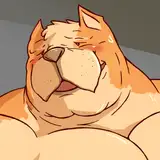
![[Photo & Making Process]Hololive - Shishiro Botan sculpted by Takatori (Fujiyama Sankaku)](https://img5.xaiju.com/storage/7/gp/nc/d38796-019e8e93-a2d4-7598-a712-f6cdd1515014.jpg)

As usual, let's start by checking the parts.
This Botan's kit is not only the main body, but also the cart, weapons, SSRB, etc., so the volume of the number of parts is also very large.
Because of the large number of parts, it would be more enjoyable if you think of the body, cart, weapons, and SSRB as independent kits.
■Removing tabs, seam line, and dry fitting

It is important to first confirm that the parts are in according to the drawings.
Skip the seam lines and other general surface treatments, as there are no particular parts to be troubled with.
First, the detail of the left arm zipper of the jacket. Be careful not to crush this.

The name "HOLOLIVE" is printed on it. Although it is almost invisible after completion, we hope to make the best use of this part.
About the seam line removal of the shopping cart. This is not too difficult as it is a simple and time consuming process. Doing it all at once is quite tiring, so find some free time and do your best...! As shown in the video, you can polish it with a thinly cut sponge file or sandpaper.

This is the most difficult part of shopping cart.

I really wanted to keep this area clean, so I separated it once with a modeling saw.

At this time, the embossing heater is used to bend the partially cut area, but please make sure that the heat does not hit the mesh of the cart as much as possible. The heat will distort the straight mesh.
*For this reason, it is not recommended to boil the cart in hot water, even for the purpose of correcting distortion or removing xylene.
If the netting is partially distorted, you can (and did) apply masking tape to one side and apply heat locally from the opposite side with an embossing heater to repair the distortion, but I do not recommend this.
Also, if you have partially cut off the mesh... you can just insert a brass wire of about Φ1 or Φ1.5 and substitute it (which I actually did).
I digress, but once the separated part is polished, you can heat it back to its original shape again, glue it with Cyanone, and you are done.

After the polishing is complete, dry fitting and check for any problems.

Browning empty casings should be carefully separated from the runner and filed. It is a good idea to re-carve them with a Linersaw or similar tool if necessary.

The tip of a real empty shell casing is hollow, right? It is reasonable to drill a 1mm hole in the tip for the handle to allow painting and at the same time to increase the detail.

The Browning body and amoebelt are dry fitting and warmed up with an embossing heater to form a natural shape.

As an aside, the English translation of "仮組み" is "dry fitting. I use the automatic translation at DeepL, but the technical terms still don't translate well,haha.
Mold release agent removal is necessary before painting, but I often soak the paint in thinner for about 6 minutes to remove because I do not want to waste time on unnecessary work.
In fact, just soaking in thinner can remove some of the mold release agent. (Of course, ventilation is necessary.)
However, even with this method, in rare cases, it may not be possible to remove the mold release agent, so it is recommended to sand the entire surface.
For detailing, we will also remove unnecessary parts of the amo-belt.

A hole is drilled using a fine drill and incised with a modeling saw or similar tool.

I'll do all of this.

Once the incision is made, polish and shape it.

It takes a great deal of time, so it is recommended to proceed slowly when you have time.

Once this is done, it is easy to paint it roughly gold, then further mask off the belt part and paint it Mr.color graphite black, then mask off the tip of the shell casing and paint it with clear orange.
The skirt of the main body cannot be assembled as it is, so once the fastener part is separated and brass wire (either Φ0.3 or 0.5) is embedded.

This allows for easy attachment and removal during dry fitting and building.

■Painting process
Botan's video explains everything he thinks is necessary, so there is nothing to write here at all, but painting the cart may require a bit of technique. Especially for those who want to use "Born mirror".

*Bone Mirror is a plating-like paint currently available only in Japan.
So the information provided in this article may not be very helpful...Personally, I think it can be painted with regular silver paint, so I hope you can use that instead.

These four bottles are required.
Also, the belt portion is made of Born mirror. As you can see from the illustration of the Botan, this part could be white, but cooler is better! That's the only reason.

Paint the entire surface with Under Black, spray with Shadow Primer Multi, then mask off only the black areas and paint with Born Mirror on the areas to be silvered. Once finished with Finish clear, spray enamel black on the lettering area and wipe off....


For the gold portion, I diluted Kreos Redo Gold (gx209) and applied a thin overcoat. I was worried about whether it would blend in, but surprisingly, I was able to make the gold look and retain the glare of the Born mirror.

The other difficult part of painting the body is the tights. I painted the skin color first, then masked off the torn areas with Goodsmile's mask sol and painted the tights' color, and then removed the masked areas.

When you remove the masking, you will probably find some paint peeling or omissions. Therefore, retouch the areas with enamel paint using a brush.

And the eyes painting, this time it didn't take much time at all because the eyes were so simple.

Drafting. Note the outline of the gaze and the iris. It is easier to stabilize if the gaze is positioned to the lower right.
Note that the angle of the eyelid and eyebrows is quite important. If you make a mistake in this, you will look like a different person.
If there are no problems with the underdrawing check, put a gradient in the eye line.

Paint the eyes with a brush. Did I forget to put shadows on the whites of the eyes? You may think so, but it is in accordance with the original work.


It looks fine, so apply the skin tone as well. Eyebrows can be applied after the skin color is applied to save unnecessary time and effort.

Install the hair and check it.

If there is no problem, it is OK.
The blush may be placed directly under the eyes, depending on the character, but in the case of Botan's blush, it looks better (more mature) if it is placed next to the eyes, so that's what I did.
As for the painting of the weapons, I painted most of the firearms with a solid coat of Creos graphite black, which is fine.
The painting method for the wood grain part is explained in the video, so I omitted it.

The RPG shells were not a good color, so they were repainted in the following colors.

The grip portion of the RPG looks like this.


The whole thing looks like this.

Tamiya Enamel Chrome Silver (x-11) was used to express peeling paint such as scratches. Titanium silver (x-32) leaves a strange particulate feel when wiped off, but x-11 leaves no particulate feel and can be finished quite beautifully.
This is an image of the entire arrangement before matting.


I liked the smoothness of the SSRB.
SSRB in TABS color is my favorite.


Finish with a matte coat.

SUKIMA SANGYO
2022-05-20 05:32:12 +0000 UTCPikk
2022-05-20 01:42:35 +0000 UTC