![[Random note] 2022 Edition List of commonly used tools for removing tabs, seamline, dry fitting and eye painting](https://img5.xaiju.com/storage/7/ns/ma/d38796-019e8e83-eabf-7119-ac15-9371ef08c5b5.jpg)

aI'm feeling a bit bored with the too big letters and flashy titles in the eye catches, so I'm going to use the opposite style, using plain titles and eye catches that are too plain.
I had previously written a light article about the tools I use.
■Frequently asked questions about the tools used (fantia)
https://fantia.jp/posts/614577
Since the contents of this article have become outdated, we have compiled a new list of the most recently used surface treatment tools and brushes used in eyes painting.
In reality, there are many more tools than this, but I don't actually use that many different tools if I limit myself to the ones I use most often.
For specific instructions on how to use each tool, please read the individual product descriptions carefully, or refer to my videos and articles as well as other people's instructions (books on GK making, etc.) to become proficient.
Model Graphix is planning to release a book that shows a series of tools and assembly/painting methods, so you may want to refer to this book as well.
How to paint a girls garage kit :(Only Japanese book)
*Notes
The amazon and other links to the tools mentioned in the article are for Japan, so I do not know if they are available for purchase by non-Japanese.
────────────
First, here is an image of the list of tools that I use most often.
All of the tools are tools that have been used by others or have been summarized in articles, so I will also add my personal impressions.

It's a jumbled mess and not very clear, so I'll make a list.
It would be difficult to collect all the tools listed here for various reasons, so I recommend that you collect them one at a time, starting with the ones you need.
For brass wire only. Easy to use!
There is no need to provide Ultimate Nippers if it is exclusively for GK
I can't grab the brass wire without it.
You don't need God Hand's Ultimate Nippers. There are stories that they are too thin to cut resin and will break or something like that.
For GK, I personally recommend Tamiya's thin-blade nippers (https://amzn.to/3MidByx) or something similar because they are cost-effective and easy to use.
I used to use it normally, but I guess I used them so much that they lost their sharpness. So I just use Kotobuki nippers now haha. Amazon.co.jp has a mysterious price, but you can usually buy it from Kotobukiya directly, so if you want it, you should buy it there.
Tsunoda's fine lead pliers is very useful when embedding brass wire. 100-yen pliers have a groove on the tip, but it is better not to have that groove when grabbing brass wire, and you cannot grab brass wire as thin as Φ0.3 if the tip is not fine. Also, tweezers are very dangerous when cutting brass wire because they may fly off. Therefore, it is safer to use fine-tipped lead pliers.
The nippers I use to cut brass wire are from a 100-yen store. I don't feel particularly inconvenienced, but there are some things like the cut brass wire flying off or the noise when cutting.... Also, I have been using it for years, so the sharpness is getting worse. Hmm, maybe it's time to replace it...
Two types of scissors are used to cut the masking tape: craft scissors and Tamiya precision tweezer scissors.
For cutting masking tape, basic.
Good for cutting thin masking tape, easy to handle
I often use Annex scissors (about 27 mm cutting edge) because they are generally good for cutting masking tape of about 15 mm or so width. It is a hassle to have to chop it up because it is a normal pair of scissors.
Tamiya's precision tweezer scissors (12 mm blade edge) are easy to use for cutting masking tape narrower than 15 mm wide. Since they are of the tweezer type, they open on their own by spring, making them more convenient than ordinary scissors. However, the blade is short, so when cutting wide masking tape, you have to move your hand several times, which may be troublesome...
The shape is exactly the same as that of surgical micro shears, but although there are some with a 14mm blade tip, there are no larger ones, such as 20mm.
This type is so easy to use that I wish there was a larger size for models.

With this, most masking is not a problem.
I use this in places where it is difficult to use Good Smile Sol
Cleaner cut than ordinary masking tape holders
Recommended because it can be used with one hand & the cut is straight without jagged edges.
I buy 15mm and 30mm widths in bulk.
Good Smile sol has low viscosity and flows well, so it is very good to use it for masking small areas or in combination with masking tape to eliminate masking leaks. I don't know what you use as a solvent, but I was told by a twitter follower that if it gets too sticky, mixing it with purified water makes it easier to use.
And when I actually tried it, it was indeed easier to use. It may feel a little bouncy and take longer to dry because it contains moisture, but it is much better than if it hardens and becomes unusable. And if you adjust the amount of purified water, it will be fine. I would like to have at least 4 bottles of this sol in stock.
And I often use masking coat for eye painting. I mentioned that Masking Coat R has low viscosity, and as a result, it tends to flow easily when used on the concave areas of the eyes, making it easy to make mistakes. On the other hand, Masking coat R has high viscosity and does not dry quickly, so it is effective when used to protect the gloss of the eyes before matting.
Hasegawa's ultra-fine masking tape is effective when used as a border for masking and mask sol is applied over it, but you can do exactly the same thing without using this by cutting regular masking tape into thin strips.
However, it is possible to do exactly the same thing by cutting ordinary masking tape into thin strips without using this tape.
It saves time and effort to cut the masking tape, and the crepe paper is highly adhesive, so it does not peel off over time, which is a big advantage.
Thick-walled and can be slightly difficult to use
Thin and light tip, easy to control and use
There are various types of tweezers, such as curved-tip, flat-tip, and reverse-action types, but I personally often use the straight type. I mainly use them for removing masking tape and mask sol. I think it is quite convenient to have a flat type for those who often use decals.
Tweezers vary in quality depending on price, but inexpensive ones generally have a thick-walled tip and require more force in the gripping motion, making them less convenient to use than good tweezers.
Tweezers in the price range of 1,000 yen or more have a thin tip and can be gripped with light force, making them very easy to handle and use.
Swiss-made tweezers have always had a good reputation, and the TENIR tweezers recently launched by Creos were also made in Switzerland. I am going to get the curved tip type and the standard type with these tweezers. They are that easy to use.
Without it, it is impossible to polish and detail narrow areas.
I recently started using it, and the straight type is also quite easy to use.
Most powerful when used with a sculpting knife.
Oh no, why is this accessory bits so easy to use!?
Can be utilized for re-carving V-shaped grooves
One of the ways to detail up a garage kit is to re-sculpt or add molds, and these tools are designed to make that happen. Without the sculpting knife and liner saw in particular, there is one less thing I can do. They are such powerful tools.
The Sculpt Knife is not sold anywhere these days, so I contacted the company directly and found out that it is not out of production or out of print, just that the production has not kept up with the demand.
Sculpting knives and linersaws do not have handles, so you should prepare one by purchasing an Olfa or Tamiya design knife separately. I modified the handle of a black design knife sold at Daiso or other stores to make it easier to use, but it is faster to buy a ready-made one than to go through such a hassle.
I bought a figure engraver thinking that it was a variation of a carbide scraper. But I found that it is very useful for digging right-angled V-shaped grooves, so I included it in the list of frequently used tools.
Most of the #240 2mm and 3mm are used to attach to altima 5
I made it by bending brass wire, but aluminum wire might work too.
Kovacs cloth file, works well with Super Asilex.(https://a.r10.to/haoNN3)
It's like I can't do anything without it... Making your own cables for pedals will increase work efficiency
Like 5, I can't do anything without it... It can all, the grinding, polishing and drilling! Drilling holes larger than 1.5mm is done with a regular electric drill.
Essential for warming and bending hard-to-polish areas such as the inside of hair. Can also be used for mating treatment and removing air bubbles in craft UV resin
I used to use the carbide scraper a lot for seam line removal, but it has recently lost its role to altima 5 and AT, so I don't use it at all now.
Ultima 5 will be released with its successor 7, so if you are buying one now, you should have no problem choosing 7. 7 is said to be upwardly compatible with a feedback feature that improves the loss of power when the tip is pressed down on the part. I ordered it without a second thought.
The same function is implemented in the Ultima AT, so it can do everything from polishing and grinding to drilling. I can see firsthand that a function as good as the AT would be fine for garage kit work.
The reverse-action sander increases the tension of the file when you grip it, making it ideal for polishing thin, narrow areas such as the tips of hair. I used to use sandpaper, but recently I've been using Kovacs Super Asilex because it lasts longer.
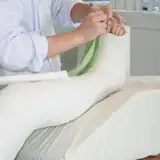
Resin casts are prone to distortion during the replication process, so having an embossing heater ready eliminates the need to boil water and boil every time.
The process of bending and polishing hair and other deep parts with heat and then putting them back together again with heat is shown in the video, but it is better to be able to do this because it makes a difference in the finished figure. Also, if the parts do not fit well after painting, warming them up a little can help them to fit well. It is useful for removing air bubbles from craft UV resin, warming up Oyumaru, etc., so it is very useful to have.

Versatile adhesive that can be used for everything from displacement and bubble filling work and gluing. DW, not SW
For curing cyanon, easy to use because it doesn't smell.
Useful for making your own little clear parts
Easy to use for temporary curing before curing with UV light
Used to cure UV resin
Useful to have for making a few parts yourself.
You can practice modeling more easily than with Epo Putty.
Useful for duplicating small homemade parts, available at Daiso and other places.
Cyanon is an adhesive in the first place, but it is so versatile that it can be used for everything from filling in bumps and air bubbles to serving that it is easy to forget that it is an adhesive at all. Until recently, I used to mix it with powder such as baby powder, but nowadays I just apply it as it is, spray it with Ci hardening spray to harden it, and then shave it with altima to process. I used to have a problem that if I cured Cyanon without mixing it with powder, it would be too hard to sharpen, but I can solve that problem by setting a zirconia bit on altima AT, so I am not afraid of anything anymore.
Since it is an adhesive, if you find air bubbles after painting and try to fill them in, they may adhere to odd places and cause the paint to peel off. In such cases, it is more effective to use UV resin or UV putty. There is no risk of dissolving the paint even if it adheres to unrelated areas.

Hoshi-no-Shizuku is recommended for UV resin for crafts. It's not prone to yellowing after curing. I think it is stable enough in terms of quality that many people recommend it. I also use Hoshi-no-Shizuku when I make clear parts; after temporary curing with a UV penlight, you can use a nail UV light for 3 to 5 minutes.
Epo Putty and Sculpey are used for making small parts by yourself. Sculpey hardens when baked in a toaster, but is easily burnt. Sculpey is not suitable for modeling by scraping after hardening.

It is good for making prototypes of small parts quickly, or for practicing modeling. Epo Putty is good for when you want to use the parts made with Epo Putty as they are! I use it less often than Sculpey.
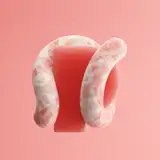
When I duplicate something made with EpoPutty or Sculpey, I make a simple mold of it with Oyumaru. After that, I duplicate it with UV resin, polish and shape it.... I always use Oyumaru because it is too much trouble to duplicate with silicone.
easy to use
I bought a lot of no-name brands, but in the end, Argofile's Zirconite, Nosefine is the easiest to use.
I can use it so much to polish 3D printed models
The conical bits that come with altima 5 are easy to use, so we use them directly with AT. Zirconia bits tend to bite into the resin if you are not used to handling them, but since they are diamond bits, this is almost never the case. Anyway, it is easy to use.
I also bought a conical zirconia bit, but it was kind of hard to use. So I end up using ArgoFile's zirconite (nose fine-fine) a lot.
I also bought a slightly thicker cone type, but I don't use this one much. They are useful, though, because they make it easier to handle large parts. Among the no-brand bits, I think the type with a ball at the end of the cone is the most useful.
Finally, there is the spiral wheel. This is used to polish the deepest parts of the output. Unlike diamond bits and zirconia bits, they wear out the more you use them, so it is probably a good idea to have about 10 of each number. If you have a set of these bits, you can use them to polish output kits or your own outputs.

I can't do anything without it... such a brush.
I can't do anything without it... such a brush.
It is used for shaving lines, not painting.
If you just want the tip, you might search for rubyheads H-31.
Eye painting is basically an enamel paint method, so I spend more time holding the Finish Master and Tsun Tsun S than drawing lines with a brush anyway. I used to mainly use God Hand's 極面相L, which is easy to draw clean and thin lines, because I want to reduce the time spent sharpening and adjusting as much as possible, but recently I have been using only the 硬面極細 from start to finish.
When I first saw the 硬面極細 brush, I thought, "Oooo, They've come out with another peppy brush..." But when I tried it, I was surprised at how well it fit in my hand. The short handle makes it very easy to handle, and it is much easier to use than it looks.
I use Finish Master Ultra Fine R and Rubyhead to sharpen lines. To be frank, the Finish Master R and Rubyhead are almost the same once you get used to them, but there is a very subtle difference in the softness of the sponges. The Finish Master R is easier to use by a slight difference, but once you get used to it, you'll be fine with Rubyhead.
The "Tsun Tsun S" is used in exactly the same way as the Finish Master. I use it to sharpen parts that are difficult to sharpen with Finish Master, but it's hard to explain... Anyway, I'd like you to actually try using it.
SUKIMA SANGYO
2023-03-29 11:47:36 +0000 UTCSUKIMA SANGYO
2023-03-29 11:43:36 +0000 UTC리티 파탈
2023-03-29 10:32:13 +0000 UTC리티 파탈
2023-03-29 10:27:50 +0000 UTCSUKIMA SANGYO
2022-07-29 09:24:59 +0000 UTCPDubs
2022-07-29 09:13:26 +0000 UTCSUKIMA SANGYO
2022-05-18 13:53:50 +0000 UTCPDubs
2022-05-18 13:47:21 +0000 UTCuuukiiiyooo
2022-05-17 18:56:48 +0000 UTC