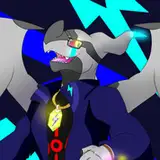
![[wip] After 4 years of GK painting, I had improved my eye painting skills](https://img5.xaiju.com/storage/7/up/xm/d38796-019e8e83-f2eb-7d35-9131-c5d8b1b4be41.jpg)

As you can see in the first image, "Tsugumi senpai" eye paint is almost complete. All that remains is to apply the matte coat, so I thought it would be a good idea to compare them with the eye paint done about three years ago (top image).
I think I was able to brush up the eye paint without changing the impression drastically since I did not change my plan to make the eyes simple and brownish. I used to apply blush with Tamiya's Weathering Master H, but after repainting, I simply airbrushed on Tamiya Enamel Clear Red X-27. This way is easier now.
■Painting eyes and face
Before eyes painting, I would like to add a little body related information.
As for the body paint, it is metallic green. I thought no one would ever paint a green bunny, but no one did. haha

I thought the gold lines on the cuffs and collar were unnecessary, so I omitted them.
For the knee socks, instead of starting with skin tone, I made a light reddish-brown color surfacer, and based on that, I alternately painted clear brown, CMY black, and magenta to adjust the color tone.

You can use skin color as it is for the fingers, or you can blow a little bit of "Nenmaku Clear (C-12)" darker at the tip for a nice look, but this time I dared to use Tamiya Enamel Clear Red (X-27).

It should only be a slight reddish tint, or it will be too obvious and unbalanced, so a little care is needed.
So here is the eye painting procedure. First, paint the primer with enamel vermilion.

The right eye is centered since the gaze is slightly to the right. Once this is done, apply a slightly thicker coat of clear. (1st coat)
After applying the clear coat, put it in the dryer for about 30 minutes.
I won't explain the rest of the process, but you can assume that every time do a clear coat on the face, put it in the dryer for about 30 minutes.
Roughly mask off the lashes to create a gradient of lashes.

Remove the masking, wipe off the excess with Finish Master, and draw eyelid. Clear coat if there is no problem. (2nd coat)

Draw the main line of the eye and the lower lashes and clear coat (3rd time).

Masking and airbrushing the eyes. First spray a mixture of enamel clear orange and clear red. You could also use clear brown.

Then spray black on the upper part of the pupil. When using solid colors for gradation, it is safer to do a test spray to avoid a grainy look.

Remove the masking and wipe off the unwanted areas. I thought it might be a little too thick. But it seemed to be OK at this level, so I proceeded as is this time. Here is the clear coat. (4th time)

Draw in the eyebrows, highlight the eyes, and draw in the moles. It doesn't matter if this is the end of the process, but I will draw in a little more, so here is the clear coat (5th coat).

Place a light reddish brown highlight in the center of the pupil and a thin highlight in white at the top of the pupil. The lines around the mouth should also be added at this time. I thought it might not be necessary, but just to be safe, I drew in a shadow color next to the pupil in gray.
The goal is to create a simple eye paint, so I clear-coated the eyes and finished the eyes here. (6th time)

Next, skin color is applied, so masking is done so that the skin color does not get into the eyes.(Good Smile liquid masking is used)

Then, apply skin tone paint. Be careful not to make it too dark. If there is no problem, remove the masking and clear coat. (7th coat)

Finally, add a thin layer of red to the blush and lips. There is no picture, but it is safer to mask the eyes.
Enamel clear red appears again. It is no longer a necessity.

When you have added just the right amount of color, try to build the face parts.

There is no noticeable discrepancy, so the painting of the face is now complete. Clear coat is applied to protect the entire surface. (8th coat)
If you want to make the eyes glossy, mask them with Gaianotes liquid masking before applying the matte coat.
You can use Good Smile's liquid masking during the process, but it often does not come off well during the matte coat. Gaianotes liquid masking can be removed cleanly, so it is important to use it properly.

Remove the masking from the eyes after matte coating.

I think it's fine!

So this is the result of repainting a figure that I painted about 4 years ago. I will put together more pictures later, but this is how it turned out.
I hope you can see how much it's grown over the past four years!

SUKIMA SANGYO
2022-05-05 02:02:11 +0000 UTCSUKIMA SANGYO
2022-05-05 01:28:40 +0000 UTCSUKIMA SANGYO
2022-05-04 17:06:18 +0000 UTCCeylonix
2022-05-04 17:00:01 +0000 UTC