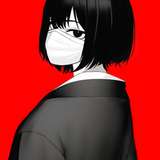
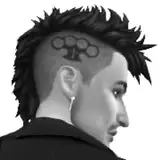
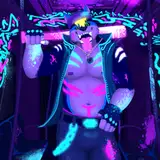
![[wip] I'm repainting a kit that painted about 3 years ago!](https://img5.xaiju.com/storage/9/tn/uq/d38796-019e8e83-f32a-718c-bd65-f91ff1ba44fc.jpg)

The story is exactly as the title says, but I am in the mood to repaint a kit I painted about 3 years ago.
This is "Tsugumi Senpai No.5" sculpted by Piyo-Piyo-Do.

There were many reasons for this, so I won't go into them, but when I look at it again, it is a finished product from a long time ago, so there are many flaws that stand out. Also, the gradation is not quite right, and there are a lot of things that I would paint like this if I were painting it now.
At first, I thought it would be okay to reapply a little bit of paint, but the more I looked at it, the more I realized that it would be better to reapply all the paint. When I painted the kit before, I was able to complete it in about three days, which I remember was the fastest record for me. That's how easy it was to assemble and paint the kit.
The plan for repainting is to leave the color scheme almost the same and just change the way the skin and tights are painted.
■Stripping before painting and dryfit, painting
First, disassemble all the parts.

I was most concerned about these tights. The surface treatment is too rough ....... There is no gradient on them and it reminds me of when I was a beginner!


I did a lot of things to the skin, such as semi-realistic painting and adding moles. I haven't done this kind of painting at all recently, but I hope I can do it again sometime, maybe with something bigger kits.
After checking various things, soak in solvent.

A little bit of color remained... probably due to the file being too low a number when I polished the tights.

Nowadays, there are a variety of reference books and other materials available, and it is possible to look them up. But when you are a beginner, I don't know the correct procedure.
So I could only do things by watching and imitating. When I look at it now, I often think, "That's not a good way to do it...! The painting was not good, but neither was the shaft hitting.
I had used urethane clear (two component) for the body, so I would soak it in thinner until it swelled. This is tedious and the thinner penetrates the resin cast and damages it, so people like me who reapply many times should not use urethane paint anymore.

This is what it looks like when the urethane paint is removed. Well, it doesn't matter because I'm going to polish it and apply a metallic top coat anyway, but if I had seen it like this 3 years ago, I wouldn't have known how to deal with it...

When the paint is removed, it usually reveals air bubbles that were not found before.

So this is once drilled with a 1 mm drill and filled with cyanon.


This is about right. If it is really noticeable, you can hide it with white surfacer.

While I'm at it, let's play a little with the modeling of the stomach area.
Pour cyanon and harden it with accelerator.


I shaved it with a zirconia bit to give it a nice soft look.

The face is also tweaked a bit.
The eyebrows are shaved and the double groove is filled in.

I can do this kind of thing now, but when I was a beginner, I think I was able to draw faces decently because of these guides.

Once this is done, it is dry fitting! The shaft strike was also reviewed.


I also changed the shape of the hands (especially the fingers) to my preferred thickness. The fingers of the right hand, which touches the waist, are also bent with an embossing heater and processed to adhere closely to the body.
Once this is done, it is time to paint. Since the entire body has been polished once, there is no need to spray primer, but I sprayed it just in case.

The color scheme is the same as the previous one, so it is applied smoothly.

Mask the body like this and paint the gold parts.
If you paint the belly in advance and even matte coat before masking, you will have less trouble.

Masking could be done without any leakage. It is useful to apply liquid mask over the masking tape overlap to minimize omissions as close to zero as possible.

The tights turned out to be a nice color.

In the past, when I painted tights, I used to do a pre-coat of skin tone, but this time I applied a light reddish-brown color surfacer as a base color, then applied clear brown, pure magenta, and CMY black on top of that. I alternately sprayed these three colors so that I could get the color and gradient I was aiming for.
The collar and sleeve cuffs are toned with a wind group bluish color and blown as shadows.

So, this is roughly where we ended up.
The look and feel has not changed at all, but I hope the details have been brushed up more.

All that remains is to paint the eyes and it is done.
I found that even with a second coat of paint, the kit was almost complete in about 3 days. Easy to assemble, easy to paint, and well sculpted, this kit is great.
PDubs
2022-05-02 08:37:41 +0000 UTCSUKIMA SANGYO
2022-05-02 01:22:04 +0000 UTCPDubs
2022-05-01 21:53:53 +0000 UTC