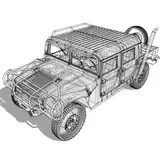
Over the last four or five weeks, I’ve been asked twice whether the side blowers are truly necessary for the T250, or if removing them would be a good way to save some money. The answer isn’t as straightforward as it might seem, but it’s definitely worth discussing—so I decided to cover it here on Patreon.
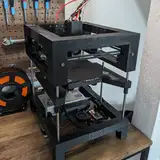
To explore this topic, I’ve set up the following test scenario:

It’s basically a 3 cm-wide cylinder with a single wall and no infill, which results in a consistent minimum layer time of 0.6 seconds. I used Klipper’s TUNING_TOWER macro to progressively reduce part cooling layer by layer, allowing me to observe how decreasing levels of cooling affect the print quality:
Here is the result for CPAP cooling only:

The print results show that at CPAP speeds of 100% to 50%, surfaces come out perfectly. However, once the speed drops below 50%, print quality degrades abruptly, resulting in wobbly outer perimeters.
Let’s have a look at how a print looks with Side blower cooling only (CPAP disabled):

Even at maximum fan speed, the outer perimeter still looked terrible. Does that mean the side blowers weren’t doing anything at all? Well, it’s not that simple!
Here’s a comparison of four different towers printed at varying side blower speeds:

As you can see in the comparison, even setting the side blowers to 30% power can reduce CPAP cooling from about 55% to around 35–40%, which also lowers overall noise levels. The sweet spot seems to be around 70% side blower power, at which point you only need 25–30% CPAP cooling for a flawless print.
With that in mind lets have a look at the noisefloor for the different configurations:

At 30% power, the CPAP is roughly a quarter as loud as the Dual 5015 setup on my T100, and the noise level isn’t particularly bothersome. However, at 70%, it starts to hiss and howl—enough to make you want to leave the room. At 100%, it becomes so loud you’d probably want to evacuate from the next room over as well.
The side blowers behave differently. At 30%, they’re extremely irritating because their inertia is so high that there’s barely enough power to keep them spinning, creating an uneven, almost psychedelic noise. This disappears at around 70%, producing a steady hum that isn’t unpleasant to the human ear. At 100%, it’s almost unbearable to stay in the same room.
Let’s combine the best of both worlds. In this configuration, I ran the CPAP at 40% power and the side blowers at 70%, creating a sound profile that’s still easy on the ears. While it’s louder than a typical bed slinger, it also delivers significantly more power:

At around 55 dB, it’s approximately 4 dB quieter than my T100—cutting its perceived loudness by more than half—and it also produces a more ear-friendly sound. In contrast, the 5015 blowers generate a higher-pitched noise, making them much harder to tune out.
So, circling back to the initial question: Are side blowers necessary? In my view, absolutely. They’re the primary reason I even considered using a CPAP for cooling at all. Without them, you’d have to run the CPAP at a narrow sweet spot that quickly becomes aggravating—so you’d likely end up buying them later anyway. Why not start off on the right foot?
Matt
P.S.: For anyone who thinks 55 dB is still too loud, remember that you can always slow down your printing speed to reduce cooling requirements. My profiles are optimized for smaller prints, but if you load your print bed with multiple objects and stretch the minimum layer time to around 15 seconds, you can easily dial in part cooling to levels under 45 dB.
Matt the Printing Nerd
2025-02-20 13:22:11 +0000 UTCchristophe BAYON
2025-02-20 12:47:24 +0000 UTCMatt the Printing Nerd
2025-02-20 09:41:52 +0000 UTCchristophe BAYON
2025-02-20 01:44:46 +0000 UTCMatt the Printing Nerd
2025-02-19 19:11:16 +0000 UTCAlex B
2025-02-19 19:05:42 +0000 UTC