Hi all!
We're finally here with another update. :)
We're a bit later than usual due to encountering unexpected problems. We eventually managed to resolve the issues and complete everything we had intended to for this period, even though it took a bit longer than anticipated. Stay tuned for a deep dive into our mesh blending tech and a demonstration of our newly implemented shaft options!
Mesh fade
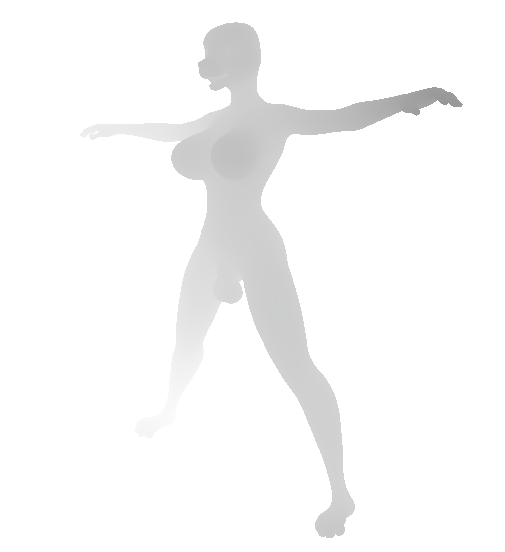
Many months ago we decided to break out the balls and sheath parts of our universal character creator mesh (model) into its own mesh. This meant we wouldn't require as many kinds of bodies as we otherwise would have, which reduces complexity and makes everything more manageable, especially in terms of body type authoring. It also meant we could theoretically introduce more kinds of balls and sheaths with time. However, breaking up the model in this fashion meant there would be a visible seam between the body and the balls/sheath model - something we weren't too thrilled about. So in order to fix this issue, we started researching how we could mitigate it by blending the meshes together.
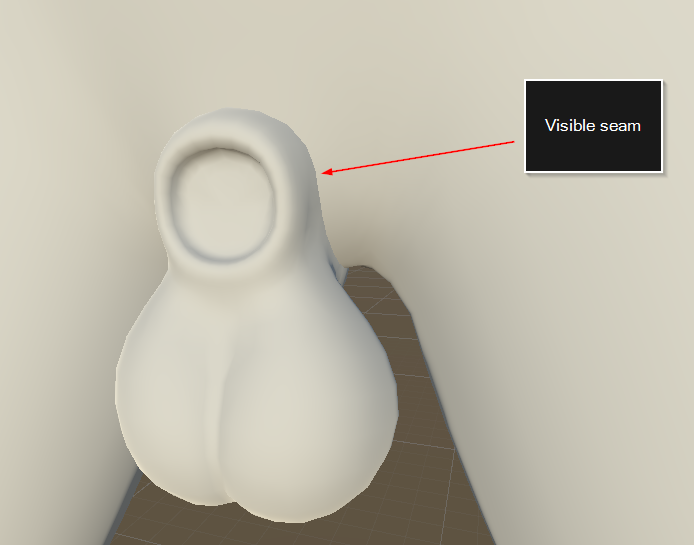
(Putting two separate intersecting meshes together will create an undesirable seam between them.)
The idea behind this mesh fading tech is simple. From the perspective of the balls/sheath model being rendered on top of the body, we want to compare the depth of the currently rendered pixel (the balls/sheath) to the one behind it (the body). The closer the balls/sheath pixel is to the body, the more we want it to fade into the body, creating the illusion of a seamless mesh. This can be achieved since Unity renders a native so called "depth texture", which looks something like this:
(Example of a depth texture. Darker values are closer to camera, while lighter ones are farther away.)
In a test we did earlier, we were using this depth texture to achieve something like this:
(Toggling mesh fading on and off. This is a recreation of our previous tech but with newer assets.)
Here, we're simply rendering the balls/sheath using a shader which samples the depth texture in the transparent render queue, compares this depth with itself and sets its opacity based on the distance. (In order to sample the depth texture, the object has to be rendered in the transparent queue.)
However, there are some pretty big issues with this approach. Firstly, objects rendered in the transparent queue in Unity's built-in rendering pipeline are unable to receive shadows, which means if we were to introduce a shadow casting object into this scene, the balls/sheath would not be affected, causing this undesirable effect:
(Objects rendered by transparent materials are unable to receive shadows.)
Furthermore, since transparent objects neither draw into the G-Buffer nor the depth buffer, but rather use forward rendering to render directly on top after these buffers have been produced, it means they wouldn't be included in SSAO and other screen space effects since those depend on depth texture and G-Buffer normals.
At the time, I was hoping that either the built-in rendering pipeline would eventually get support for transparent objects receiving shadows, or that Unity's new rendering pipeline HDRP (which does support transparent objects receiving shadows) would become production ready (it's currently in development and not finished). However, as a release of YL2 is drawing closer, it became apparent that neither one of those things were going to happen anytime soon. We had to come up with something ourselves.
Our solution
So just to sum up what we were trying to do and what our options were... We wanted to fade the balls/sheath model with the body using a depth texture. Up until this point, we had tried using a transparent shader to accomplish this, but using transparency means we would loose other vital functions.
Transparency approach:
+ Can sample depth texture
+ Can fade with pixel behind using opacity
- Cannot receive shadows
- Doesn't work with SSAO
In order to solve this, I could only think of two possible solutions:
1. Somehow hack Unity's shadow system to make it support transparent objects.
2. Somehow make opaque objects behave as transparent objects, but with all the benefits of opaque objects (shadow reception, depth writing and G-buffer normals).
I wasn't too keen on the first option. Hacking Unity to make it support something like that is a big task, and there's no guarantee we would even be able to solve something like that. There's good reason why they left out transparent objects receiving shadows in the first place, because it isn't a trivial issue. So instead I started exploring the other option.
I was pretty confident I could simulate transparency on an opaque object using a GrabPass.
In order for a GrabPass to work however, we'd have to switch over to the forward rendering path from the deferred one, since you cannot sample GrabPass textures in the deferred renderer. (Only after the deferred renderer is finished, i.e. for transparent objects which are rendered using forward rendering on top of the deferred renderer result.)
Furthermore, unfortunately it is only possible to sample the depth texture after all opaque objects have been rendered. So we'd essentially be caught in a catch 22 - in order to sample the depth texture, we need the object to be transparent, but a transparent object cannot receive shadows, so we need the object to be opaque, but an opaque object cannot sample depth texture.
Opaque approach:
+ Can fetch pixel behind using GrabPass (in forward rendering path)
+ Can receive shadows
+ Does work with SSAO
- Cannot sample depth texture (required for fading)
So if we could just solve the depth texture problem, we would essentially be good to go!
My idea now was to render a custom depth texture in addition to the native Unity one, and "manually" supply that to the balls/sheath shader for use in fading with the GrabPass. The problem with this is that you would essentially have to render the scene twice (once for your own custom depth texture and once for Unity's regular rendering pass), and you definitely don't want to do something as costly as that!
Since we only need the balls/sheath to fade with character bodies, most of the scene can be ignored when rendering our custom depth texture. But even rendering a character is quite costly, especially considering the triangle density of ours. Therefore, we came up with the solution of marking the crotch area of our character in our 3D authoring software, and then procedurally generate a new mesh from that marking inside Unity (during runtime). That way, we would get a mesh with significantly fewer triangles.
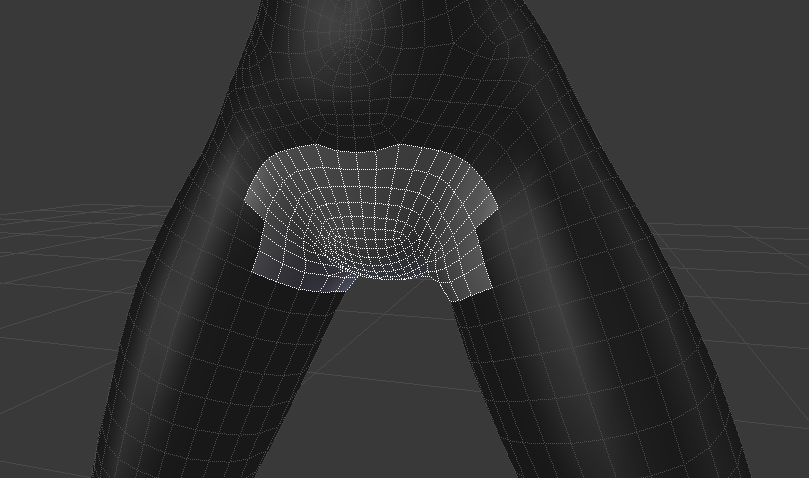
(Crotch area is marked in authoring software.)
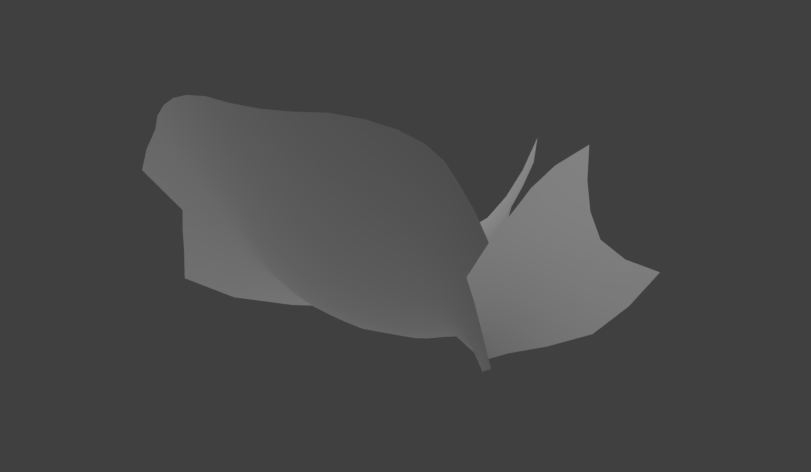
(Using the marking, we're able to extract a new mesh with much fewer triangles. This mesh is then rendered into a custom depth texture, which is displayed in the image above.)
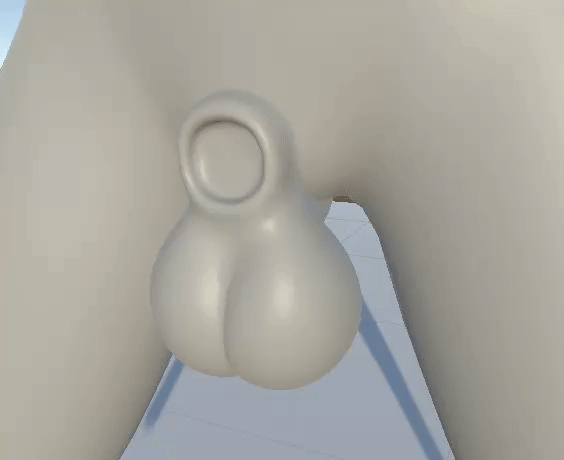
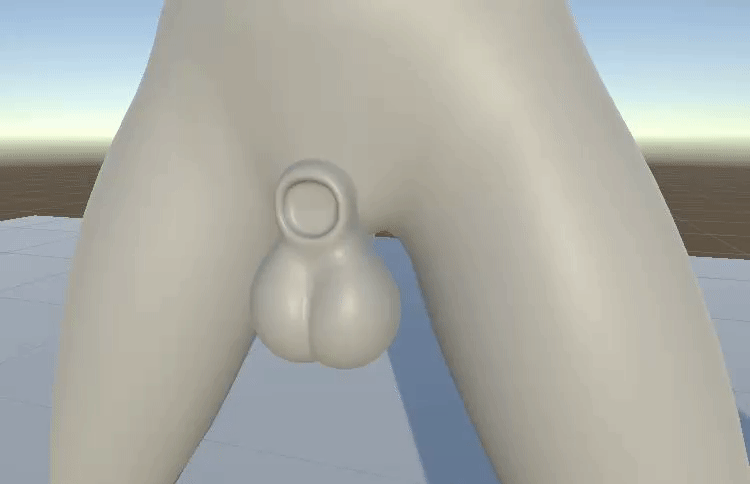
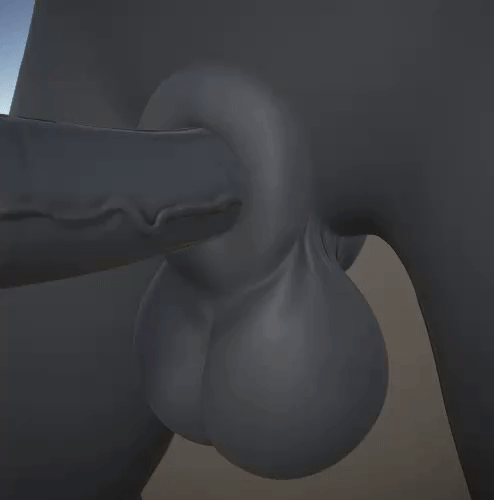
With all of this set up, we could render just this reduced mesh into our custom depth texture, and then use that for the fading. That gave us exactly what we were looking for - a tech able to fade meshes together while also being able to receive shadows:
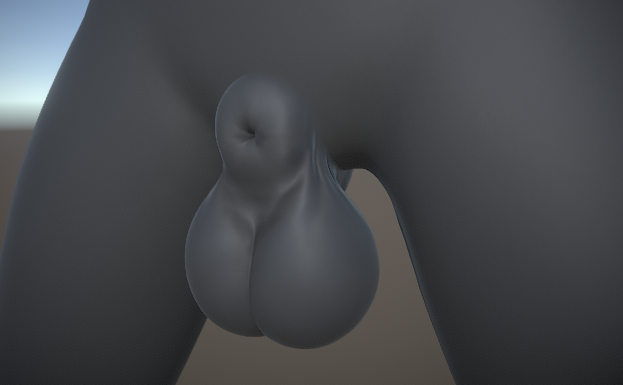
(Balls/sheath are perfectly blended into the body using our custom depth texture.)
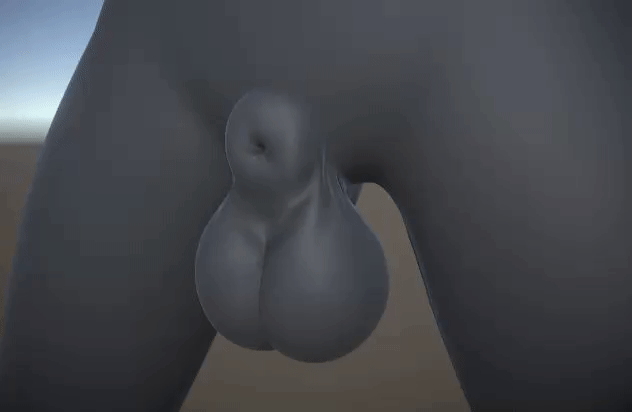
(Since the object is opaque, it is able to receive shadows.)
At this point I was so happy to have this issue resolved. Finally mesh blending that works with shadows and that looks beautiful! Of course, my happiness was short-lived, as we had completely forgotten about SSAO which would turn out to be a major problem.
Custom character skinning and SSAO
When we added SSAO to our camera, we noticed this strange effect:
(Yikes! A ghost living inside the mesh?)
What exactly is going on here? Well, it doesn't have so much to do with the mesh fading tech per se, but rather our switch from deferred to forward rendering. You see, in order to make our seamless tech work (not related to mesh fading), we had to abandon Unity's built in skinned mesh renderer and instead implement our own. (Later on, this would also prove to have been necessary regardless of seamless tech or not, since we need to access and modify the vertex buffers for various other systems as well, such as the soft body system but also our new orifice adaptation tech which now has been implemented to run entirely on the GPU (more about this below)).
What's happening is that we're skinning our character (posing using bones) using our own custom method, resulting in a vertex buffer with the skinned data. This buffer is then supplied to our own custom shader, which during rendering will use the supplied data to offset vertices and thus make the model appear skinned. The model will appear properly and depth will be rendered correctly. If we had used the deferred rendering path, the G-Buffer normals would also have been rendered correctly, as normals are rendered at the same time as the colors in the deferred rendering path. HOWEVER, since we had to switch over to the forward rendering path in order to make grab passes work (for our mesh fading tech), it meant we would no longer get a G-Buffer with normals anymore. In forward rendering, normals are rendered in a separate pass using a replacement shader. And here's the problem - the shader responsible for rendering these normals doesn't use our custom vertex buffers, as that requires a custom shader. Instead, it would just render the unskinned mesh (which in our case happens to be lying flat on the ground).
(While the model appears correctly, the normals are rendered into the normals texture incorrectly. Here we have enabled Unity's frame debugger to see what's going on, and as shown, we can see the normals of a mesh lying down being rendered into the normals texture rather than from the model standing up, which is definitely not something we want.)
This was a major problem and set back. I started having second thoughts about this approach altogether. I wasn't sure if this would even be possible to solve, as the rendering of this normals texture is something Unity handles internally.
Luckily, after some research and testing, we discovered you can essentially hook into Unity's rendering pipeline using CommandBuffers. All we needed to do was exclude our models from Unity's native normals pass, inject a command buffer into Unity and render into the normals texture ourselves using a custom shader, that fetches data from our custom vertex buffers and offsets vertices the same way our character shader does. Simple enough!
Once we did that, the normals were correctly written into the normals texture and SSAO appeared correctly:
(Using a custom normals shader which uses our own vertex buffers, normals are correctly written into the normals texture.)
Unfortunately, this is where we hit another problem. As the normals written into the normals texture in our shader didn't have any fading tech implemented into them, SSAO would expose the true shape of the model, nullifying the mesh fading altogether.

(Toggling SSAO on and off. When enabled, the "true" shape of the model is revealed, causing the undesirable seam to make a comeback.)
(A close-up of the normals texture for this area. As you can see, the seam is very visible here, so it's not a mystery why SSAO, which depends on this texture, would cause the same seam to be visible.)
After a brief moment of panic and disbelief what a huge pain all this turned out to be so far, I realized this should probably be quite easily fixed, if we only rendered the balls/sheath model using yet another custom normals shader, that uses our custom depth texture to fade with the object behind it. And as it turned out, this worked perfectly!
(Toggling SSAO on and off when using our custom normals shader which fades the normals of the balls on top of the body.)
(A close up of the normals texture when using the fixed shader. As you can see, the balls/sheath are blended with the body.)
I don't think this is even something that HDRP is able to do out of the box. (Should be possible to do with tweaking though.)
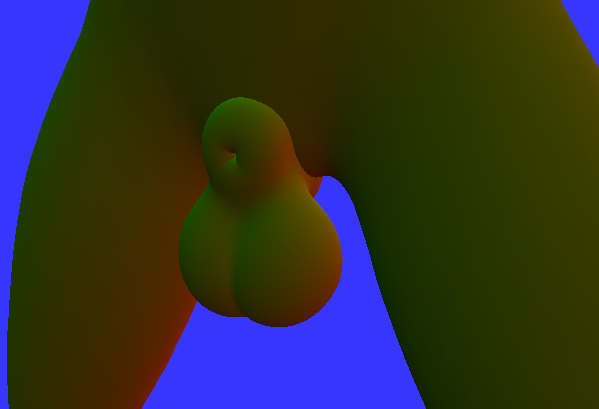
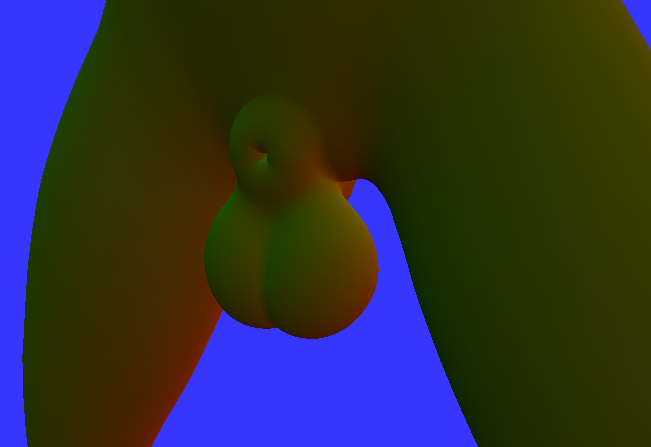
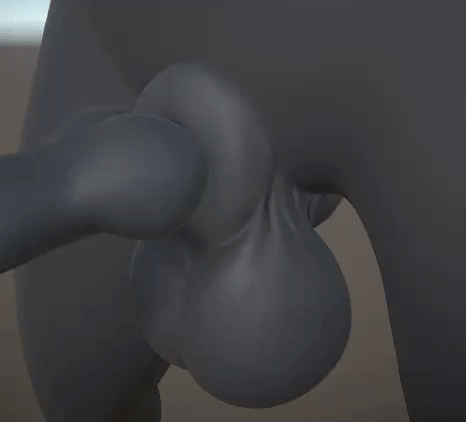
So much effort went into this tech. It wasn't easy and we've probably spent way more time on this than we should have. But at last we have a tech that is able to blend meshes together, that works with shadows and SSAO, and it's gorgeous!
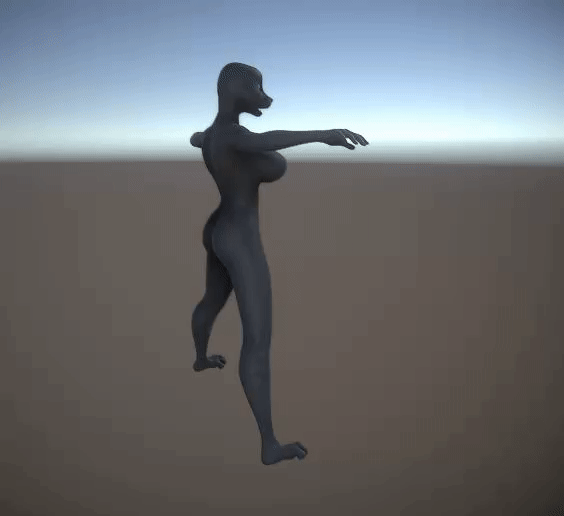
(Final shot of the fading tech, with SSAO enabled.)

(I think I earned it, lol!)
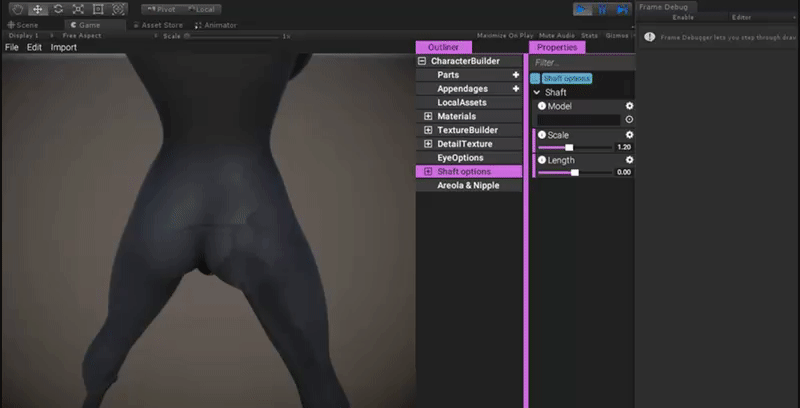
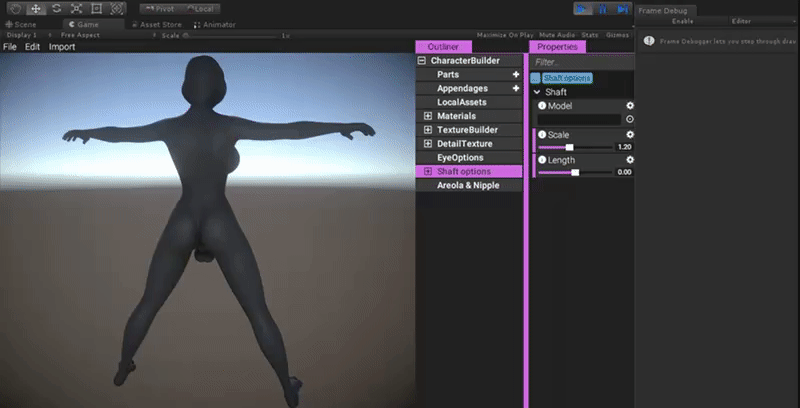
Shaft options
Shafts have now started being integrated into the character editor. You're able to select what shaft model to use, as well as configure its dimensions.
In order to bring up the shaft options, you first need to select what balls/sheath mesh to use. Browse down to Balls/Sheath in the character builder object and select an option (currently we only have 1).

(Select a balls/sheath option to spawn the shaft options.)
https://gyazo.com/9f76f7e362ee0259197a78ff7aae81a6
Choosing a balls/sheath mesh will also instance a default shaft - in this case a horse one. To switch it to another, simply select the "Shaft options" object (which is now accessible) and configure the "Model" property:

(Select a shaft to use. Currently we only have two, but more will be implemented.)
https://gyazo.com/2a66d96db4cc3ab967d3b5523adf3f0b
If you for whatever reason don't want a shaft, you are able to exclude it by selecting "None" in the model property:
(Select "None" to remove shaft entirely while keeping the balls.)
https://gyazo.com/ab6f4135272355a10cf395b998f58737
To configure the length of the penis, simply configure the length slider:
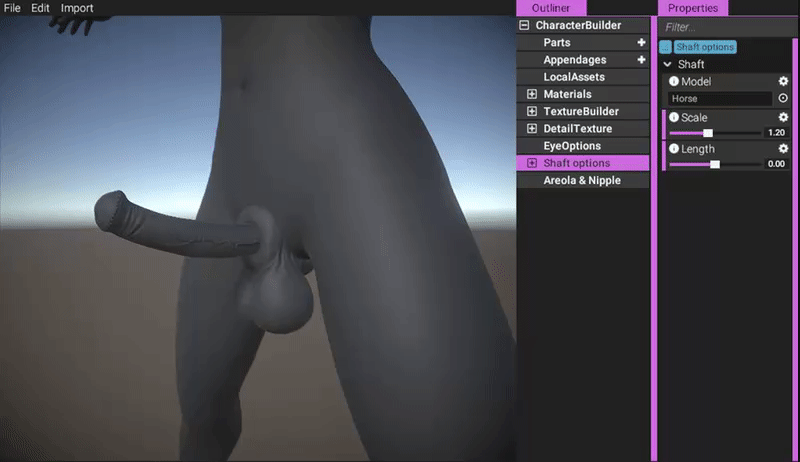
(Use the length slider to configure the length.)
https://gyazo.com/86018936df670cf84d10fe8444739f7b
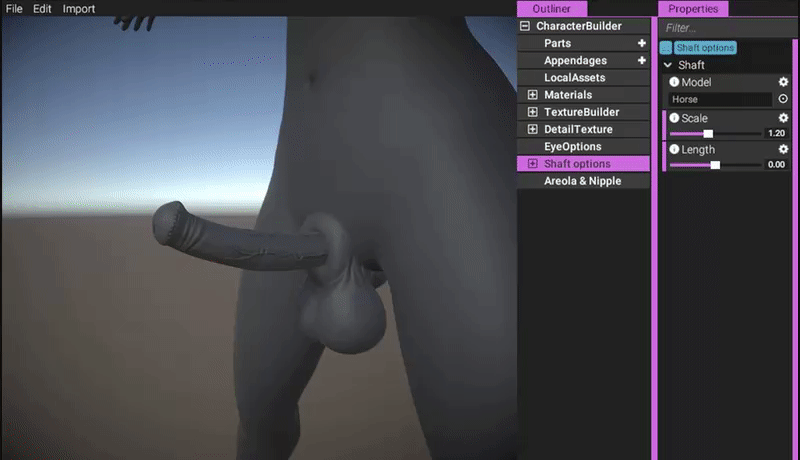
You are also able to configure the overall scale of the model:

(Use the scale slider to scale the object.)
https://gyazo.com/4c3a785acea677ea1ad6cd4b73c95c0d
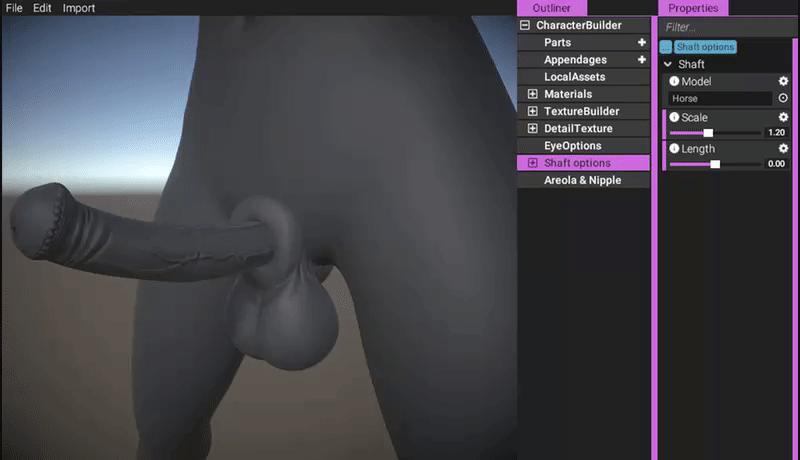
To create a thick penis, simply reduce length and increase scale (thickness and length are inversely correlated, if you think about it):

(Both thick and thin penises can be created by playing around with the sliders.)
https://gyazo.com/af36fa35778b0ef5c874077efae6db64
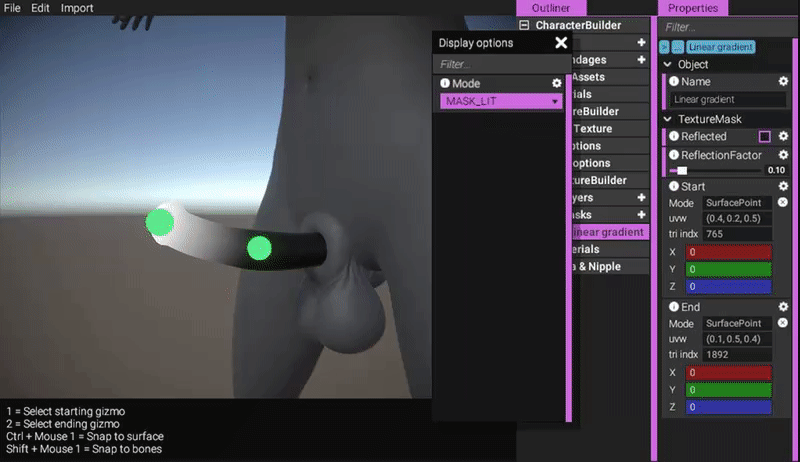
Like other objects, shafts have their own texture builders, enabling you to texture them in any way you like. You have the same plethora of options as the body texturing system (it's the same system), allowing you to author textures procedurally and/or using your own externally authored textures.
(Adding a linear gradient mask to be used for a glow effect.)
https://gyazo.com/68b0677c054cbbc777f0ed818c015aeb
(Adding a layer using the mask we just authored to make it glow.)
https://gyazo.com/2db17c101a2700386447c628c9ae6b6f
Mesh adaptation
You might have noticed that the sheath is automatically adapting itself to the shape of the shaft in the images above. Let's have a closer look at that!
(Sheath adapts to the shape of the shaft. This is a new implementation that operates exclusively on the GPU.)
https://gyazo.com/993eff1fa8c8b2a74ad81931a72331a7
(Same as above but using the canine shaft instead.)
https://gyazo.com/4e1dd93feac058abfcefb56d775c666e
This is a brand new implementation of our previous orifice mesh adaptation technology from Yiffalicious, based on the same principles and algorithm, but completely re-imagined to work exclusively on the GPU. It uses our custom GPU quad triangle raycaster that we mentioned some way back, and since all calculations and data stay on the GPU throughout the whole raycasting and mesh adaptation process, it means performance is boosted tremendously. Our hope is that we'll be able to lift the 30 fps limit that existed on orifices in Yiffalicious and update sheaths/orifices much more frequently, even though we will have so many more systems operating in YL2! (Soft body system, among others.)
Dogson
Dogson has been working a lot with assisting me in fixing issues related to balls/sheath and shafts, but he's also been busy grinding through errors reported by our YL2 Batch Tools. Any new content is essentially banned from being made right now - all we want to do is finalize the things we already have and get them into the engine. Our intent is focused on wrapping it all up and getting a release out there asap.
Summary
Problems with mesh fading had us slightly worried, but after a lot of effort and testing, we finally have something that works perfectly for us.
We've also been implementing shaft options into the character editor.
Dogson has been busy grinding through the list of things needed to be done for a release to happen asap.
FurryVNE Team
2019-07-24 17:26:06 +0000 UTCKayleeTheCat
2019-07-24 15:11:40 +0000 UTCFurryVNE Team
2019-07-18 07:24:53 +0000 UTCPetus Leekus
2019-07-17 20:33:24 +0000 UTCLadmaro
2019-07-17 20:30:06 +0000 UTCDragonisser
2019-07-16 19:27:14 +0000 UTCFox of Ages
2019-07-15 13:13:55 +0000 UTCChristopher Lee
2019-07-15 12:31:54 +0000 UTC